Nurseinfo.in provides free Nursing Notes, Nursing Procedures, Medical MCQs, Nursing Calculators, Care Plans and exam preparation resources for BSc Nursing, GNM, P.B. BSc and MSc Nursing students. Browse subject-wise notes, previous year questions and study materials based on the latest nursing syllabus.
Nurseinfo.in provides free Nursing Notes, Nursing Procedures, Medical MCQs, Nursing Calculators, Care Plans and exam preparation resources for BSc Nursing, GNM, P.B. BSc and MSc Nursing students. Browse subject-wise notes, previous year questions and study materials based on the latest nursing syllabus.
BOWEL WASH – BOWEL ELIMINATION (Purpose, Contraindications, General Instructions, Methods Used, Solutions Used, Preliminary Assessment, Preparation of Patient and Environment, Equipment, Procedure and After Care)
UPDATED 2024
Bowel
elimination is a basic bodily function that most people carry out in private
and are often embarrassed to discuss publicly. Nurses will encounter patients
with bowel elimination issues in all areas of care. Knowledge and understanding
of both normal function and the problems that can occur with that process will
enable nurses to support and care for patients with bowel elimination problems
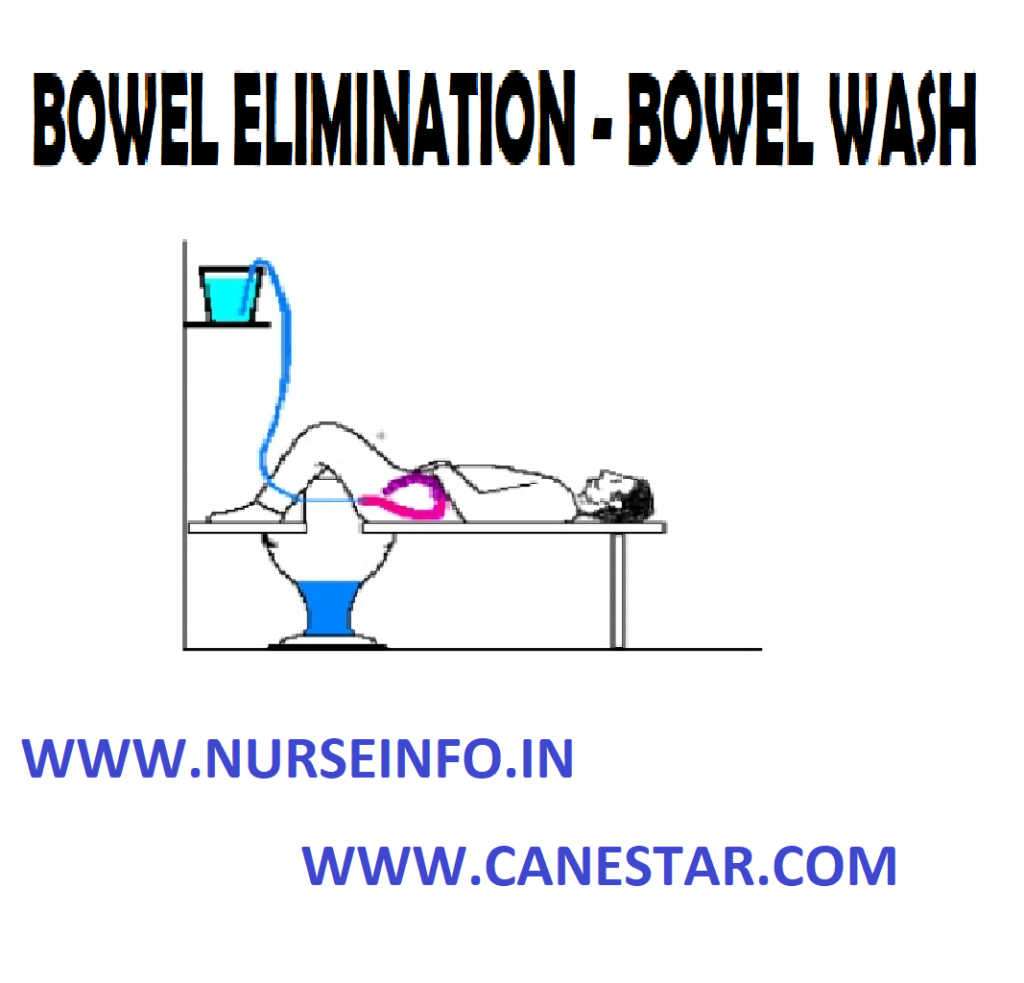
BOWEL WASH
Bowel wash
or colonic lavage or enteroclysis is defined as washing out colon with large
quantities of solution.
Bowel
irrigation or enteroclysis is defined as washing out of the colon after the
feces has been expelled by using large quantities of prescribed solution
PURPOSE
To prepare for diagnostic examination
or before certain surgery
To relieve inflammation
To stimulate peristalsis
To supply fluid and electrolyte those
are absorbed from intestine
To dilute and remove toxic agents
To reduce temperature in hyperpyrexia
To relieve fecal incontinence
To supply medications locally
To clean the colon of feces, gas and
barium
To treat infection and other
pathological condition of colon
CONTRAINDICATIONS
Rectal infection
Fistula in anus
Painful and bleeding hemorrhoids
Painful skin lesions around the anus
Massive carcinoma or tumors of the
rectum
Loose sphincter
Polypus and diverticula of the
intestine
GENERAL INSTRUCTIONS
A cleaning enema should be given one
hour before the colon irrigation
The bladder should be emptied before
colonic irrigations
The temperature of the solution is
kept constant throughout the procedure
Allow only 200 to 300 ml of fluid to
run into the rectum at a time
Make sure that the return flow is not
blocked
Use a smooth and flexible rectal tube
and lubricate it well
Prevent air entry into the intestines
Stop the procedure temporarily the
patient complaints of pain
Listen to the complaints of the
patient and should not ignore any discomfort however small they may be
METHODS USED FOR BOWEL IRRIGATION
Funnel and catheter
Y connection and a rectal tube
Two tube method
SOLUTION USED
Tap water
Cold water
Normal saline
Sodium bicarbonate 1 to 2 %
Antiseptic solution KNMO4
Boric solution 1 to 2 %
Tannic acid 1: 100
Alum 1: 100
TEMPERATURE OF THE SOLUTION
Cleaning purpose 104 degree F (40
degree Celcius)
Thermal effect 110 to 115 degree F
(43.3 to 46 degree celcius)
Reducing temperature 80 to 90 degree
F (27 to 32 degree celcius) amount of water used for bowl, irrigation is 2 to 3
liters or till the return flow is clear
PRELIMINARY ASSESSMENT
Check
Doctors order for any specific
precautions
Diagnosis of the patient
General condition of the patient
Self-care ability of the patient
Mental status to follow instructions
Any contraindications
Need for any extra help
Articles available in the unit
PREPARATION OF THE PATIENT AND ENVIRONMENT
Explain the sequence of the procedure
Arrange the articles at the bed side
Provide privacy
Place the Mackintosh and towel under
the patient
Place the patient in left later
position
Keep the bucket on a low stool or
receive the out flow of fluid
Remove the back rest and extra
pillows
EQUIPMENTS
A clean tray
containing
Funnel and tubing with glass
connection
Mackintosh and towel
Rectal tube placed in a kidney tray
Vaseline
Rag pieces in a container
Hot and cold water in jugs
Prescribed solution in jug
Paper bag
Bucket
Toilet tray if needed
Clean linen if needed
Bath thermometer
PROCEDURE
Wash hands thoroughly
Prepare the solution at the required
temperature
Attach the tubing and the rectal tube
with the funnel, pour solution in it and check for any leakage
Lubricate the tip of the rectal tube
about 4 inches
Separate patient’s buttocks to
visualize anus clearly and insert tip of tube about 4 to 5 inches, while
patient takes deep breath
Lower funnel below level of rectum
and empty return flow into bucket
Fill funnel again. Pour 200 to 300 ml
of fluid each time. Raise funnel and allow fluid to run continuously. When 200
to 300 ml of fluid has gone in pinch tube before tunnel is completely. Lower
and invert tunnel over bucket and siphon fluid, noting characteristics of
return flow
Repeat this process, till return flow
is clear
Remove the rectal tube by using rag
pieces
AFTER CARE
Remove rectal tube by using rag
pieces
Discard rag piece in to K-basin
Place patient comfortably, provide
bedpan if needed
Change linen if soiled, replace
equipment after cleaning
Hand wash and record the procedure in
nurse’s record sheet
BOWEL WASH – BOWEL ELIMINATION (Purpose, Contraindications, General Instructions, Methods Used, Solutions Used, Preliminary Assessment, Preparation of Patient and Environment, Equipment, Procedure and After Care)
Maternal and Child Health Nursing Procedure List 2024
Updated 2024
Maternal and Child Health Nursing is a specialized field within nursing that focuses on the care of women during pregnancy, childbirth, and the postpartum period, as well as the care of newborns, infants, children, and adolescents. This field encompasses a continuum of care that addresses the unique needs of both mothers and children.
List of Maternal and Child HealthNursing Procedures are given below. Click the respective Topic to Read the respective Nursing Procedures in detail
Maternal and Child Health Nursing is a critical component of healthcare that aims to ensure the health and well-being of both mothers and children throughout the various stages of life, from conception to adolescence. It involves a holistic and family-centered approach to care, addressing not only the physical aspects but also the emotional and social dimensions of health.
Here is an overview of Maternal and Child Health Nursing:
Maternal Health:
Antepartum Care: Providing care to pregnant women before childbirth, including monitoring maternal health, addressing complications, and educating about healthy pregnancies.
Intrapartum Care: Assisting during labor and delivery, monitoring fetal well-being, and providing support to both the mother and family.
Postpartum Care: Supporting mothers in the postpartum period, addressing physical and emotional changes, and providing guidance on newborn care.
Child Health:
Newborn Care: Focusing on the care of newborns immediately after birth, including assessments, screenings, and support for breastfeeding.
Infant and Child Health: Providing healthcare services, vaccinations, and developmental assessments for infants and children. Addressing common childhood illnesses and promoting preventive care.
Adolescent Health: Addressing the unique health needs of adolescents, including sexual health education, mental health support, and guidance on healthy lifestyle choices.
Family-Centered Care:
Recognizing the importance of the family in the care process and involving family members in decision-making and support.
Health Promotion and Education:
Educating women and families about prenatal care, childbirth, breastfeeding, and child development.
Promoting healthy behaviors and lifestyles to prevent maternal and child health issues.
Nutritional Counseling:
Providing guidance on proper nutrition for pregnant women, breastfeeding mothers, and children to ensure optimal health and development.
Community Outreach:
Engaging in community-based programs to enhance maternal and child health, such as prenatal education classes, vaccination clinics, and family support services.
Collaboration with Interdisciplinary Teams:
Working collaboratively with obstetricians, pediatricians, midwives, social workers, and other healthcare professionals to provide comprehensive care.
Crisis Intervention:
Addressing emergencies and complications related to pregnancy, childbirth, and childhood, including high-risk pregnancies and neonatal emergencies.
Cultural Competence:
Being culturally sensitive and adapting care plans to meet the diverse needs of women and families.
Advocacy:
Advocating for the rights and well-being of mothers and children, promoting access to quality healthcare, and addressing health disparities.
EYE IRRIGATION – Purpose, Common Solutions Used, General Instructions, Equipment Needed and Procedures (COMMUNITY HEALTH NURSING)
UPDATED 2024
Eye
irrigation is washing of the conjunctiva sac by a stream of liquid
PURPOSES
To treat inflammatory condition of
the conjunctiva
To apply heat or cold to the eye
To apply medications
To remove foreign particles or
irritating chemicals fallen in the eye
To
relieve congestion and pain
COMMON SOLUTIONS USED
Plain water to clean the eye
Normal saline (sodium chloride)
Boric acid 2%, as an antiseptic
Silver nitrate 1%, as an antiseptic
Acriflavine 1%
GENERAL INSTRUCTIONS
Maintain aseptic technique throughout
the procedure to prevent introduction of infection into eye
Use only sterile articles and
solutions for eye irrigation
Never touch eye with irrigator
Test temperature of the solution at
the inner surface of the wrist
Flow of the fluid should be from
inner canthus to the outer canthus to prevent forcing the infection into the
nasolacrimal duct
Medications should be instilled
immediately after eye irrigation
Temperature of the solution is about
98 to 100 degree F, so that the conjunctiva is not injured
EQUIPMENT NEEDED
An irrigator kept in a sterile bowl
Prescribed solution in a container at
the correct temperature
Bowl of cotton swabs
Medication bottle or ointment
Kidney tray, paper bag, and eye pad
Mackintosh and towel
PROCEDURE
Wash hands to prevent cross infection
Clean eyelids and eyelashes from the
inner to the counter corner of the eye by using wet swabs
Irrigate the eye using solution which
is at body temperature
Ask the patient to close his eyes and
allow a small amount of the fluid to run over eye lid. Separate eye lids gently
with thumb and fore finger of the left thumb
Keep the nozzle of the irrigator
about 2 cm above the eyes and allow the fluid to run into the conjunctival sac.
The flow should run from the inner cantus to the outer cantus, so that the
infection will not enter into the nasolacrinal duct
Ask the patient to look up while
irrigating the inner part of the lower lid and to look down while the inner
part of the upper lid is irrigated
Irrigate the eye until the outflow is
clean
Wipe the eyes for the effect of
irrigation
Instill eye drops or ointments
according to order and make the patient comfortable
EYE IRRIGATION – Purpose, Common Solutions Used, General Instructions, Equipment Needed and Procedures (COMMUNITY HEALTH NURSING)
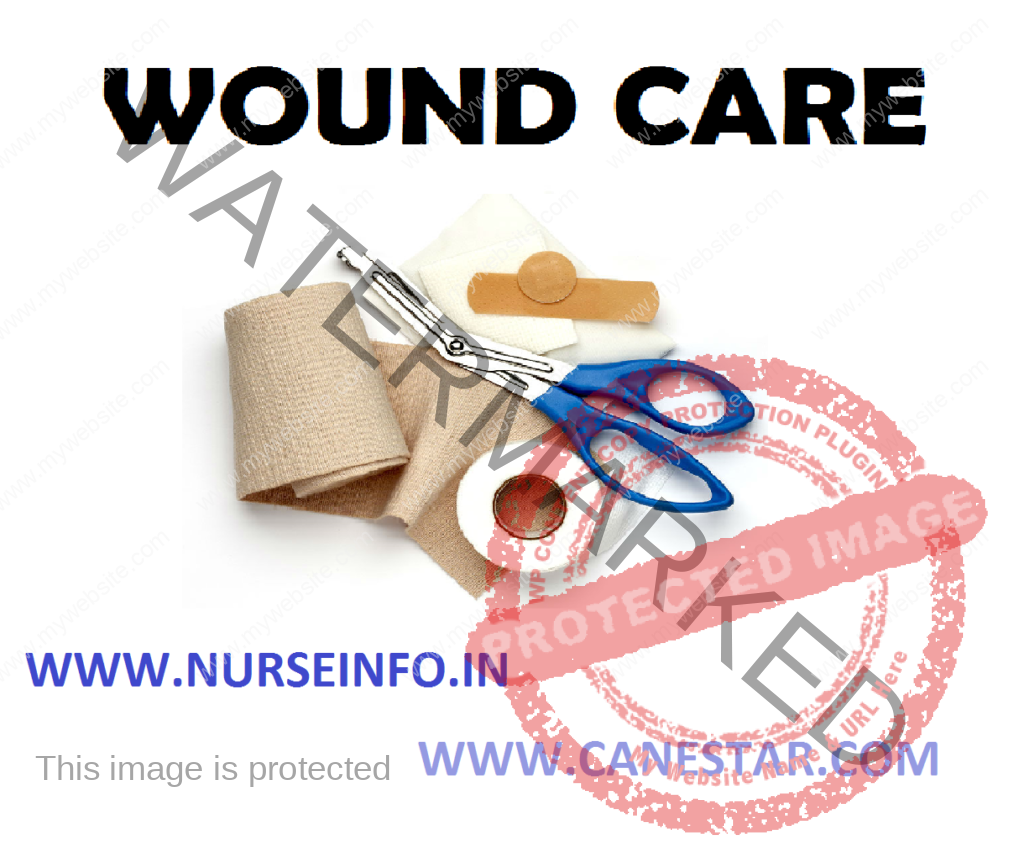
WOUND CARE – Definition, Types, Wound Healing, Wound Dressing, Equipment and Procedure
UPDATED 2024
A wound is a
break in the continuity of an external or internal surface caused by physical
means. Wounds can be accidental or intentional (as when the physician makes an
incision during a surgical operation). There are two basic types of wounds:
closed and open.
DEFINITION
Wound care:
wound care is defined as cleaning, monitoring and promoting healing in a wound
that is closed with sutures, clips or staples.
Wound: an
injury to living tissue caused by a cut, blow, or other impact, typically one
in which the skin is cut or broken
Surgical or
wound dressing: sterile dressing covering applied to a wound or incision using
aseptic technique with or without medication.
A closed
wound involves an injury to the underlying tissues of the body without a break
in the skin surface or mucous membrane; an example is a contusion, or bruise.
A contusion
results when the tissues under the skin are injured and is often caused by a
blunt object. Blood vessels rupture, allowing blood to seep into the tissues,
which results in a bluish discoloration of the skin. After several days, the
color of the contusion turns greenish yellow as a result of oxidation of blood
pigments
Bruising
commonly occurs with injuries such as fractures, sprains, strains and black
eyes. Open wounds involve a break in the skin surface or mucous membrane that
exposes the underlying tissues; examples include incisions, lacerations,
punctures, and abrasions.
An incision
is a clean, smooth cut caused by a sharp instrument, such as a knife, razor, or
piece of glass. Deep incisions are accompanied by profuse bleeding; in
addition, damage to muscles, tendons, and nerves may occur.
A laceration
is a wound in which the tissues are torn apart, rather than cut, leaving ragged
and irregular edges. Lacerations are caused by dull knives, large objects that
have been driven into the skin, and heavy machinery. Deep lacerations result in
profuse bleeding and a scar often results from the jagged tearing of the
tissues.
A puncture
is a wound made by a sharp-pointed object piercing the skin layers, for
example, a nail, splinter, needle, wire, knife, bullet, or animal bite. A
puncture wound has a very small external skin opening, and for this reason
bleeding is usually minor. A tetanus booster may be administered with this type
of wound because the tetanus bacteria growth best in a warm anaerobic
environment, such as the one in a puncture.
An abrasion
or scrape is a wound in which the outer layers of the skin are scraped or
rubbed off, resulting in oozing of blood from ruptured capillaries. Abrasions
are often caused by falling on gravel and floors (floor burn). These falls can
result in skinned knees and elbows.
WOUND HEALING
The skin is
a protective barrier for the body and is considered its first line of defense.
When the surface of the skin has been broken, it is easy for microorganisms to
enter and cause infection. The body has a natural healing process that works to
destroy invading microorganisms and to restore the structure and function of
damaged tissues.
Phases of
Wound Healing
Phase 1:
Phase 1, is also called the inflammatory phase, begins as soon as the body is
injured. This phase lasts approximately 3 to 4 days. During this phase, a
fibrin network forms, resulting in a blood clot that “plugs” up the opening of
the wound and stops the flow of blood.
The blood
clot eventually becomes the scab. The inflammatory process also occurs during
this phase. Inflammation is the protective response of the body to trauma, such
as cuts and abrasions, and to the entrance of foreign matter, such as
microorganisms. During inflammation, the blood supply to the wound increases,
which brings white blood cells and nutrients to the site to assist in the
healing process.
The four
local signs of inflammation are redness, swelling, pain and warmth. The purpose
of inflammation is to destroy invading microorganisms and to remove damaged
tissue debris from the area so that proper healing can occur.
Phase 2:
Phase 2 is also called the granulation phase and typically last 4 to 20 days.
During this phase, fibroblasts migrate to the wound and begin to synthesize
collagen. Collagen is a white protein that provides strength to the wound. As
the amount of collagen increases, the wound becomes stronger, and the chance
that the wound will open decreases. There also is a growth of new capillaries
during this phase to provide the damaged tissue with an abundant supply of
blood. As the capillary network develops, the tissue becomes a translucent red
color. This tissue is known as granulation tissue. Granulation tissue consists
primarily of collagen and is fragile and shiny and bleeds easily.
Phase 3:
Phase 3, is also known as the maturation phase, begins as soon as granulation
tissue forms and can last for 2 years. During this phase, collagen continues to
be synthesized, and the granulation tissue eventually hardens to white scar
tissue. Scar tissue is not true skin and does not contain nerves or have a
blood supply. The medical assistant should always inspect the wound when
providing wound care. The wound should be observed for signs of inflammation
and the amount of healing that has occurred. This information should be charted
in the patient’s record.
WOUND DRESSING
Purpose of
Dressing
Provide physical, psychological and
aesthetic comfort
Remove necrotic tissue
Prevent, eliminate or control
infection
Absorb drainage
Maintain a moist wound environment
Protect the wound from further injury
Protect the skin surrounding the
wound
Promote homeostasis as in a pressure
dressing
Prevent contamination from feces,
urine, vomitus, etc
For splinting or immobilization of
wound
Major
Principles for Wound Dressing
Uses standard precautions at all
times
When using a swab or gauze to cleanse
a wound, work from the clean area out toward the dirtier area. (Example: when
cleaning a surgical incision, start over the incision line, and swab downward
from top to bottom). Change the swab and proceed again on either side of the
incision, using a new swab each time.
When irrigating a wound, warm the
solution to room temperature, preferably to body temperature, to prevent
lowering of the tissue temperature. Be sure to allow the irrigant to flow from
the cleanest area to the contaminated area to avoid spreading pathogens.
TYPES OF DRESSING
Dry dressing: clean wounds are
dressed by the application of 4 to 8 layers of gauze folded into suitable size
and shape. The surrounding of the wound is cleansed by some antiseptic and
dried and dry dressing is applied after the application of medicine to the
wound.
Wet dressings: it is used if wounds
are infected and if there is pus. The wet dressing compresses the hot, it
stimulated the supportive process. The dressing is made of many layers of gauze
or cotton pad covered with gauze.
Pressure dressing: it is done when
there is bleeding or oozing from the wound. The dressing consists thick pad of
sterile gauze applied over the wound with a firm bandage and binder
General
Instructions
Maintain aseptic technique to prevent
cross infection to the wound and to the ward
All the material touching the wound
should be sterile
Wash hands before and after each
dressing top avoid cross infection
All articles should be disinfected
thoroughly, so that they will be free from pathogens
Use masks, sterile gloves and gown
for large dressing to minimize the wound contamination
Dressing is changed at least 15
minutes after the room has been cleaned and avoid meal timings
Clean wound should be dressed before
infected or discharging wounds
Wounds that are draining freely
should be dressed frequently, according to the doctor’s order
Avoid coughing, sneezing and talking
when the wound is opened
While dressing avoid contamination
with patients skin. Clothing and bed linen with soiled instruments and
dressings
Clean the wound from cleanest area to
the less clean area, e.g. clean the wound from its center to the periphery
If the dressings are adherent to the
wound due to drying of the secretions or blood, wet it with normal saline before
it is removed from the wound
While dressing, keep the wound edges
as near as possible to promote healing
Measure the amount of discharge from
the wound. Note the color, amount and consistency of the drainage
Before doing the dressing, inspect
the wound for any complication and if it is present, report immediately to
avoid further complications
PRELIMINARY ASSESSMENT
Check the doctor’s order for specific
instructions
Identify the correct patient, bed
number and general condition
Check the nurse’s record to note the
condition of the wound in previous dressing
Check the abilities of the patient
for self-help understanding and limitation
Check the availabilities of the
articles
EQUIPMENT
A sterile
tray containing:
Artery forceps: 1
Dissecting forceps: 2
Scissors: 1
Sinus forceps: 1
Probe: 1
Small bowl: 1
Safety pin: 1
Gloves,
masks and gowns, cotton balls, gauze pieces, cotton pads, and site or dressing
towels.
A trolley
containing: cleaning solutions as necessary, ointments and powders as ordered,
Vaseline gauze in sterile containers, roller gauze in sterile container,
chittle forceps in a solution, sterile gauze, cotton and pad drum, bandages,
adhesive plaster, pins and scissors, mackintosh and draw sheet, kidney tray and
covered bucket to put soiled dressing.
PROCEDURE
Explain the procedure to the patient,
using sensory preparation
Inspect the wound for redness,
swelling or signs of dehiscence or evisceration
Observe the characteristics of any
drainage
Clean the area around the wound with
an appropriate cleansing solution
Swab from clean area towards the less
clean area (clean the wound from the center to periphery)
Apply medications if ordered
Apply sterile dressing – apply gauze
pieces first and then the cotton pads
Remove the gloves and discard it into
the bowel with lotion
Secure the dressing with bandage or
adhesive tapes
DRESSING TECHNIQUES
The
following dressing techniques are easy to do and require on sophisticated
equipment. Clean technique is usually sufficient. Pain medication may be
required as dressing changes can be painful. Gently cleanse the wound at the time
of dressing change
Wet-to-Dry
Indication:
to clean a dirty or infected wound
Technique:
moisten a piece of gauze with solution and squeeze out the excess fluid. The
gauze should be damp, not soaking wet. Open the gauze and place it over top of
the wound to cover. You do not need many layers of wet gauze. Place a dry
dressing over top. The dressing is allowed to dry out and when it is removed it
pulls off the debris. It’s ok to moisten the dressing if it is too stuck.
How often:
ideally, 3-4 times per day, more often on a wound in need of debridement, less
often on a cleaner wound. When the wound is clean, change to a wet-to-wet
dressing or an antibiotic ointment
Wet-to-Wet
Indication:
to keep a wound clean and prevent buildup of exudates
Technique:
moisten a piece of gauze with solution and just barely squeeze out the excess fluid
so it is not soaking wet. Open the gauze and place it over top of the wound to
cover it. Place a dry dressing over top. The gauze should not be allowed to dry
or stick to the wound
How often:
ideally, 2-3 times a day. If the dressing gets too dry, pour saline over the
gauze to keep it moist
Antibiotic
ointment: antibiotic ointment is used to keep a wound clean and promote healing
Technique:
apply ointment to the wound – not a thick layer; just a thin layer is enough.
Cover with dry gauze
How often: 1-2
times per day
PROCEDURE OF WOUND/SURGICAL DRESSING
Position the patient comfortably
Expose the dressing site
Instruct not to touch wound,
equipment or dressing
Wash hands
Open dressing pack
Transfer extra cotton balls and gauze
pieces into the dressing pack if the wound is large
Pour cleaning solution into the
dressing cup
Cover the pack without contaminating
the inner layer
Place dressing mackintosh and towel
under the part and place clean K-basin over mackintosh
Remove outer dressing
Use ether to remove adherent adhesive
Leave the inner dressing if it does
not come out with outer dressing
If wound drain is present, remove one
layer at a time
Do surgical hand washing
Wear gloves if the wound is
contaminated
Flip open the dressing pack cover by
inserting fingers in the inner layer of the wrapper
Using thumb forceps, pick up cotton
ball and wet it in saline
Using artery clamp and thumb forceps,
soak adherent gauze squeezing the cotton ball over the gauze
Using the same artery clamp, remove
the gauze and dispose in the plastic bag
Discard the artery clamp
Observe the character and amount of
drain and assess the condition of the wound
Use only thumb forceps to pick up
cotton balls
Pick up cotton balls every time using
only the thumb forceps and soak in cleaning solution
Squeeze out excess solution from the
cotton balls into the kidney basin (sterile)
Clean the wound (clean to dirty) with
firm stroke using the artery clamp
Discard used cotton balls into the
clean K-basin
Use only one cotton ball for each
stroke
Ensure wound is thoroughly cleaned
Finally, clean the skin is proximity
to the wound edge, with strokes away from the wound
Soak gauze piece in the dressing
solution, squeeze out excess solution, spread it keeping it over the sterile
field
Apply over the wound, fully covering
the wound with medicated gauze pieces
Apply dry gauze pieces over the
medicated gauze pieces
Apply pad if the wound is large or
lot of exudates is present in the wound
Discard gloves if used
Discard the used artery clamp and
thumb forceps into the clean K-basin
Secure dressing with adhesive/bandage
After Care
Assist the patient to dress up and to
take a comfortable position
Change the garments if soiled with
drainage
Remove the mackintosh and towel.
Replace the bed linen
Take all articles to the utility
room. Discard the soiled dressing into a covered container and send for
incineration
Wash hands and record the procedure
on the nurse’s record with date and time
Teach the patient/family about wound
care and signs and symptoms of infection
PATIENT EDUCATION
Explain the
following to the patient regarding wounds:
The type of wound that the patient
has: incision, laceration, puncture, or abrasion
The purpose of suturing the wound: to
close the skin and protect against further contamination, to facilitate
healing, and to leave a smaller scar
If a tetanus toxoid has been
administered, explain the purpose of this immunization: to protect against
tetanus (lockjaw)
Teach the patient how to care for the
wound, as follows:
Keep the dressing clean and dry. If it becomes wet, contact the medical
office to schedule a sterile dressing change
Apply an ice bag for swelling (if prescribed by the physician)
Report immediately any signs that the wound is infected. These signs
include the following:
Fever
Persistent or increased pain, swelling or drainage
Red streaks radiating away from the wound
Increased redness or warmth
Notify the doctor’s office if the
sutures become loose or break
Return as instructed by the physician
for the removal of sutures
Teach the patient how to apply an ice
bag (if prescribed by the physician)
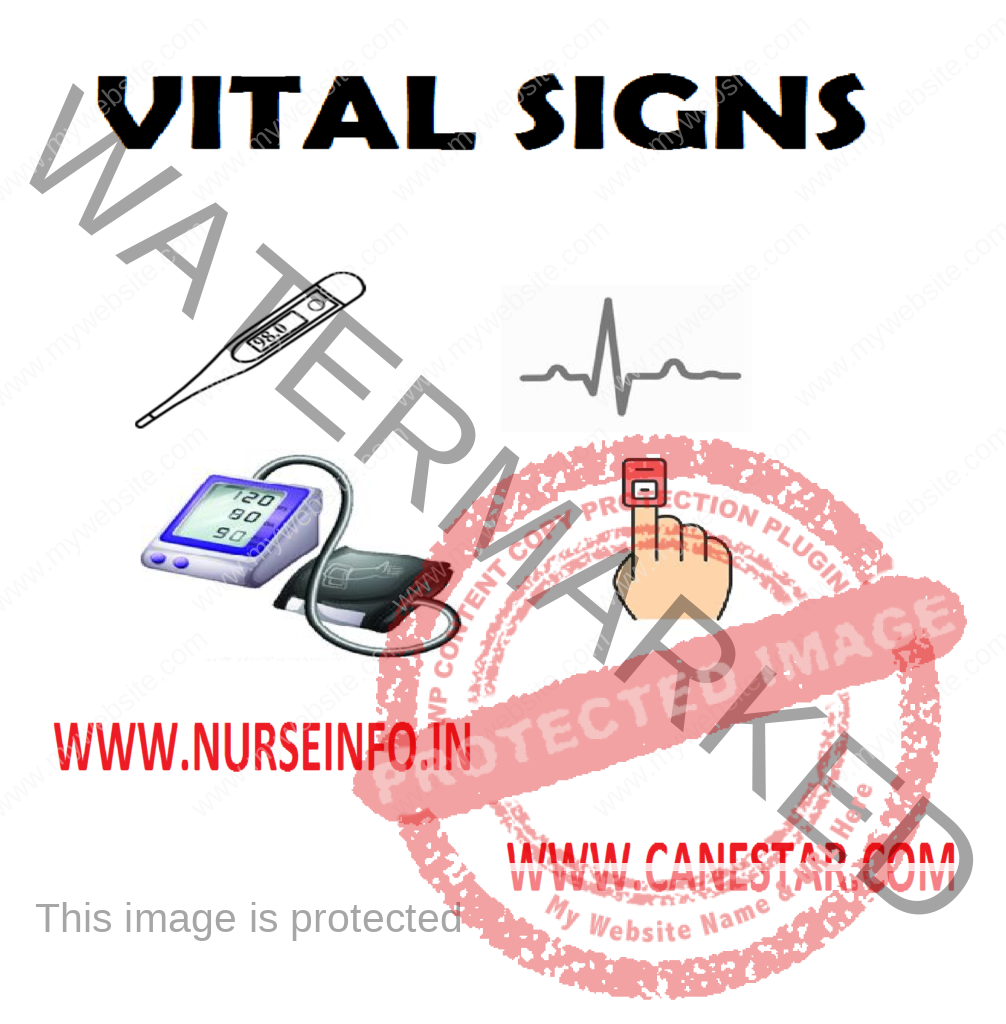
The vital sign or cardinal signs are body temperature, pulse rate, respiration and blood pressure. These signs should be looked at in total, to monitor the vital functions of the body. The signs reflect changes in functions that otherwise it might not be observed. Temperature, pulse, respiration, blood pressure (BP) and oxygen saturation are measurements that indicate a person’s hemodynamic status. These are the five vital signs most frequently obtained by healthcare practitioners.
Vital signs are measurements that provide essential information about the physiological functions of the body. These measurements are crucial indicators of a person’s overall health and help healthcare professionals assess and monitor various bodily functions. The four primary vital signs are:
Body Temperature:
Normal Range: Typically around 98.6°F (37°C) when measured orally.
Methods of Measurement: Oral, rectal, tympanic (ear), axillary (underarm), or temporal artery.
Heart Rate (Pulse):
Normal Range: Resting heart rate varies but is generally between 60 and 100 beats per minute (bpm) for adults.
Methods of Measurement: Palpating the pulse at various locations (e.g., radial artery on the wrist, carotid artery in the neck) or using electronic monitoring devices.
Respiratory Rate:
Normal Range: Adults typically breathe 12 to 20 times per minute.
Methods of Measurement: Observing chest movements or counting breaths per minute.
Blood Pressure:
Normal Range: The normal range is around 120/80 mm Hg, with variations based on factors such as age, gender, and health condition.
Systolic Pressure (the higher number): Represents the pressure in the arteries when the heart contracts.
Diastolic Pressure (the lower number): Represents the pressure in the arteries when the heart is at rest between beats.
Methods of Measurement: Using a blood pressure cuff and a sphygmomanometer or an automated blood pressure monitor.
Pain Assessment: Though not a traditional vital sign, pain assessment is often considered alongside vital signs for a comprehensive understanding of a patient’s well-being.
Oxygen Saturation (SpO2): Measures the percentage of oxygen in the blood. Normal values are typically between 95% and 100%.
Capnography: Monitors the concentration of carbon dioxide in exhaled breath, providing information about respiratory status.
DEFINITION
Vital signs are the measurements
provide data can be used to determine the patient’s usual state of health
Vital signs, or signs of life,
indicate the following objective measures for a person; temperature,
respiratory rate, heart beat (pulse), and blood pressure. When these values are
not zero, they indicate that a person is alive. All of these vital signs can be
observed, measured, and monitored. This will enable the assessment of the level
at which an individual is functioning. Normal ranges of measurements of vital
signs change with age and medical condition
PURPOSE
The purpose
of recording vital signs is to establish a baseline on admission to a hospital,
clinic, professional office, or other encounter with a healthcare provider.
Vital signs may be recorded by a nurse, physician, physician’s assistant, or
other healthcare professional. The healthcare professional has the
responsibility of interpreting data and identifying any abnormalities from a
person’s normal state, and of establishing if current treatment or medications
are having the desired effect
Abnormalities
of the heart are diagnosed by analyzing the heartbeat (or pulse) and blood
pressure. The rate, rhythm and regularity of the beat are assessed, as well as
the strength and tension of the beat, against the arterial wall.
Vital signs
are usually recorded from once hourly to four times hourly, as required by a
person’s condition
The vital
signs are recorded and compared with normal ranges for a person’s age and
medical condition. Based on these results, a decision is made regarding further
actions to be taken.
All persons
should be made comfortable and reassured that recording vital signs in normal
part of health checks, and that it is necessary to ensure that the state of
their health is being monitored correctly. Any abnormalities in vital signs
should be reported to the healthcare professional in charge of care
TIMINGS OF TAKING VITAL SIGNS
On patient’s admission to a health
care facility
In hospital, on routine schedule
according to physician’s order or hospital policy
During patient’s visit to clinic or
physician’s office
Before and after any surgical
procedure
Before and after any invasive diagnostic
procedure
Before and after administration of
medication that affect cardiovascular, respiratory and temperature control
function
When the patient’s general physical
changes, e.g. loss of consciousness or increase in intensity of pain
Before and after nursing
interventions influencing any one of the vital signs, e.g. before ambulating a
patient previously on bed rest or before patient performs range of motion
exercises
Whenever patient reports to nurse any
non-specific symptoms of physical distress, e.g. “feeling funny or different”
PRINCIPLES OF VITAL SIGNS
Vital signs are governed by vital
organs and often reveal even the slightest deviation from the normal body
functions
The changes in the condition of the
patient improvement or regression may be detected by the observation of these
signs
Significant variations in these
findings may indicate problems regarding to insufficient consumption
Through vital signs, specific
information may be obtained that will help in the diagnosis, treatment, medications
and nursing care
Patients emotional state may also
cause a significant variation in these
symptoms
METHODS OF MEASUREMENT
Inspection: inspection means
observing with the eye and is associated with light and seeing
Percussion: percussion is tapping an
area to elicit sounds
Auscultation: auscultation is
listening to sounds within the body with a stethoscope
Palpation: palpation is the art of
feeling with the hand
VITAL SIGNS AND NORMAL VALUES
Temperature 98.6 degree F or 37
degree Celcius in adults
Pulse 72 beats/minute in adults
Respiration 16 breaths/minute in
adults
Blood pressure 120/80 mm Hg in adults
GUIDELINES FOR TAKING VITAL SIGNS
The primary nurse caring for the client is the best one to take vital signs, interpret their significance, and make decisions about care
Equipment used to measure vital signs must be appropriate and work properly to ensure accurate finding
Knowing the normal range for all vital signs helps the nurse detect abnormalities
A client’s normal range may differ from the standard range for that age or physical state. Normal values for a client serve as a baseline for comparing in condition over time
Know the client’s medical history and therapies or medication, for vital sign changes
Control or minimize environmental factors that may affect vital signs. Measuring a pulse after client experiences an emotional upset, many yield values that are not clear indicators of the client’s current status
An organized, systematic approach when taking vital signs ensures accuracy of findings
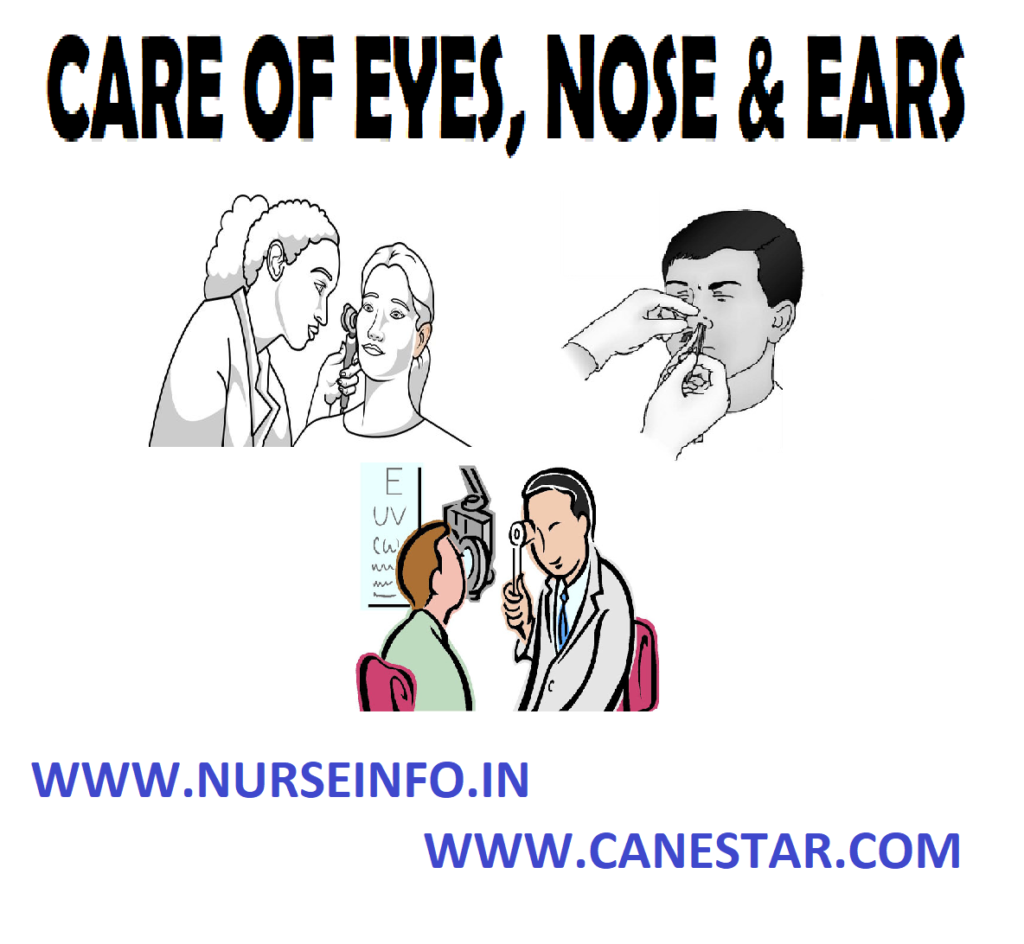
The eyes,
nose and ears are important organs which require no special care in daily life.
Hygienic care of these organs is always done as part of the general bathing
procedure. Hygienic care of the eyes, ears and nose prevents infection and
helps to maintain their functions. Assessments must be made of the patient’s
knowledge and methods used to care for the aids, as well as any problems he
might be having with the aids. Patients with limited mobility cannot grasp
small objects. Patients that have reduced vision or are seriously fatigued will
also require assistance from the specialist
Important
points: the eyes, ears, and nose are sensitive and therefore extra care should
be taken to avoid injury to these tissues. Never use bobby pins, toothpicks, or
cotton-tipped applicators to clean the external auditory canal. Such objects
may damage the tympanic membrane (eardrum) or cause wax (cerumen) to impact
within the canal
Essential Steps in Eye, Ear and Nose
Eyes are cleaned from the inner to
the outer cantus
During a bath, each eye is cleaned
with a separate portion of the wash cloth
Excessive accumulation of secretions
make patient sniff or blow the nose
The patients who cannot remove
secretions needs assistance to clear the congestion and protect from nasal
mucosa
Babies and small children a wisp of
cotton moistened with warm water or oil, introduced into the anterior nares and
rotated gently, cleanses the nostrils
Common Problems of Neglected Care
Poor eye,
ear causes debris may accumulate behind the ear and in the anterior aspect of
the external ear. This can lead to ulceration of the skin. Collection of
cerumen or ear wax, in the external auditory canal cause difficulty in hearing
Purpose
To maintain the cleanliness of eye,
ear and nose
To prevent infection
To keep the organ in normal
functioning
To prevent obstruction
Factor Affecting
Systemic disease condition (diabetes
and hypertension)
Acute illness (viral or bacterial
infection)
Trauma (blow or foreign bodies)
Medication (toxic drugs)
Allergic substances
Congenital anomalies
Common Problems
Eye: conjunctivitis (burning, itching, red-watery and painful eyes with increased secretions) cataracts, glaucoma, strabismus and squint
Ear: otitis media, impacted cerumen and foreign bodies
Nose: mechanical irritation and obstruction
General Instructions
Eye
Unconscious patients are at risk for
eye injury. Daily swabbing of eye with wet sterile cotton is important
Cleaning is done from the inner
canthus of eye to the outer canthus of the eye
Use normal saline to remove the crust
During bath, each eye is cleaned with
a separate portion of the wash cloth
When sterile procedure is required,
each eye cleaned with separate swabs, swabbing each once only
Ear
Do not use pins or slides to clean
ears. Only use clean buds to clean ears
Poor hygiene of ear, debris may
accumulate behind the ear and in the anterior aspect of the external ear
Nose
Observation of nose for signs of
discharge, lesions, edema and deformity is required
External crusted secretions can be
removed with a wet wash cloth or a cotton applicator moistened with oil, normal
saline or water
Foreign bodies and small children a
wisp of cotton moistened with water or oil, introduced into the anterior flares,
and rotated gently cleanse the nostrils
Preliminary Assessment
Check
Patients diagnosis
Doctors order for specific
instructions
Assess the general condition
Self-care ability
Articles available in the unit
Preparations of the Patient and Environment
Explain the procedure
Arrange the articles at the bedsides
Place the patient in flat if the
condition permits
Protect the pillow and the bed with a
Mackintosh and towel under the head
Eye Care
Eye care is
carried out for a number of reasons: to clean the eye of discharge and crusts;
prior to eye drop installation; to soothe eye irritation; to prevent corneal
damage/abrasion in the unconscious/sedated patient
Equipment Needed
Clean trolley
Sterile dressing pack containing a
gallipot, gauze swabs and disposable towel
Sterile 0.9% sodium chloride
Sterile gloves
Appropriate eye ointment/drops (as
prescribed)
Good light source
Disposable bag for rubbish
The patient
should be sitting or lying with their head tilted backwards and chins pointing
upwards. This allows for easy access to the eyes and is a good position for
patient comfort.
Procedure:
explain to the patient what you are about to do even if the patient is
unconscious. Make sure the bed area is clear of any obstructions to enable you
to move around the bed freely, and that you have all the equipment-ensuring you
are prepared means you will not have to leave the patient unnecessarily during
the procedure
Make sure that the patient is in a
comfortable position and that there is a good light source
Ensure patients privacy
Make an assessment of the patients
eyes
Wash hands, put on gloves and open
sterile pack
Place disposable towel around the
patient’s neck
Ask the patient to close their
eyelids, to avoid damage to the cornea
With a gauze swab dampened in the
saline 0.9% gently swab from the inner aspect (nasal corner) of the eye
outwards. Use a new swab each time until all discharge has been removed
Repeat the procedure for both eyes
Dry the patient’s eyelids gently to
remove excess fluid
Dispose of equipment
Ensure that patient is comfortable
Wash hands thoroughly
At this point, if required, eye
ointment/drops are instilled
The medicine prescription should be
checked against the label on the eye ointment/drops prior to cleaning patient’s
eyes. The expiry date should also be checked on the medication
Check the patient’s prescription
sheet for the date and time of administration
Make sure that you have the correct
eye ointment/drop for each eye
Ensure the patient is in a
comfortable position head titled back and supported
The patient should be warned if the
medication is likely to cause side effects, such as blurred vision
After Care
Instill any medications that are
ordered
Remove the Mackintosh and towel from
under the patient head
Adjust the position of the patient
Replace the articles to the utility
room
Wash hand thoroughly
Record and report the procedure in
the nurse’s record
Care of the Ears
The ears are cleaned during the bed
bath. A clean corner of a moistened washcloth rotated gently into the ear is
used for cleaning. Also, a cotton-tipped applicator is useful for cleansing the
pinna
The care of the hearing aid involves
routine cleaning, battery care and proper insertion techniques. The specialist
must assess the patient’s knowledge and routines for cleaning and caring for
his hearing aid. The specialist will also determine whether the patient can
hear clearly with the use of the aid by talking slowly and clearly in a normal
tone of voice. Have the patient suggest any additional tips for care of the
hearing aid
When not in use, the hearing aid should be stored where it will not
become damaged. The hearing aid should be turned off when not in use. The
outside of the hearing aid should be cleaned with a clean, dry cloth. Hearing
loss is a common health problem with the elderly, and the aid assists in the
ability to communicate and react appropriately in the environment
Care of the Nose
Secretions can usually be removed
from the nose by having the patient blow into a soft tissue. The specialist
must teach the patient that harsh blowing causes pressure capable of injuring
the eardrum, nasal mucosa, and even sensitive eye structures
If the patient is not able to clean his nose, the specialist will assist using a saline moistened washcloth or cotton tipped applicator. Do not insert the applicator beyond the cotton tip Suctioning may be necessary if the secretions are excessive. When patients receive oxygen per nasal cannula, or have a nasogastric tube, you should cleanse the nares every 8 hours. Use a cotton-tipped applicator moistened with saline. Secretions are likely to collect and dry around the tube; therefore, you will need to cleanse the tube with soap and water
CARE OF THE EYES, NOSE AND EARS – Definition, Purpose, Equipment, Preliminary Assessment, Procedure, After Care
HOT FOMENTATION (Hot Application) – Purpose, Classification, Preliminary Assessment, Preparation of Patient and Environment, Equipment, Procedure and After Care
UPDATED 2024
Hot fomentation is a local moist heat application, over an area by means of two thick pieces of flannel or other soft material, wrung out from boiling water, protected by water, soft covering, wool and bandage
Hot
fomentation is defined as a process of applying moist heat to localized part of
body
Purpose
To relieve pain and congestion
To relieve inflammation
To relieve retention of urine
To relieve intestinal and renal colic
To stimulate nerve ending to stimulate
peristalsis
To provide comfort and warmth
To relax muscles
To promote suppuration
To apply sterile compress on wounds
Classification
Simple fomentation: boiled or dipped
in boiling water is used for fomentation, it is called simple fomentation.
Medicated fomentation: drug is added
to boiled water for fomentations and it is applied to unbroken skin used to
relieve tympanites by increasing the peristalsis and relaxing the muscle spasm
Surgical fomentation: this is a
fomentation to broken part of skin like over an open wound. The purpose is to
relieve pain and muscle spasm, to reduce swelling and congestion and to
accelerate the process of suppuration
Area of Application
Whole of the back and sides of axilla
are covered to relieve congestion of kidney
Joint stiffness or inflammation of
the whole joint and some areas above or below the joint are covered
In case of stomach pain, the area of
application is from xiphisternum to umbilicus and both sides of abdomen
General Instructions
Make sure that the skin in intact,
nor sored or abraded in case of medical fomentation
The skin is smeared with little
Vaseline/oil before the application of moist heat to prevent scalding
The skin is covered with a layer of
warm cotton (sterile) in care of open wound until a fresh application is made,
if any interval of time elapses between the removal of one and the application
of the next
Preliminary Assessment
Check
To correct patient
The doctors order for specific
instruction
General condition diagnosis of the
patient
Inspect the body part for any lesions
of the skin
Determine the duration and frequency
of the treatment
Assess the contraindication to the
application of heat
Self-care ability to follow
instructions
Articles available in the unit
Preparation of the Patient and Environment
Explain the sequence of the patient
Provide privacy if needed
Arrange the articles at the bedside
Drape the part according to the need
and expose only the needed part
Position the patient comfortable according
to the need
Place a Mackintosh and towel under
the patient to prevent protect the bed
Expose the area and apply the olive
oil, on the part to prevent burns
Equipment
A kettle of boiling water
Wringer with wringer rods placed in
basin
Lint or funnel pieces to apply warmth
Plates – 2 to take the compress to
the patient side
Methods of Fomentation
Boiling
Water Method
Fold a large bath towel lengthwise
and twist as much as possible; place middle three-quarters into boiling water
and let it become thoroughly soaked
Lift out of water and pull hard to
wring out all the water possible. Let it untwist by dropping one end and hold
the other end
Lay it over the towel placed on the
patient’s body if the towel is very hot
OR
Place hot
towels on the skin surface and quickly remove it to avoid burning; watch it
very carefully to lift the towel if heat is not tolerated. The towel will cool
off rapidly. Practice this skill thoroughly before you work on your client
Cover with another towel
Repeat procedure 3 or 4 times. In
between the hot towels, briskly wipe the body surface with ice-cold cloth and
then blot the moisture quickly. It is the moisture that burns the skin,
therefore the skin must be dry completely before the next application
Streaming
Method
Soak completely and wring out 5 large
bath towels or fomentation pads in water
Place the towels or pads on the grid
of a large canner (32 quarts or liters)
Place enough water in the canner
below the grid and boil it for 20 minutes-towel or pads should not touch the
water
Microwave
Method
Take a large bath towel soaked in
cold water; wring out all the water possible
Place the single towel in a black
plastic garbage bag or other strong plastic bag
Place the bag in the micro-wave oven
and turn to high for 4 minutes (or until steaming)
Quickly remove towel and use it on
the body surface; if it is very hot, place a dry towel on skin area before
applying the very hot towel
A tray
containing:
Cotton balls in a container to apply
the oil
Forceps-to hold the cotton balls
Olive oil or Vaseline
Small Mackintosh
Waterproof cover and cotton pad
Abdominal binder and safety pin
Paper bag
Hot water bag and cover
Duster and lotion thermometer
Procedure
Wash hands
Expose the needed area and observe
for any lesions on the skin
Place the patient at the edge of the
bed near the working side
Expose the area and apply Vaseline
Place fomentation cloth/pack in
wringer. Insert wringer rods and place in basin
Check temperature of water (125-150
Degree F)
Pour water on fomentation cloth and
wet fully
Hold wringer rods with hands and
turns in opposite direction to wring out excess water from pad
Remove pad by holding one corner over
second basin
Place flannel Mackintosh over pad
Apply bandage/binder depending upon
site and secure with pins or adhesive
Remove after 10 to 15 minutes
After Care
Observe skin for any pallor; extreme
redness, pain and discomfort
Remove and reapply as needed for better
effect
After removing, gently dry part
Replace the articles after cleaning
Wash hands thoroughly
Record the procedure in nurse’s
record sheet
HOT FOMENTATION (Hot Application) – Purpose, Classification, Preliminary Assessment, Preparation of Patient and Environment, Equipment, Procedure and After Care
STEAM INHALATION (Hot Application) – Purpose, Preliminary Assessment, Preparation of Patient and Environment, Equipment, Procedure and After Care
UPDATED 2024
Inhalation
is defined as the drawing of air or other vapors into lungs through mouth or
nose.
Steam
inhalation is defined as utilization of moist heat to loosen lung congestion
and help liquify secretions
Purpose
To relieve inflammation of the mucus membrane
in acute colds and in sinusitis
To relieve irritation in bronchitis
and whooping cough by moistening
To provide antiseptic action on the
respiratory tract
To provide warm and moist air
following operation, e.g. tracheotomy
To soften thick, tenacious mucus and
relieve coughing
Types of Inhalations
Dry-Inhalation: ether, chloroform,
nitrous oxide, menthol, eucalyptus and spirit ammonia
Water moist inhalation: plain steam,
tincture benzoic, menthol in alcohol and oil of eucalyptus solution
Indication of Tincture Benzoin Inhalation
Purulent bronchitis
Bronchiectasis
Lung abscess
Common cold and sore throat
General Instructions
The temperature of the water should
be remaining between 120 and 160 degree F or 54.4 and 76.7 degree Celcius
Water in the inhaler should remain
just below the spout to avoid scalding
The spout of the inhaler must be
placed in such a way that the patient cannot touch it or put his face too near
Keep the patient warm and prevent
drought before, during and after the inhalation
When volatile groups like menthols
are used to keep his eyes closed to prevent the drug irritating the conjunctiva
Observe the patient closely
throughout the procedure
Preliminary Assessment
Check
The doctors order for any specific
instructions
General condition and diagnosis of
the patient
Self-care ability to follow
instructions
Type, duration and medication of
inhalation
Articles available in the unit
Preparation of the Patient and Environment
Explain the procedure to the patient
Allow the patient to empty to the
bladder and towels if necessary. Given bedpan or urinal to a bedridden patient
Provide Fowler’s position with back
rest, cardiac table and extra pillows
Close windows, doors and put off fan
to prevent drought
Provide sputum cup within the reach
of the patient
Provide a face towel to remove sweat
from face during inhalation
Mouth piece should be boiled and
cooled before use
Arrange the articles at the bedside
Equipment
A tray
containing:
Nelson’s inhaler in a large bowel
Face towel and patient towel – 1
Bath blanket
Tincture benzoin
Teaspoon, dropper
Kettle with boiling water
Gauze pieces
Cotton swabs
Swab sticks
Kidney tray and paper bag
Procedure
Wash hands
Open sterile inhaler mouth – piece
and cover with sterile gauze and attach to clean inhaler
Close spout of inhaler with cotton
ball. Pour boiling water up to spout. Add medicine (tincture benzoin) if
needed. Close inhaler with mouth piece and take to bed side
Face spout away from patient and
remove cotton ball
Instruct to take in deep breath
through mouth and breathe out through nose
Continue procedure for 15 to 20
minutes keep patient warm throughout to prevent chilling
Give chest physiotherapy and encourage
patient ot bring out sputum
After Care
Remove the inhaler from the patient
Use face towel to wipe of
perspiration from his face
Remove the accessories and make the
patient comfortable
Replace the articles after cleaning
Wash hands
Record the procedure in nurse’s
record sheet
STEAM INHALATION (Hot Application) – Purpose, Preliminary Assessment, Preparation of Patient and Environment, Equipment, Procedure and After Care
SPECIMEN COLLECTION – Definition, Purpose, Principles, Equipment, Procedure for Urine Collection, Urine Culture, Stool-Routine Test and Culture, Sputum Culture, Blood Smear, Blood Culture, Throat Swab, Vaginal Swab/Smear and Urine Testing
UPDATED 2024
DEFINITION
Specimen
collection is defined as collection of a required amount of tissue of fluid for
laboratory examination
Specimen may
be defined as small quantity of a substance, which shows the kind and quality
of the whole
PURPOSE
To make diagnosis and to help in
treatment
To note progress or recess of a
disease
To observe the effects of special
treatment and drugs
To assess the general health of the
patient
To investigate the nature of the
diseases
To aid the doctor in diagnosis and
treating the diseases
PRINCIPLE
Contaminated and improperly collected
specimens will produce false results which will adversely affect the diagnosis
and treatment of patient
Specimen allowed to stand at room
temperature of a long time will give false results due to decomposition of
specimen, multiplication of undesirable bacteria and destruction of pathogenic
bacteria
Blood chemistry is not uniform
throughout the day. It varies with the good intake
The accuracy and reliability of
findings depend upon the correct method collection. Transportation of the
specimens to the laboratory and recording of reports
Inaccurate results may lead the
physician in the diagnosis and treatment of patients
Specimens serve as a media for
transmission of disease producing organisms to the personnel who handle them
carelessly
General Instruction
Provide adequate explanations
regarding the collection of specimens
Ask the patient to wash the external
genital area with soap and water then rinse with water alone before collecting
urine specimens
Equipment used for the collection of
specimens should be clean and dry
No antiseptic should be present in
the specimen bottle
As for as possible morning specimens
are collected
Specimens should be always fresh for
the laboratory examination
Bacteria multiply in the room
temperature so, the specimens which are not tested immediately are kept in the
refrigerator, because cold temperature inhibits the growth of bacteria
Insist the patient and the personnel
to wash hands thoroughly after handing the specimen bottles
Container should have a wide mouth to
prevent spilling of the specimens, on the outer side of the bottles
Containers of the proper size are
used according to the nature of specimen
Blood: Commonly collected for laboratory testing to assess various health parameters.
Urine: Used for urinalysis to evaluate kidney function and detect certain medical conditions.
Saliva: Contains DNA and is often used in genetic testing.
Tissues: Biopsy samples are collected for histological examination to diagnose diseases like cancer.
Swabs: Used to collect samples from surfaces, body cavities, or wounds for microbiological analysis.
Collection Procedures:
Sterile Techniques: Depending on the type of specimen, sterile techniques may be necessary to prevent contamination.
Proper Containers: Specimens are collected in specific containers designed for the type of sample being obtained.
Labeling: Accurate and clear labeling of specimens is crucial to avoid errors in identification.
Transport and Storage:
Temperature Control: Some specimens require specific temperature conditions during transport and storage to maintain their integrity.
Timeliness: Specimens should be transported to the laboratory promptly to prevent degradation or alteration of the sample.
Chain of Custody:
Documentation: Maintaining a clear chain of custody ensures that the specimen’s handling and transportation are documented accurately, especially in legal and forensic contexts.
Safety Precautions:
Personal Protective Equipment (PPE): Healthcare providers and collectors should use appropriate PPE to prevent exposure to potentially infectious materials.
Disposal: Proper disposal methods for used collection materials and biohazardous waste are essential.
Patient/Donor Instructions:
Fasting or Preparation: Some tests may require patients to fast or follow specific instructions before specimen collection.
Intensive Care Unit (ICU) nursing involves caring for critically ill patients who require constant monitoring and specialized medical interventions. ICU nurses play a crucial role in providing comprehensive care to patients with life-threatening conditions.
Here is an overview of some common ICU nursing procedures:
Patient Assessment:
Conducting thorough assessments of patients upon admission to the ICU and continuously monitoring their vital signs, neurological status, and other critical parameters.
Assessing the patient’s response to treatments and interventions.
Ventilator Management:
Assisting with the placement and management of mechanical ventilation for patients who require respiratory support.
Monitoring and adjusting ventilator settings based on patient needs and physician orders.
Hemodynamic Monitoring:
Monitoring and interpreting hemodynamic parameters such as blood pressure, heart rate, and cardiac output.
Administering medications to support or regulate blood pressure and cardiac function.
Medication Administration:
Administering a wide range of medications, including intravenous medications, vasopressors, sedatives, and analgesics.
Monitoring for medication effectiveness and potential side effects.
Central Line Care:
Managing central venous catheters, including insertion, maintenance, and monitoring for complications.
Administering medications and fluids through central lines.
Invasive Procedures Assistance:
Assisting with or performing invasive procedures, such as inserting arterial lines, chest tubes, and urinary catheters.
Providing care for patients undergoing surgical interventions.
Wound Care:
Monitoring and caring for wounds, incisions, and surgical sites.
Collaborating with the healthcare team to prevent and manage infections.
Nutritional Support:
Collaborating with dietitians to assess and provide nutritional support for critically ill patients.
Administering enteral or parenteral nutrition as prescribed.
Neurological Assessment:
Conducting frequent neurological assessments, including Glasgow Coma Scale (GCS) monitoring.
Monitoring for signs of neurological deterioration or improvement.
Patient and Family Education:
Providing ongoing education to patients and their families regarding the patient’s condition, treatment plan, and potential outcomes.
Supporting families emotionally and helping them understand the critical care environment.
Collaboration with Interdisciplinary Team:
Collaborating with physicians, respiratory therapists, pharmacists, physical therapists, and other healthcare professionals to coordinate and deliver comprehensive care.
Pain Management:
Assessing and managing pain through pharmacological and non-pharmacological interventions.
Collaborating with the healthcare team to ensure adequate pain control.
List of ICU Nursing Procedures are given below. Click the respective Topic to Read the respective Nursing Procedures in detail
ICU nursing requires a high level of skill, critical thinking, and the ability to work under pressure. The goal is to stabilize and support critically ill patients while addressing the underlying causes of their conditions. Communication and collaboration with the interdisciplinary team are key components of providing effective and holistic care in the ICU.
ICU nursing involves a variety of procedures to care for critically ill patients.