Free Nursing Notes, MCQs & Nursing Procedures

Nurseinfo.in provides free Nursing Notes, Nursing Procedures, Medical MCQs, Nursing Calculators, Care Plans and exam preparation resources for BSc Nursing, GNM, P.B. BSc and MSc Nursing students. Browse subject-wise notes, previous year questions and study materials based on the latest nursing syllabus.

Home Blog Page 47

TRACHEOSTOMY CARE

TRACHEOSTOMY CARE – Definition, Use of Tracheostomies, Parts of the Tracheostomy, Indications for Tracheostomy, Complications of Tracheostomy, Care of the Tracheostomy Patient and Cleansing the Inner Cannula

DEFINITION

A tracheostomy is an incision into the trachea the 2nd, 3rd, or 4th tracheal ring

USE OF TRACHEOSTOMIES

  • To facilitate prolonged artificial ventilation
  • To bypass serious upper respiratory obstructions
  • To prevent aspiration of blood, secretions or food into the lungs
  • To provide easier access to the lower airways than that is possible through nose or mouth

PARTS OF THE TRACHEOSTOMY TUBE

  • Outer tube or outer cannula
  • The inner tube or inner cannula
  • The obturator or pilot. It is used as a guide to the outer tube

INDICATIONS FOR TRACHEOSTOMY

  • Apnea
  • Respiratory obstruction
  • Circulatory arrest
  • Exsanguinating hemorrhage
  • Carcinoma of the larynx
  • Diphtheria, Ludwig’s angina
  • Head injury, neck injury or chest injuries
  • Respiratory failure
  • Fracture of the larynx or trachea
  • In case of foreign body in hypopharynx or larynx
  • Patient with severe burns, especially around hand, neck, and face
  • Patients who have had thyroidectomy or radical neck resection
  • Patients with neurological disorders, drug overdose, bulbar paralysis, or cerebrovascular accidents
  • Patients with severe pulmonary edema
  • Patients with severe emphysema
  • Weak, feeble patients
  • Canine biting

COMPLICATIONS OF TRACHEOSTOMY

  • Subcutaneous emphysema
  • Pneumothorax
  • Mediastinal emphysema
  • Obstruction of tracheostomy tube
  • Respiratory insufficiency
  • Displacement of the tube from its position on the tracheal turner
  • Hemorrhage
  • Pulmonary infection
  • Atelectasis
  • Tracheoesophageal fistula

Tracheomalacia

Constant pressure exerted by the cuff causes tracheal dilation and erosion

Signs and Symptoms

  • An increased amount of air is required in the cuff to maintain the seal
  • A large tracheostomy tube is required to prevent air leak at the stone
  • Food particles are seen is tracheal secretions
  • The client does not receive the set tidal volume of the ventilator

Management

No special management is needed unless bleeding occurs

Prevention

  • Use and uncuffed tube as soon as possible
  • Monitor cuff pressure and air volumes closely and detect changes

Tracheal Stenosis

Narrowed tracheal lumen is due to scar formation from irritation of tracheal mucosa by the cuff

Signs and Symptoms

Stenosis usually is seen after the cuff is deflated or the tracheostomy tube is removed. The client has increased coughing, inability to expectorate secretions or difficulty in breathing or talking

Management

Tracheal dilation or surgical intervention is used

Prevention

  • Prevent pulling of and traction on the tracheostomy tube
  • Properly secure the tube in the midline position
  • Maintain proper cuff pressure
  • Minimize oronasal intubation time

Tracheoesophageal fistula (TEF)

Excessive cuff pressure causes erosion of the posterior wall of the trachea. A hole is created between the trachea and the anterior esophagus. The client at highest risk also has a nasogastric tube present

Signs and Symptoms

  • Manually administer oxygen by mask to prevent hypoxemia
  • A small soft feeding tube is used instead of a nasogastric tube for tube feedings
  • A gastrostomy or jejunostomy may be performed
  • Monitor the client with a nasogastric tube closely; assess for TEF and aspiration

Prevention

  • Maintain cuff pressure
  • Monitor the amount of air needed for inflation and detect changes
  • Progress to a deflated cuff or cuffless tube as soon as possible

Trachea-innominate artery fistula

A malpositioned tube causes its distal tip to push against the lateral wall of the tracheostomy. Continued pressure causes necrosis and erosion of the innominate artery. This is a medical emergency

Signs and Symptoms

The tracheostomy tube pulsates in synchrony with the heartbeat. There is heavy bleeding from the stoma. This is a life-threatening complication

Management

  • Remove the tracheostomy tube immediately
  • Apply direct pressure to the innominate artery at the stoma site
  • Prepare the client for immediate surgical repair

Prevention

  • Use correct tube size and maintain tube in midline position
  • Prevent pulling or tugging on the tracheostomy tube immediately notify the physician of the pulsating tube

CARE OF THE TRACHEOSTOMY PATIENT

  • Maintain an open airway. Suction and clean the tube as indicated. Prevent aspiration, e.g. of water, solutions, etc. through the tracheostomy. Keep materials which may occlude the tracheostomy, away from the opening, e.g. clothing, bedsheets
  • Observe the patient carefully for indication of respiratory difficulty, e.g. noisy respirators, restlessness, cyanosis, intercostals and substernal retraction, alternations in respiratory rate, labored respiration
  • Practice asepsis. Strict aseptic technique should be followed while suctioning, cleaning and dressing the wound
  • Observe for complications of tracheostomy. If the airway is obstructed, do suctioning, if the tracheostomy outer tube has come out, put the tracheal dilator inside and inform the doctor. Never try to push a blown out tracheostomy tube back into its place. Tracheal dilator and tracheal hook, sterile, should be present near the patient all the time
  • Ensure maximal humidification of the inspired air and approximately warm inspired air. Sterile wet gauze covering the tracheostomy will help in humidification
  • Provide adequate hydration to help liquefy pulmonary secretions. At least 3,000 ml of intravenous fluids are ordered daily if adequate oral intake is not possible
  • Maintain fluid and electrolyte balance. Keep an accurate intake and output chart
  • Be gentle. The tracheal mucosa is easily traumatized during suctioning
  • Keep the necessary articles like extra sterile inner tracheostomy tube, tracheal dilator, tape, Vaseline, gauze, sterile gauze pieces, suction nozzles, sterile water and suction apparatus nearby
  • Prevent pressure and trauma to the tracheobronchial tree. If a cuffed tube is being used, see that the cuff is deflated, as ordered, to relieve pressure periodically on the tracheal wall
  • Periodically inspect the tracheostomy for trauma or infection
  • Ensure use of a fresh tracheostomy tube as needed. Clean the inner cannula of mucus and encrustations as indicated. The inner tube is changed by nurses and outer tube by doctors
  • Change the dressings and tracheostomy tube as necessary
  • Provide appropriate skin care. Keep skin clean and dry
  • Provide adequate nourishment
  • Provide frequent mouth care to minimize possible infection. Plenty of water should be given orally
  • Administer medications as ordered. Narcotics and sedatives are usually avoided. To minimize apprehension, only mild tranquilizers are given
  • For long-term cases, the patient and his relatives are taught how to take care of the tube
  • Alleviate the patient’s apprehension by closely observing him, providing care in a calm but efficient manner and helping him communicate by providing a call bell

The suction procedure is as follows:

  • Auscultate the chest before and after suctioning
  • Wash hands and use sterile gloves
  • Place a sterile towel across the patient’s chest just below the tracheostomy tube
  • Clean the skin around the tube and the adaptors with a recommended antiseptic
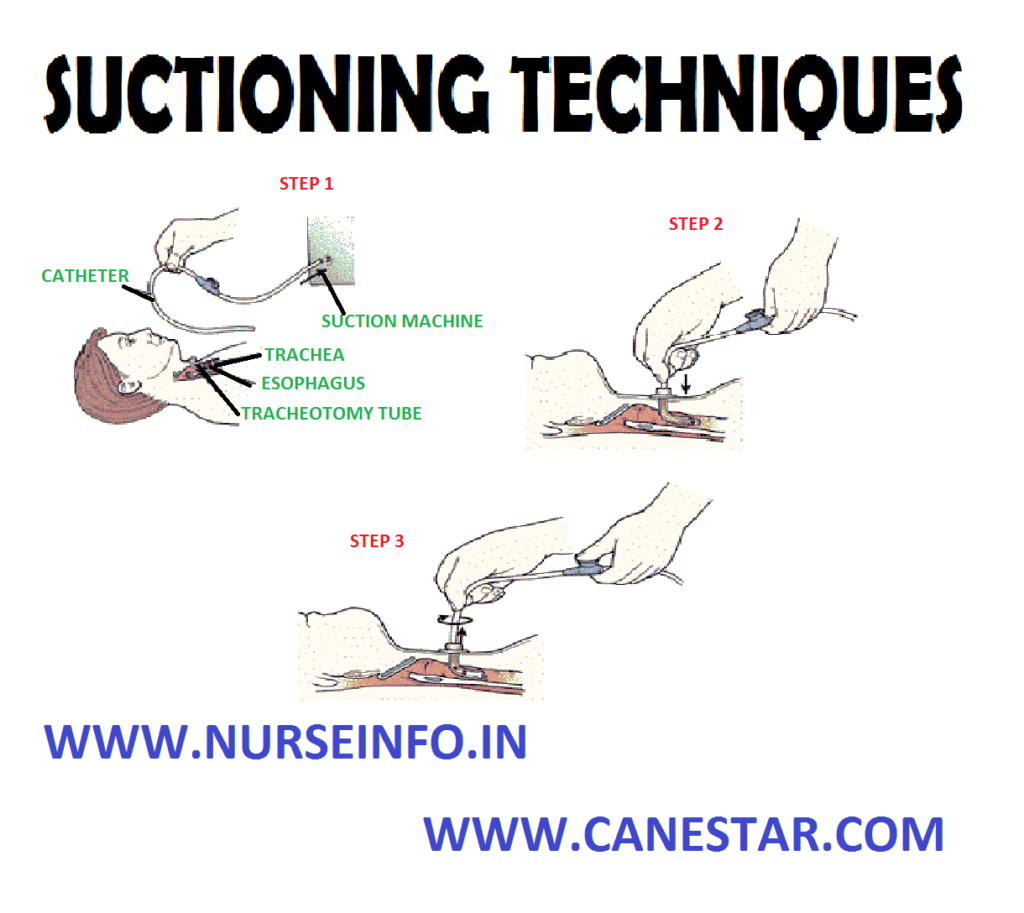
  • Select the catheter, attach it to the suction apparatus and lubricate it with sterile normal saline, gently insert into the tracheostomy tube and do the suctioning. It should not be continued more than 5 seconds at a time
  • After suctioning, discard the catheter and gloves and also the saline. Note the amount and the character of the secretions aspirated
  • Wash hands after completion of the procedure

Cleansing the Inner Cannula

It is changed every 2 to 4 hour, but in some cases, only twice. It can be cleaned with cold water and soap and also with hydrogen peroxide solution. After cleaning, it can be sterilized and can be used again. Do not leave the inner cannula out for longer than 5 to 10 m while removing or cleaning it

If left out for longer periods, secretions and crust begin to form in the outer cannula, making it difficult to reinsert the inner cannula

The following conditions should be reported to the doctor if they occur during the postoperative period:

  • Tube displacement
  • Indications of shock, hemorrhage, respiratory insufficiency and hypoxia
  • Respiratory obstruction
  • Excessive restlessness or apprehension
  • Cyanosis, in case of cyanosis, oxygen should be given
  • Rhinorrhea
  • Development of tracheoesophageal fistula
TRACHEOSTOMY CARE – Definition, Use of Tracheostomies, Parts of the Tracheostomy, Indications for Tracheostomy, Complications of Tracheostomy, Care of the Tracheostomy Patient and Cleansing the Inner Cannula

SUCTIONING TECHNIQUE

SUCTIONING TECHNIQUE – Types, Orotracheal and Nasotracheal and Tracheal Suctioning

Suctioning is the process of sucking. The removal of gas or fluid from a cavity or rather container by means of reduced pressure

Suctioning done: when a patient is unable to clear respiratory tract secretion with coughing, the nurse must use suctioning to clear the airways

TYPES

  • Oropharyngeal and nasopharyngeal suctioning
  • Orotracheal and nasotracheal suctioning

OROPHARYNGEAL AND NASOPHARYNGEAL

  • The oropharynx extends behind the mouth from the soft palate above the level of the hyoid bone and contains the tensil.  The nasopharynx is located behind the nose and extends to the level of soft palate
  • This suctioning is used when the patient is able to cough effectively but is unable to clears secretions by expectorating or swallowing

OROTRACHEAL AND NASOTRACHEAL

It is necessary when the client with pulmonary secretion is unable to cough and does not have an artificial airway present

TRACHEAL SUCTIONING

Tracheal suctioning is accomplished through an artificial airway such as an endotracheal tube or tracheostomy tube.

EQUIPMENT

  • Laryngoscope with curved on straight blade and working light sources
  • Endotracheal tube with low pressure cuff and adapter to connect to ventilator style to guide the endotracheal tube
  • Oral airway
  • 10 ml syringe
  • Suction sources
  • Suction catheter
  • Sterile towel
  • Gloves
  • Face shield
  • End trail CO2 detector
  • Resuscitation and mask connected to O2 source

PROCEDURE

Preparation Phase

Assess the patient’s heart rate, level of consciousness and respiratory status

Performance Phase

  • Remove the patient dental bridgework and plates
  • Remove headboard of bed
  • Prepare equipment
  • Aspirate stomach contents if nasogastric tube is in place.
  • If time allows inform the patient of impending inability to talk and discuss alternative means of communication
  • If the patient is confused, it may be necessary to apply soft wrist restraints
  • Put on gloves and face shield
  • During oral intubations if cervical spine is not injured place patients head in a “sniffing” position
  • Spray the back of the patient’s throat with anesthesia spray if time is available
  • Ventilate and oxygenate the patient with the resuscitation bag and mask before intubations
  • Hold the handle of the laryngoscope in the left hand and hold the patients mouth open with the right hand by placing crossed hungers on the teeth
  • Insert the curve blade of the laryngoscope along the right side of the tongue, push the tongue to the left and use right thumb and index finger to pull patient lower lip away from lower teeth
  • Lift the laryngoscopes forward to expose the epiglottis
  • Lift the laryngoscopes forward to 45 degree angle to expose glottis and visualize vocal cords
  • As the epiglottis is lift forwards, the vertical opening of the larynx between the vocal cords will come into view
  • Once the vocal cord is visualized, insert the tube into the right corner of the mouth and pass the tube while keeping vocal cords in constant view
  • Gently push the tube through the triangular space formed by the vocal cords and back wall of trachea
  • Stop insertion just after the tube cuff had disappeared from view beyond the cords
  • Withdraw laryngoscope while holding endotracheal tube, attach bag to ET tube, and ventilate the patient
  • Inflate cuff with the minimal amount of air required to occlude the trachea
  • Insert a bite block if necessary
  • Ascertain expansion of both sides of the chest by observation and auscultation of breath sound
  • Record distance from proximal end of tube to the point where the tube reaches the teeth
  • Secure tube to the patient’s face with adhesive tape or apply a commercially available endotracheal tube stabilization device
  • Obtain chest X-ray to verify tube position
SUCTIONING TECHNIQUE – Types, Orotracheal and Nasotracheal and Tracheal Suctioning

SPUTUM CULTURE

SPUTUM CULTURE – (Purposes, General Instructions, Client Preparation, Equipment, Procedure, Documentation)

Sputum culture are obtained to aid with diagnosis and treatment decisions in patients with suspected pneumonia tuberculosis, or there infectious diseases of the lower airway. A microbiology laboratory cultures and incubates the specimen to identify any pathogenic microorganisms. Sputum is obtained for cytology to search for abnormal cells that might indicate cancer or a precancerous condition of the lungs or airway. In either case, it is important to obtain a specimen that has been coughed up and expectorated from the lower airways, with minimal contamination by oral and pharyngeal secretions. The patient must be asked to cough deeply and the specimen is collected in a sterile container

PURPOSE

  • Sputum collection for suspected cancer for tuberculosis may be required for three consecutive mornings
  • To provide a specimen to determine the presence and type of microorganisms in the oropharynx

GENERAL INSTRUCTIONS

  • The specimens should be brought to the office as soon as possible to avoid deterioration of the material
  • Most diagnostic specimens are obtained early in the morning when the greatest volume of secretions has had a chance to accumulate
  • If the sputum specimen is not possible to collect, specimen may also be collected after respiratory treatments or therapy
  • It is vitally important that the patient understand that the specimen must be collected from the lung field and not from the mouth
  • Pathogen must be collected from sits of concern with a twisting motion for maximum collection. Touching other areas will alter the substances on the swab

CLIENT PREPARATION

  • Inform about the difference between saliva and sputum may need to be explained on the client’s level of understanding
  • Before the sputum collection, encourage the client to increase fluid intake to decrease the viscosity (thickness) of the secretions
  • The client may be weak from illness, and thick mucus will be hard to bring up, causing the client to be even more exhausted. A cool mist humidifier may help also

EQUIPMENT

  • Tongue blade (depressor)
  • Sterile specimen container
  • Sterile swab (if one is not supplied with the specimen container)
  • Complete laboratory request slip

PROCEDURE

  • Wash hands
  • Arrange the equipment and supply
  • Explain the procedure to the client
  • Put the gloves and face mask or shield
  • Carefully remove the sterile swab from the container
  • Have the patient say AHHH as you press on the midpoint of the tongue depressor
  • Swab the area of concern on the mucous membranes, especially the tonsillar area, the crypts, and anterior and posterior pharynx. Turn the swab to expose all its surfaces. Avoid touching areas other than those suspected of infection
  • Maintain the tongue depressor position while withdrawing the swab
  • Follow the instructions on the specimen container for transferring the swab. Some require that the wooden swab stick to broken after dropping into the culture; others may have a special swab that is contaminated within the container and is secured when the container is sealed
  • Properly dispose of the equipment and supplies, remove gloves and wash your hands
  • Route the specimen or store it appropriately until routing can be completed

DOCUMENTATION

  • Date and time
  • Collection of throat culture
  • Routing of specimen
  • Patient complaints/concerns
  • Patient education/instructions
  • Signature and name of the nurse
SPUTUM CULTURE – (Purposes, General Instructions, Client Preparation, Equipment, Procedure, Documentation)

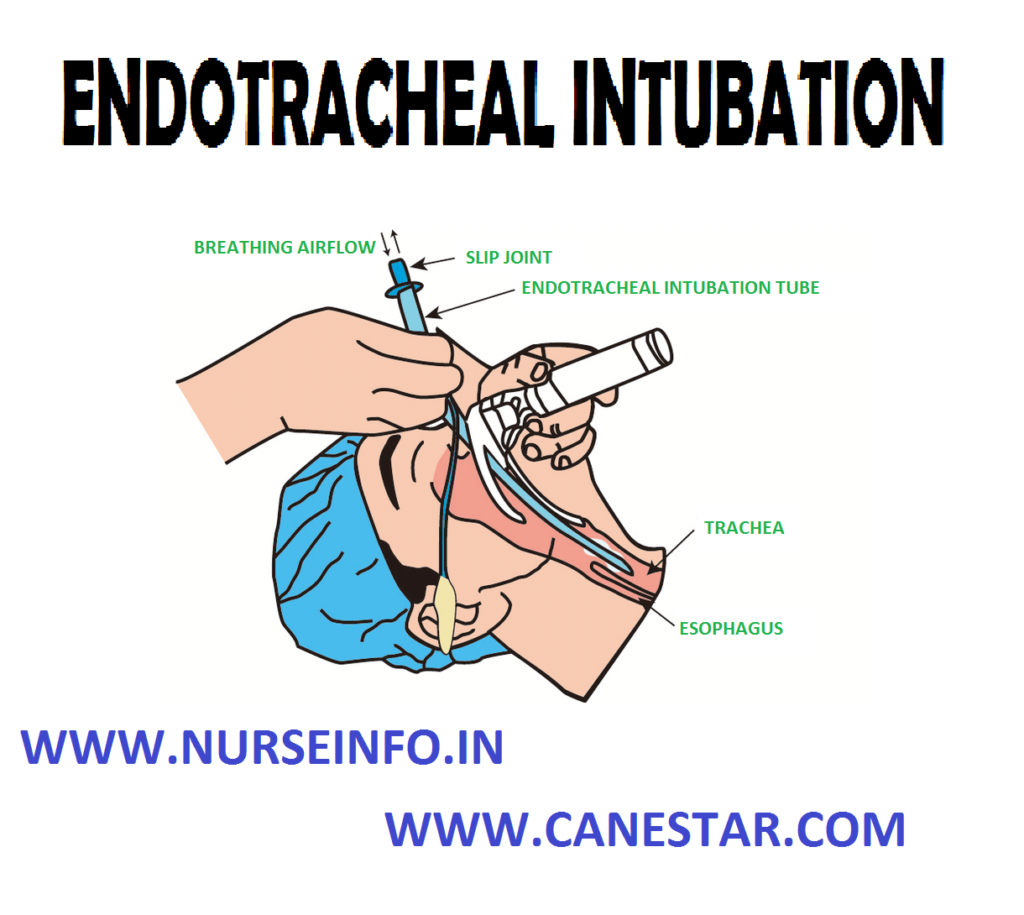
ENDOTRACHEAL INTUBATION

ENDOTRACHEAL INTUBATION – Definition, Purpose, Assessment Phase, Precautions, Planning Phase, Client/Family Teaching and Equipment Used

DEFINITION

Endotracheal intubation is assisting in passing of a slender hollow tube into trachea through nose or mouth to facilitate artificial ventilation and resuscitation, using aseptic technique

PURPOSE

  • To treat acute respiratory failure, persistent hypoxemia, persistent rise in pCO2
  • To maintain patient airway
  • To ensure adequate oxygenation in fracture of cervical vertebrae, spinal cord injury
  • To provide ventilatory assistance when indicated

Objective: to insert an endotracheal tube into the trachea to provide a patient airway for ventilatory support or to manage secretions

ASSESSMENT PHASE

  • Does the client require intubations? Why are intubations being considered?
  • Based on time consideration and on the condition of the client. Should nasal or oral intubations be attempted?
  • Will the client need mechanical ventilation after intubations?

PRECAUTIONS

  • Avoid damage to the client’s teeth and soft tissue, which can be caused by improper use of the laryngoscope and tubes or by unnecessary force during the procedure
  • Ensure the availability of a oxygen source. Ventilate the client with a manual resuscitator using 100 percent oxygen if intubation cannot be accomplished within a reasonable period
  • Have suction equipment setup and operable at the client’s bedside before performing the procedure
  • Avoid bronchial intubations by correctly positioning the endotracheal tube above the level of the carina
  • Be alert for signs of esophageal intubations. These signs include abdominal distention, belching and lack of breath sounds in the lung fields after intubations

PLANNING PHASE

  • Endotracheal tubes with low pressure cuffs in various sizes (most common sizes for adult client range from 5 to 9 mm inside diameter)
  • Laryngoscope handle and several sizes of both curved and straight blades
  • Topical anesthetic spray and sedative
  • Water-soluble anesthetic lubricating jelly
  • Flexible stylet
  • Forceps
  • 10 ml syringe
  • Oral airway or bite block
  • Tape, benzoin tincture and alcohol swabs
  • Suction equipment
  • Manual resuscitator with oxygen source

CLIENT/FAMILY TEACHING

  • If the client is conscious, explain the need for endotracheal intubations and explain the procedure
  • Explain sensations that may be experienced during the procedure
  • Explain the need for endotracheal intubations and explain the procedure to the family

EQUIPMENT USED FOR ENDOTRACHEAL INTUBATION: IMPLEMENTATION PHASE

  • Ensure that client is properly oxygenated using manual resuscitator with 100% oxygen
  • Administer medications as ordered
  • Check equipment

Use syringe to inflate tube cuff. Check for uniform inflation and leaks before use

Check laryngoscope batteries and light by attaching proper sized blade

  • If using stylet, lubricate entire length and insert into endotracheal tube. Make sure tip of stylet does not extend beyond tip of endotracheal tube
  • Remove client’s dentures or partial plates if applicable
  • Hyperextend client’s neck or place client’s head in brandy sniffing position
  • Open client’s mouth using crossed finger technique if necessary. Spray posterior pharynx with topical anesthetic. Suction mouth and pharynx if necessary
  • Hold laryngoscope in left hand. Insert blade into right side of client’s mouth, moving to center of mouth to displace tongue
  • Advance blade until epiglottis is visualized. If straight blade is used, advance blade past epiglottis. If curved blade is used, position tip of blade anterior to epiglottis in the vallecula
  • Lift laryngoscope to a 45 degree angle. Do not use the teeth a pivot
  • If oral intubations will be used, insert endotracheal tube through mouth into larynx between vocal cords
  • Advance tube until cuff disappears behind vocal cords. If nasal intubations will be used, insert endotracheal tube through nares into the pharynx. Forceps may now be used to guide tube between vocal cords and into larynx. Advance tube until cuff disappears behind vocal cords
  • Holding tube in place, removes stylet, if used, and inflate cuff
  • Ventilate client with manual resuscitator and 100% oxygen. Auscultate chest during ventilation. Suction endotracheal tube is necessary
  • Secure tube with adhesive tape. Before applying tape, wipe client’s cheeks with alcohol and benzoin
  • Obtain chest film
  • Connect client to oxygen using Briggs adapter or to mechanical ventilator
  • Check cuff inflation using pneumometer. Pressure should not exceed 25 cm. record pressure and volume of air required to maintain seal
ENDOTRACHEAL INTUBATION – Definition, Purpose, Assessment Phase, Precautions, Planning Phase, Client/Family Teaching and Equipment Used

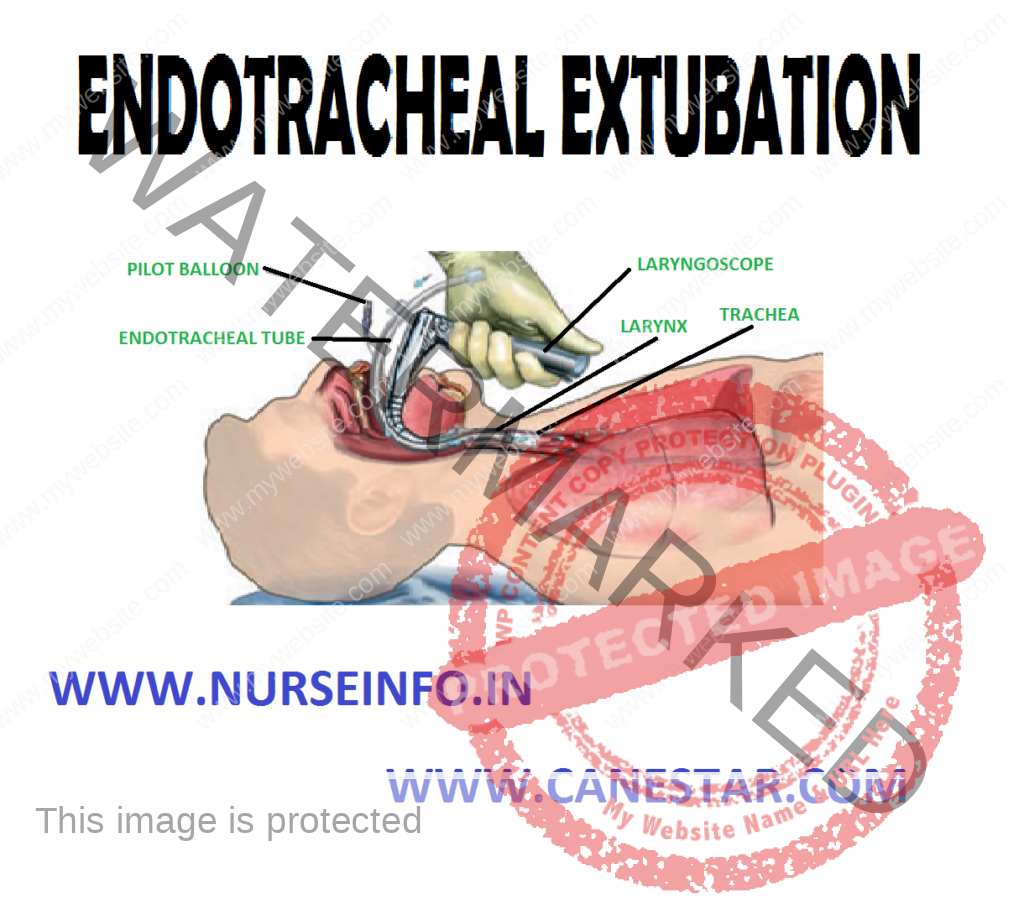
ENDOTRACHEAL EXTUBATION

ENDOTRACHEAL EXTUBATION – Objective, Assessment Phase, Precautions, Planning Phase, Client/Family Teaching and Implementation Phase)

OBJECTIVE

To remove either an oral or nasal endotracheal tube after it has been determined that the client can breathe without assistance and that secretions can be removed without an airway in place

ASSESSMENT PHASE

  • Can the client ABC value be maintained without assisted ventilation?
  • Has the client’s underlying condition improved to the point at which an artificial airway is no longer required?
  • Does the client have spontaneous respirations without the assistance of a ventilator?
  • Will the client require supplemental oxygen after extubation?
  • Are secretions a problem? Will the client be able to cough and clear secretions after the endotracheal tube is removed?

PRECAUTIONS

  • Extubations should only be attempted after the client is well-rested, especially in clients who have been intubated for long periods. Extubation may be more successful in the morning than in the late afternoon or evening
  • Never remove an endotracheal tube unless the personnel who are trained to reintubate are present. If respiratory failure follows extubation, a patient airway must be re-established
  • A suction setup with sterile catheters and gloves must be present during the extubation process to remove secretions in the client’s airway

PLANNING PHASE

  • Sterile suction catheter
  • Sterile gloves
  • Scissors
  • Water-soluble lubricant
  • Vacuum source lubricant
  • Unit dose container of sterile normal saline or 6 ml syringe filled with normal saline stethoscope
  • Aerosol setup with supplemental oxygen

Emergency airway box

Manual resuscitator with mask

Laryngoscope and blades

Endotracheal tubes

CLIENT/FAMILY TEACHING

  • Discuss the procedure for removing the endotracheal tube
  • Describe the suctioning process that will be used concurrently with the extubation procedure
  • Encourage the client to cough and breathe deeply, after the endotracheal tube is removed. Describe the benefits of coughing and deep breathing and explain why these procedures will reduce the risk of reintubations

IMPLEMENTATION PHASE

  • Elevate head of bed to semi-Fowler’s position or as high as client can tolerate
  • Assemble equipment for suctioning as prescribed in previous section on blind endotracheal suctioning
  • Assemble equipment to give supplemental oxygen after endotracheal tube is removed
  • Remove tape or other means of securing tube in place
  • Using sterile technique, suction secretions from the endotracheal tube
  • Increase client’s FiO2
  • Insert syringe into one way valve in pilot balloon and be prepared to deflate cuff
  • Instruct client to breathe deeply. Reinsert suction catheter 1 to 2 inches below end of endotracheal tube, deflate cuff and apply suction while endotracheal tube is removed
  • Supplemental oxygen and aerosol should be administered to client as needed
  • Tracheostomy tubes are removed in approximately same way as endotracheal tubes are. More attention is given to stoma after tracheostomy tube is removed. Sterile dressing should be applied to stoma after tube is removed. Permanent closure to stoma usually occurs within few days of extubation
  • After reoxygenation, encourage client to cough and breathe deeply. Suction oropharynx
  • Correctly dispose of tubes, catheters and gloves

Belated Nursing Care

  • Encourage client to cough and deep breathly
  • Suction is needed to remove secretions from oropharynx and trachea
  • Caution: do not leave client unattended. Observe for any signs of respiratory failure and airway obstruction
  • Prevention the complication of extubation
ENDOTRACHEAL EXTUBATION – Objective, Assessment Phase, Precautions, Planning Phase, Client/Family Teaching and Implementation Phase)

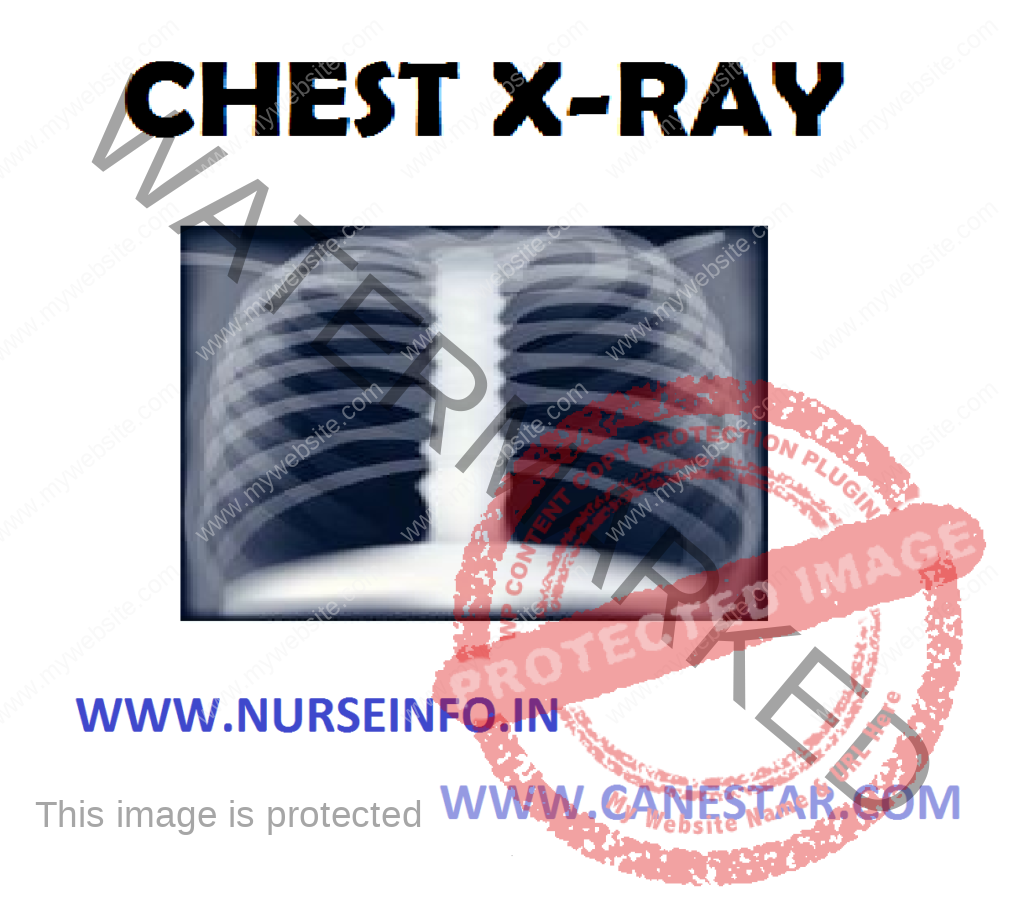
CHEST X-RAY

CHEST X-RAY (Purpose, Indications, Normal Findings, Standard Positions Used, Portable Chest X-ray, Lateral View, Lateral Decubitus Position, Oblique Position, Lordotic Position and Nursing Considerations)

Chest X-ray can help in the diagnosis of the large variety of pulmonary problems, including pneumonia, lung cancer, emphysema, pulmonary edema, and many others. When performed in a radiology department, usually two view are ordered; a posterior to anterior view and lateral view. This gives a radiologist a more three-dimension perspective of the chest X-ray may also be taken of the sinuses in cases of sinusitis

PURPOSE

  • Chest X-ray studies done as part of routine screening procedures
  • To detect or identify the pulmonary diseases
  • To monitor the status of respiratory disorders and abnormalities (e.g. pleural diffusion, atelectasis and tuberculosis cavities lesions)
  • To confirm endotracheal or tracheotomy tube placement
  • To detect traumatic chest injuries after any major accidents

INDICATIONS

  • Chest X-ray is used to identify abnormalities in chest structures and lung tissue for diagnosis and injuries of the lungs and to monitor treatment
  • Chest films may reveal abnormalities when there are no physical signs or symptoms of pulmonary disease
  • Chest films show the bony structures (e.g. ribs, sternum, clavicles, scapulae, and upper portion of the humerus)

NORMAL FINDINGS

  • The vertebral column is visible vertically through the middle of the thorax. The two hemidiaphragm normally appear rounded, smooth and sharply defined, with the right hemidiaphragm slightly elevated above the left
  • The junction of the rib cage and the diaphragm, called the costophrenic angle is normally clear visible and angled
  • Heart tissue is dense and appears white but less intensely white then bony structures. The heart shadow is normally clearly outlined and extends primarily onto the left side of the thorax and occupies no more than one third of the chest width
  • Close observation shows the trachea in the upper middle chest almost superimposed over the cervical and thoracic vertebrae. The trachea bifurcates at the level of the forth thoracic vertebra into the right and left main stem bronchi
  • The pulmonary blood vessels, bronchi and lymph nodes are located in the hilum on both the right and left sides of the midthorax
  • Lung tissue appears black on X-ray film. Vascular lung structures are visible as white, thin, wispy strings fanning out from the hilum

STANDARD POSITIONS USED

  • Adult chest X-ray studies are taken with the clients standing or sitting facing the X-ray film, with the chest and shoulder in direct contact with the film cassette
  • The shoulders are rotated forward to pull the scapulae away from the lung field
  • The X-ray cathode penetrates from the posterior. This position is called posteroanterior (PA) position
  • The radiograph is usually taken at pull inspiration, which causes the diaphragm to move downwards
  • Radiographs taken on expiration are sometimes requested for demonstrating the degree of diaphragm movement or for assisting in the assessment and diagnosis of pneumothorax

PORTABLE CHEST X-RAY

  • For clients unable to be transported to the radiology department, portable chest radiography may be taken
  • Portable radiographs are usually taken with the film placed behind the client, and the X-ray beam penetrates from the front of the chest anterioposterior (AP) position
  • Because the X-ray beam enters from the anterior chest, the heart will appear larger than it reality is and larger than on a PA view

LATERAL VIEW

  • It usually accompanies a standard PA view. It is taken from either the right or left side of the chest
  • The arms are raised above the head, and the side of the chest is placed against the film
  • The lateral view allows better visualization of the heart and diaphragm dome
  • When used in conjunction with a PA film, a lateral position gives a three-dimension view, allowing more specific identification of an abnormality’s location

LATERAL DECUBITUS POSITION

  • This position may be used when it is necessary to determine whether opaque areas on the pleura are due to solid or liquid media
  • This view is taken with the client lying on either the right or left side, depending on which side of the chest is being assessed
  • In a left lateral decubitus position, the client is lying on the left side. The term decubitus refers to a lying down position

OBLIQUE POSITION

  • This position is used to see behind and around underlying structures. The shoulders are rotated either to the right or left of the film
  • By turning the client, the angle at which the X-ray beam passes through the chest is shifted
  • In a right oblique position, the right side is closest to the film. The view may be taken from either an anterior or posterior position

LORDOTIC POSITION

  • This position is useful if clearer visualization of the upper lung fields is needed
  • This angle of the X-ray cathode is lowered and the beam directed at an upward angle
  • This angle removes the clavicles and first and second ribs from the field of vision

NURSING CONSIDERATION

  • Explain to the client that this test detects or monitor the progress of respiratory distress
  • Explain the client, who will perform the procedure, where and when it will be done, and that it takes only minutes
  • Inform that the client must wear a gown without snaps but may keep his pants, socks and shoes on
  • Instruct the client, to remove all jewelry from his neck and chest
  • Inform the client, that this procedure is performed in radiology department; the client will stand or sit in front of a machine
  • Inform that the client is asked to take a deep breath and to hold it for a few seconds while the X-ray is taken
  • Reassure him that the amount of radiation exposure is minimal. Faculty personnel will leave the area when the technician takes the X-ray because they are potentially exposed to radiation many times a day
  • If the client is incubated, make sure that no one disconnects the tubes during the procedure
  • Care should be taken for female clients of childbearing age
CHEST X-RAY (Purpose, Indications, Normal Findings, Standard Positions Used, Portable Chest X-ray, Lateral View, Lateral Decubitus Position, Oblique Position, Lordotic Position and Nursing Considerations)

POSTURAL DRAINAGE

POSTURAL DRAINAGE – Definition, Purpose, Equipment, General Instructions, Procedure

DEFINITION

Drainage of secretion from lung segments by gravity utilizing specific positioning techniques

PURPOSE

  • To drain lung secretion before and after surgery
  • To aid for easy breathing in bronchial or lobar pneumonia, lung abscess
  • To treat patient with, e.g. bronchiectasis, chronic bronchitis and cystic fibrosis
  • To assist patient who are unable to cough and bring out sputum, via. Unconscious, debilitated, quadriplegic patient

EQUIPMENT

  • Pillows: 3:4
  • Sputum cup
  • Tissue paper
  • Sputum measuring glass

GENERAL INSTRUCTIONS

  • Perform postural drainage for patient  on empty stomach before meals
  • Avoid postural drainage for patient with hemoptysis

PROCEDURE

  • Explain purpose an procedure to patient
  • Locate affected lung with help of X-rays, auscultation and percussion
  • Administer bronchodilators before procedure
  • Give steam inhalation to patient after obtaining doctor’s written order
  • Position patient according to lung segment to be drained

Postural drainage techniques:

Upper lobes:

Upper segments: place patient in high Fowler’s position in chair or bed

Anterior segments: place patient in semi-Fowler’s position in chair or bed

Posterior segments: place patient in Fowler’s position in chair or bed, provide a cardiac table

Lateral segments: place patient in lateral position elevated to about 45 degree celcius, first to one side and then to other side. When out of bed ask patient to lean on arm, resting on chair or table for support.

Right middle lobes

      Anterior segment (right side): place patient flat on left side with a pillow under chest. Right shoulder and body are kept forward

Posterior segment: place patient in prone with chest and abdomen elevated

Lower lobes

    Anterior segments: place patient in supine, Trendelenburg with hips elevated with pillows, so that hips are higher than shoulders

Posterior segments: place patient prone, Trendelenburg or hips elevated with pillows so that hips are higher than shoulders

Lateral segments: place patient in right side lying

Trendelenburg for left lung and left side lying Trendelenburg for right lung or hips elevated with pillows to keep hips higher than shoulders

  • Perform chest percussions and vibrations on areas to be drained
  • Encourage patient to cough out secretions and collect in sputum container
  • Do suctioning if coughing is not possible
  • Make patient comfortable and ask to rest flat for ten to fifteen minutes before allowing sitting or getting out of bed
  • Dispose sputum container in infectious waste container. Replace articles
  • Document, time, amount and color of sputum drained, response of patient to therapy
POSTURAL DRAINAGE - Definition, Purpose, Equipment, General Instructions, Procedure
POSTURAL DRAINAGE – Definition, Purpose, Equipment, General Instructions, Procedure

NEBULIZATION THERAPY

NEBULIZATION THERAPY – Purpose, Jet Medication Nebulizer, Ultrasonic Nebulizer, Equipment and Procedure

NURSING PROCEDURES LIST CLICK HERE

Nebulization Therapy

Nebulization therapy is to liquefy and remove retained secretions from the respiratory tract. A nebulizer is a device that produces a stable aerosol of fluid and/or drug particles.

PURPOSE

  • To relieve respiratory insufficiency due to bronchospasm
  • To correct the underlying respiratory disorders responsible for bronchospasm
  • To liquefy and remove retained thick secretion from the lower respiratory tract
  • To reduce inflammatory and allergic responses the upper respiratory tract
  • To correct humidify deficit resulting from inspired air by passing the upper airway during the use of mechanical ventilators in critically ill and post-surgical patients

TYPES

  • Jet nebulizers
  • Ultrasonic nebulizer

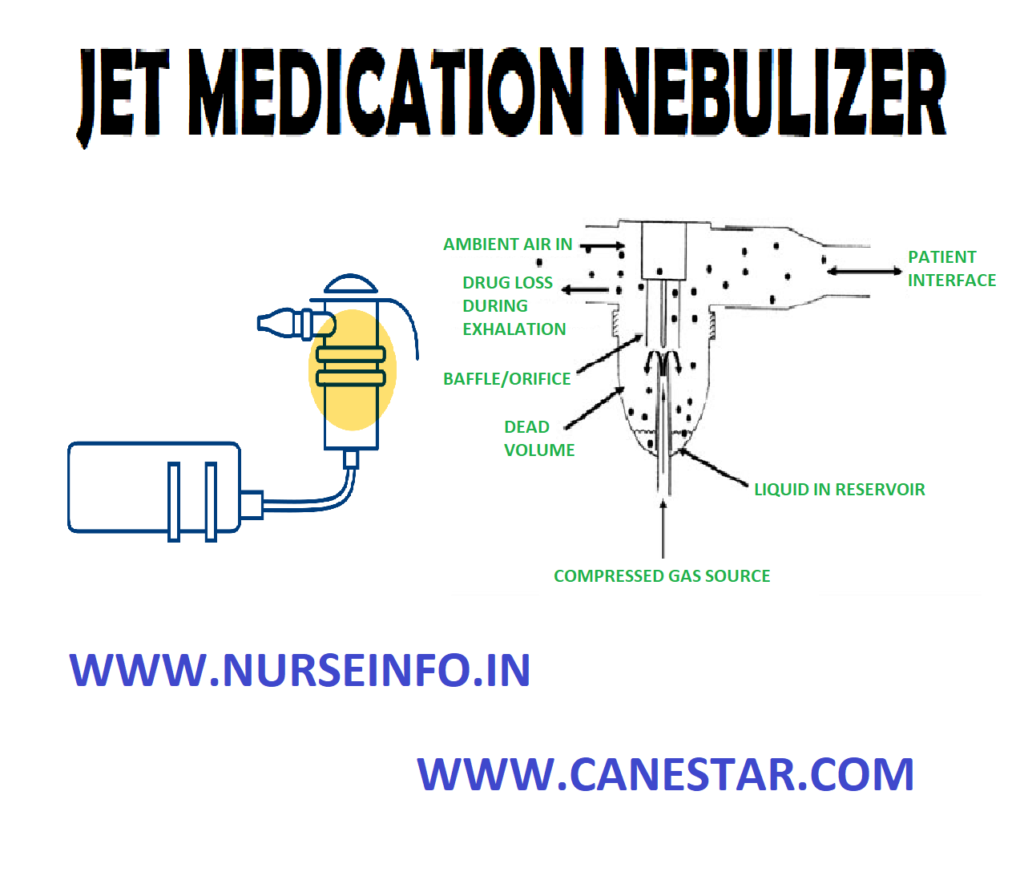
JET MEDICATION NEBULIZER

A jet medications nebulizers utilize a high velocity gas flew to generate practice from the prescribed solution either O2 of compressed air powers the nebulae.

EQUIPMENT

  • O2 cylinder/wall O2 outlet of flew metals
  • A clean tray with O2 nipple adapted to bit the connection tubing

Nebulizer kit consent of:  (face mask/mouth piece)

Nebulized jet and nebulizer cap O2 supply tubing

  • Physician orders
  • Prescribed nebulizer solution
  • The 0.9% NaCl ampoules as diluent if prescribed
  • A 5 ml syringe with needle
  • Disposable spectrum cup
  • Box of disposable leisters

PROCEDURE

  • Unscrew the nebulizer jar and instill the prescribed dose of solutions
  • Rescrew cap on nebulizer jar
  • Connect one end of the O2 tubing to the nebulizer and attach the other end of the supply tubing to the O2  flew maters
  • Place the patient in a comfortable sitting on semi-Fowler’s positions
  • Adjust the O2 to flow rate 5 to 6 units per minute or until a fine must appears
  • Place the mask snugly over the patients face to cover the nose, mouth and chin and adjust the elastic sharp around the patients
  • Instruct the patient to take deep breath, repeat hold breath briefly this exhale unit all the medications is nebulized
  • Observe expansion of the patient chest during therapy
  • Observe the patient. Though out the procedure and give constant reassurance
  • Thin oil the O2 when all the solution has vaporized and remove the face mask
  • Encourages the patient to length after several deep breaths
  • Assist the patient to a comfortable position and wipe off the moisture from the face to face with towel or disposable tissue
  • Dismantle the nebulizes kit and decontaminate in both soapy water

ULTRASONIC NEBULIZER

The ultrasonic nebulizer utilizes fluid contained in two chambers, which is rapidly vibrated, causing the fluid to breathe into small particles.

It works on the principles that high adequacy sound waves can break up water into aerosol particles by means of two transducers

EQUIPMENT

  • Ultrasonic equalizers and manufacturers instruction
  • Circulating set-up
  • Disposable aerosol mask
  • Sterile water
  • Physicians writes codes
  • Prescribed solution
  • Disposable sputum cup
  • Box of disposable tissue

PROCEDURE

  • Fill ultrasonic chamber, and the prescribed solution to the appropriate lay with sterile water
  • Assemble circulating according to manufacture instructions and plug the cord into an electrical outlet
  • Turn on the machine and adjust the selling until the described amount of mist is obtained
  • Position the client, in a comfortable sitting or semi-Fowler’s positions
  • Place the mask singly over the patient to cover the base
  • Observe the patient, for any adverse reaction to the treatment
  • Encourage the patient to partially cough and expectorate any secretions loosed during the treatment
  • Turn off the machine and discontinue the procedure
  • Remove the facemasks and decontaminate in hot soapy water
  • Wash and dry mask bands

PRELIMINARY ASSESSMENT

  • Check the general condition of the patient
  • Check the doctor’s orders
  • Check the correct position of the patient
  • Check the articles available in the patient unit

COMPLICATIONS

  • Combustion
  • CO2 necessaries
  • O2 toxicity
  • Absorption atelectasis
  • Infection
  • Chronic O2 therapy it home

POSTURAL DRAINAGE

DEFINITION

Drainage of secretion from lung segments by gravity utilizing specific positioning techniques

PURPOSE

  • To drain lung secretion before and after surgery
  • To aid for easy breathing in bronchial or lobar pneumonia, lung abscess
  • To treat patient with, e.g. bronchiectasis, chronic bronchitis and cystic fibrosis
  • To assist patient who are unable to cough and bring out sputum, via. Unconscious, debilitated, quadriplegic patient

EQUIPMENT

  • Pillows: 3:4
  • Sputum cup
  • Tissue paper
  • Sputum measuring glass

GENERAL INSTRUCTIONS

  • Perform postural drainage for patient  on empty stomach before meals
  • Avoid postural drainage for patient with hemoptysis

PROCEDURE

  • Explain purpose an procedure to patient
  • Locate affected lung with help of X-rays, auscultation and percussion
  • Administer bronchodilators before procedure
  • Give steam inhalation to patient after obtaining doctor’s written order
  • Position patient according to lung segment to be drained

Postural drainage techniques:

Upper lobes:

Upper segments: place patient in high Fowler’s position in chair or bed

Anterior segments: place patient in semi-Fowler’s position in chair or bed

Posterior segments: place patient in Fowler’s position in chair or bed, provide a cardiac table

Lateral segments: place patient in lateral position elevated to about 45 degree celcius, first to one side and then to other side. When out of bed ask patient to lean on arm, resting on chair or table for support.

Right middle lobes

      Anterior segment (right side): place patient flat on left side with a pillow under chest. Right shoulder and body are kept forward

Posterior segment: place patient in prone with chest and abdomen elevated

Lower lobes

    Anterior segments: place patient in supine, Trendelenburg with hips elevated with pillows, so that hips are higher than shoulders

Posterior segments: place patient prone, Trendelenburg or hips elevated with pillows so that hips are higher than shoulders

Lateral segments: place patient in right side lying

Trendelenburg for left lung and left side lying Trendelenburg for right lung or hips elevated with pillows to keep hips higher than shoulders

  • Perform chest percussions and vibrations on areas to be drained
  • Encourage patient to cough out secretions and collect in sputum container
  • Do suctioning if coughing is not possible
  • Make patient comfortable and ask to rest flat for ten to fifteen minutes before allowing sitting or getting out of bed
  • Dispose sputum container in infectious waste container. Replace articles
  • Document, time, amount and color of sputum drained, response of patient to therapy
NEBULIZATION THERAPY – Purpose, Jet Medication Nebulizer, Ultrasonic Nebulizer, Equipment and Procedure

ARTIFICIAL AIRWAY MANAGEMENT

ARTIFICIAL AIRWAY MANAGEMENT – Definition, Indications, Endotracheal Route of Insertion, Tube Types, General Instructions, Equipment, Preparation of the Patient and the Environment, Procedure, After Care and Complications

DEFINITION

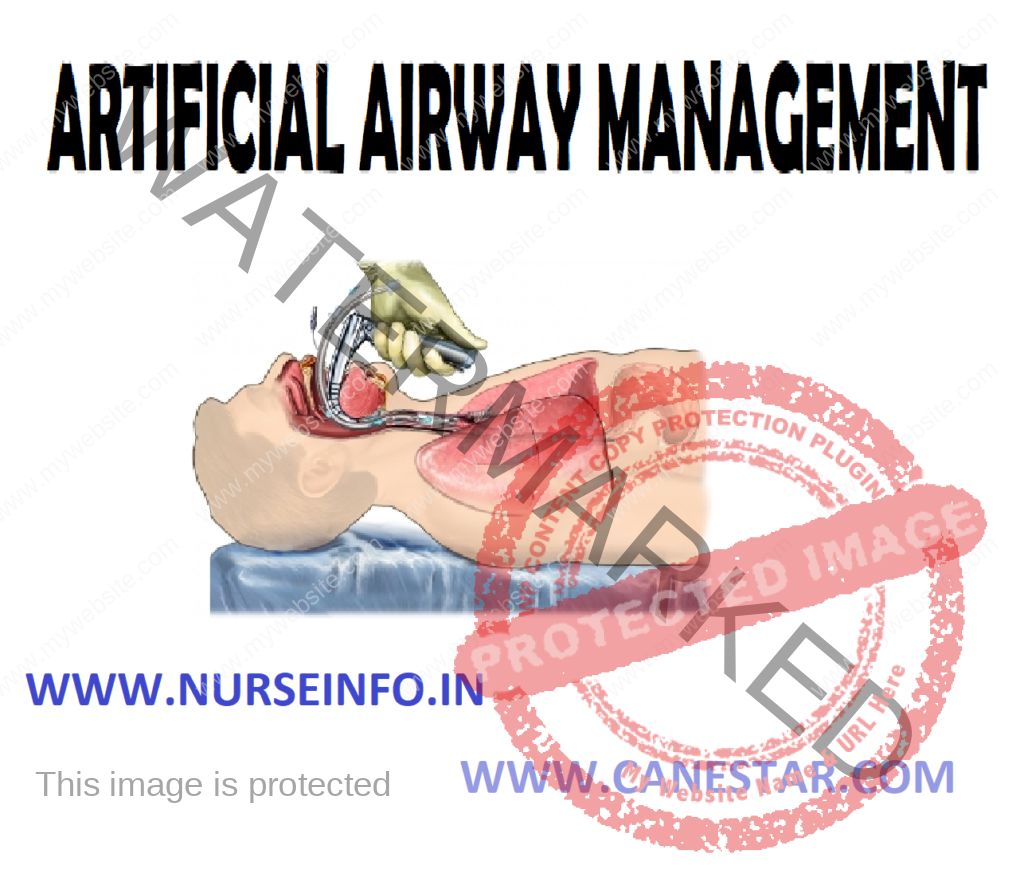
An artificial airway is a tube that is inserted at the mouth or nose or level of the second or third tracheal ring to permit mechanical ventilation and facilitate secretion removal. The distal end of the tube is located in the trachea below the vocal cords.

INDICATIONS

  • Acute respiratory failure, central nervous system (CNS) depression, neuromuscular disease, pulmonary disease, chest wall injury
  • Upper airway obstruction
  • Anticipated upper airway obstruction from edema or soft tissue swelling due to head and neck trauma, some postoperative head and neck procedures involving the airway facial or airway burns, decreased level of consciousness
  • Aspiration prophylaxis
  • Fractured cervical vertebrae with spinal cord injury requiring ventilator assistance

ENDOTRACHEAL ROUTE OF INSERTION

Tube can be inserted through nose or mouth. A cuff is always located at the distal end of the tube.

  • Orotracheal: insertion of an oral tube is technically easier, since it is done under direct visualization. Disadvantages are increased oral secretions, decreased patient comfort, difficulty with stabilization, and inability of the patient to use lip movement as a communication.
  • Nasotracheal: may be more comfortable to the patient and is easier to stabilize. Disadvantages are that blind insertion is required, possible development of pressure necrosis of the nasal airway, sinusitis and otitis media

TUBE TYPES

  • Vary according to length and inner diameter in millimeters
  • Vary according to cuff, most are high volume, low pressure with self-sealing inflation valves or the cuff may be foam rubber (foam cuff)
  • Vary according to composition and cuff type synthetic Teflon, nylon, polyvinyl chloride, polyethylene or silastic. May or may not have inner cannula.  Usually are cuffed.
  • Tubes with high volume, low pressure cuff self-sealing inflation valves and with or without inner cannula

Pressure limiting cuffs

Polyurethane foam filled cuffs

Speaking tracheotomy tube

Fenestrated

  • Usual sizes for adult are 6.0, 7.0, 8.0, and 9.0 mm

GENERAL INSTRUCTIONS

Physical Management

  • Ensure adequate ventilation and oxygenation through the use of mechanical ventilation, continuous positive airway pressure (CPAP) device, Briggs T-piece adapter
  • Provide adequate humidity, since the natural humidifying pathway of the oropharynx is bypassed. Clear airway of secretions as needed with suctioning
  • Use aseptic technique when entering the artificial airway. The artificial airway is sterile below the level of the vocal cords
  • Frequently assess the patient’s need for ventilator assistance
  • Elevate the patient to a semi-Fowler’s or sitting position, when possible, since these positions resulting improved lung compliance. The patient’s position however, should be changed at least every 2 hours, to ensure ventilation of all lung segments and prevention of secretion stagnation. Position changes are also necessary to avoid skin breakdown
  • Nutrition endotube: recognizes that the tube holds open the epiglottis. Therefore, only the inflated cuff prevents the aspiration of oropharyngeal contents into the lungs. The patient must not receive oral feeding. Nutrition must take the form of external tube feedings.
  • Be aware of the complications and damage that inflated cuffs may have on the tracheal mucosa. Endotracheal tube cuffs should be inflated continuously and deflated only during intubations, extubations, and tube repositioning. The internal cuff pressure should be checked every 2 hours
  • External tube site care endotube: patients with endotracheal tubes have mouth care every shift, or a frequently as needed. Oral secretions tend to stagnate and risk oral infection is increased. An oral endotracheal tube may also stimulate an increase in the production of oral secretions. The tube must be secured at all times and the ventilator, CPAP or T-piece tubing supported so that traction is not applied to the tube
  • Have available at all times all the patient’s bedside a resuscitation bag, oxygen bag source and mask to ventilate the patient in the event of accidental removal anticipate your course of action in such an event
  • Endotracheal tube: know the location and assembly of reintubation equipment. Know the method of contact personnel capable of reintubation

PSYCHOLOGICAL CARE OF THE PATIENT

  • Recognize that the patient is usually apprehensive particularly about choking inability to communicate verbally, being unable to remove secretions, difficulty in breathing, or mechanical failure
  • Explain the function of the equipment carefully
  • Inform the patient and his family that he will not be able to speak while the tube is in place being a tracheostomy tube

EQUIPMENT

  • Laryngoscope with curved or straight blade and working light source
  • Endotracheal tube with low pressure cuff and adapter to connect tube to ventilator or resuscitation bag
  • Stylet to guide the endotracheal tube
  • Oral airway or bite block to keep the patient from biting into and occluding the endotracheal tube
  • Adhesive tape or tube fixation system
  • Sterile anesthetic lubricant jelly
  • Syringe
  • Suction source
  • Suction catheter and tonsil suction
  • Resuscitation bag and mask connected to oxygen source
  • Anesthetic spray

PREPARATION OF THE PATIENT AND THE ENVIRONMENT

  • Suction endotracheal tube
  • Suction oropharyngeal airway above the endotracheal cuff as thoroughly as possible
  • Loosen tape or endotracheal tube securing device
  • Extubate the patient

Ask the patient to take as deep as a breath as possible

At peak inspiration deflate the cuff completely and pull the tube out in the direction of the curve

  • Once the tube is fully removed, ask the patient to cough or exhale forcefully to remove secretions. Then suction the back of the patient’s airway with the tonsil suction
  • Evaluate immediately for any signs of airway obstruction, stridor or difficult breathing. If the patient develops any of the above problems, attempt to ventilate the patient with the resuscitation bag and mask and prepare for reintubation
  • Administer oxygen as directed

AFTER CARE

  • Observe patient closely post-extubation for any signs and symptoms of airway obstruction or respiratory insufficiency
  • Observe character of voice

COMPLICATIONS

Mechanical

  • Cuff leaks
  • Cuff herniation
  • Tube obstruction
  • Tube displacement
  • Inadvertent extubation
  • Right main stem intubation

Laryngeal and Tracheal

  • Sore throat
  • Hoarse voice
  • Glottic edema
  • Ulceration of tracheal mucosa
  • Vocal cord ulceration, granuloma, or polyps
  • Vocal cord paralysis
  • Laryngotracheal web: formation of a web fibrin and cellular debris initiated by neuro tissue at the glottic or subglottic level
  • Post-extubation tracheal stenosis
  • Formation of tracheoesophageal fistula
ARTIFICIAL AIRWAY MANAGEMENT – Definition, Indications, Endotracheal Route of Insertion, Tube Types, General Instructions, Equipment, Preparation of the Patient and the Environment, Procedure, After Care and Complications

PEDICULOSIS TREATMENT

PEDICULOSIS TREATMENT

NURSING PROCEDURES LIST CLICK HERE

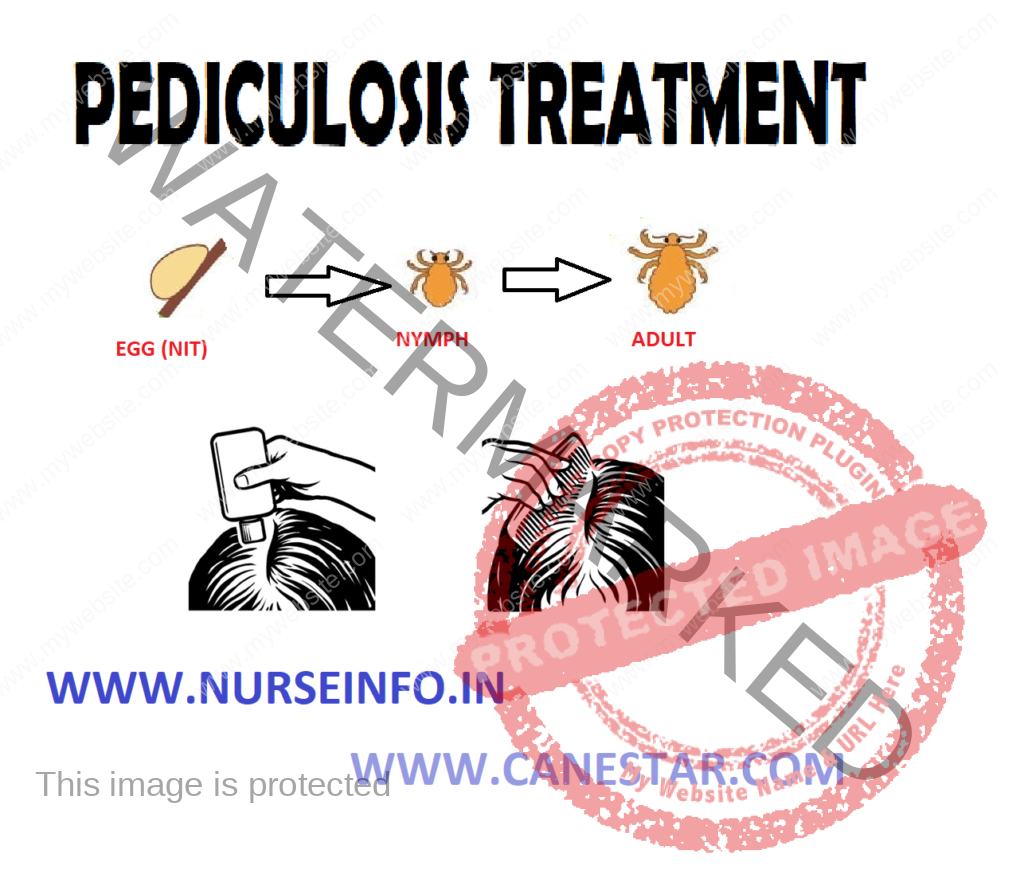
Pediculosis is defined as the state of being infected with lice. Pediculi or lice is a small blood sucking parasite.

It is associated with poor personal hygiene. It can be acquired in overcrowded, unsanitary conditions and exposure to infected persons

Purpose

  • To destroy pediculi and nits
  • To prevent its transmission to other
  • To promote comfort
  • To promote sense of well-being

Dangers of Pediculosis

  • Severe itching
  • Scratching and as the result, abscess formation
  • Presence of dandruff
  • Restlessness and insomnia due to discomfort
  • Anemia
  • Presence of nodules at the back of head due to infected glands

Prevention of Pediculosis

  • Proper personal hygiene should be maintained by every person
  • Daily hair combing and frequently washing it
  • If the patient complains of itching or scratches the head, examine hair and scalp thoroughly

Medications Used for Pediculosis Treatment

  • DDT powder one part to nine part of talcum powder
  • Kerosene mixed with equal parts of sweet oil destroys both lice and nits
  • Carbolic acid 1:40
  • Readily available lysil
  • Preparations containing gamma, benzene hexachloride available in the market and can be used according to the instruction on the label

Types of Pediculi

  • Pediculosis capitis: which infest the head
  • Pediculosis corporis: which infest the body and is found with its flits in the clothing
  • Pediculosis pubis: this infests the axillary and pubic hair, the eyebrows and sometimes the eyelashes

General instructions

  • The parasiticides are applied thoroughly on the scalp (to the body if necessary) and is left for overnight
  • On the next day a thorough bath is given and the linen is changed
  • The linen should be thoroughly disinfected to remove the lice from the cloths
  • Since, the parasiticides are not effective against the nits (eggs) the procedure is repeated after a week

Preliminary Assessment

Check

  • Doctors order for specific precautions
  • General condition of the patient
  • Condition of the scalp and the hair
  • Assess mental state to follow the instructions
  • Articles available in the patients unit

Equipment

A tray containing

  • Mackintosh – 1
  • Bath towels – 2
  • Wash cloth – 1
  • A cap, a triangular bandage or a towel folded diagonally
  • Safety pins
  • Kidney tray with disinfectant, e.g. carbolic acid 1:40
  • Paper bag
  • Hair comb
  • Cotton swabs or gauze piece in a container
  • Vaseline
  • Gown mask and cap
  • Bucket with antiseptic solution, e.g. carbolic acid 5%

Preparation of the Patient and the Unit

  • Explain the sequence of procedure
  • Provide privacy by means of screens
  • Arrange the articles conveniently on the bedside
  • Place the patient flat if the condition permits
  • Bring the patients head and shoulder to the edge of the bed
  • Protect the pillow and bed with a mackintosh and a towel
  • Protect the patient’s eyes with a clean damp wash cloth
  • Pull off the fan to prevent the parasiticide spilling over the face during its application
  • Loosen the hair and comb out the tangles

Procedure

  • Wash hands thoroughly
  • Put on gown, mask and cap
  • Part the hair into small sections and apply the parasiticide on the hair and scalp, rubbing gently
  • In long hairs, the medicine is to be applied along the whole length of the hair
  • Roll up the long hair to the top of the head and cover the head with cap or triangular bandage or by a towel folded diagonally secure it with pins

Note: the treatment is done in the evening and left over night

After Care

  • Remove the Mackintosh and towels from under the patients head
  • Tidy up the bed; place the patient in a comfortable position
  • Remove the gown, mask and cap and put them into the antiseptic lotion
  • Replace the articles in their proper place after clean and disinfect
  • Record and report the procedure in the nurses record sheet
  • The hair is washed in the following morning
  • Comb the hair with a fine toothed comb
  • Repeat the procedure after one week because the nits are not affected by the parasiticides
  • Disinfect all the articles that have come in contact with the hair by immersing them in carbolic acid 1:20 for one hour before washing
PEDICULOSIS TREATMENT - Definition, Purpose, Prevention, Medications, Types, Preliminary Assessments, Equipment, Procedure, After Care
PEDICULOSIS TREATMENT – Definition, Purpose, Prevention, Medications, Types, Preliminary Assessments, Equipment, Procedure, After Care
Nursing Notes, MCQs & Procedures
Download Our App
×
Nurseinfo Nursing Notes
⭐⭐⭐⭐⭐ 4.8 • Free
Get Nursing Notes, MCQs, PDFs, Exam Updates and Practice Questions in one app.
📲 Download App Not Now