Cardiopulmonary Resuscitation (CPR): Complete Nursing Notes
Introduction
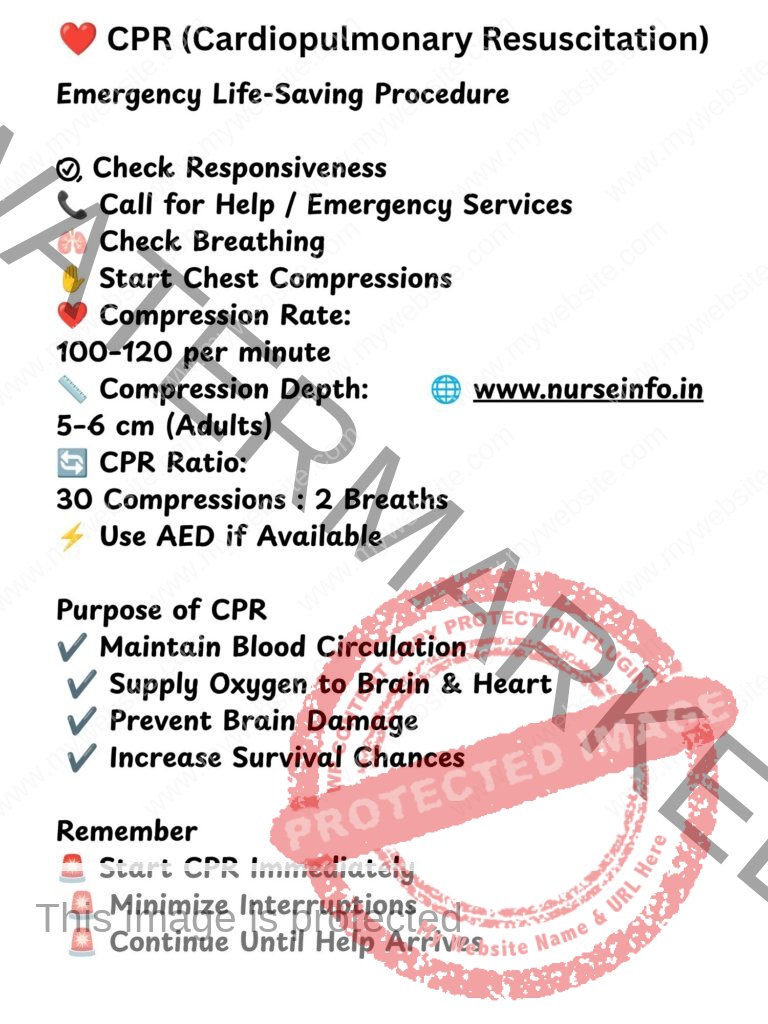
Cardiopulmonary Resuscitation (CPR) is a life-saving emergency procedure used when a person’s heart stops beating or breathing stops. CPR combines chest compressions and rescue breaths to maintain blood circulation and oxygen supply to vital organs until advanced medical care becomes available. Early recognition of cardiac arrest and immediate CPR can significantly improve survival outcomes.
What is Cardiopulmonary Resuscitation (CPR)?
Cardiopulmonary Resuscitation (CPR) is an emergency technique performed to manually preserve brain function and blood circulation in a person experiencing cardiac arrest or respiratory arrest. It is an essential component of Basic Life Support (BLS).
Definition of CPR
CPR is a lifesaving procedure involving chest compressions and artificial ventilation performed on an individual whose breathing or heartbeat has stopped, with the aim of maintaining circulation and oxygenation until spontaneous circulation is restored.
Objectives of CPR
The main objectives of CPR include:
- Maintain blood flow to the brain and heart.
- Provide oxygen to body tissues.
- Prevent irreversible brain damage.
- Increase the chances of survival.
- Support life until advanced medical treatment is available.
- Restore spontaneous circulation and breathing.
Importance of CPR
CPR is important because:
- Brain damage can begin within minutes after cardiac arrest.
- Immediate CPR helps maintain oxygen delivery to vital organs.
- Early CPR improves survival rates.
- It buys time until emergency medical services arrive.
- It is a critical link in the Chain of Survival.
Indications for CPR
CPR should be initiated when a person:
- Is unresponsive.
- Is not breathing normally.
- Has no pulse or signs of circulation.
- Experiences sudden cardiac arrest.
- Suffers severe respiratory arrest.
- Is found unconscious with absent breathing.
Contraindications of CPR
CPR may not be indicated when:
- There is a valid Do Not Resuscitate (DNR) order.
- Obvious signs of irreversible death are present.
- The environment is unsafe for the rescuer.
- Severe injuries incompatible with life are observed.
Equipment Required for CPR
The following equipment may be used during CPR:
- Personal Protective Equipment (PPE)
- Pocket mask
- Face shield
- Bag-Valve-Mask (BVM)
- Automated External Defibrillator (AED)
- Oxygen source
- Suction apparatus
- Emergency crash cart
Basic Principles of CPR
- Ensure scene safety.
- Check patient responsiveness.
- Activate emergency response system.
- Begin high-quality chest compressions.
- Maintain airway patency.
- Provide effective rescue breaths.
- Use an AED as soon as available.
- Minimize interruptions in chest compressions.
Steps of Adult CPR
Step 1: Ensure Safety
Check the surroundings and ensure the area is safe for both the rescuer and the victim.
Step 2: Check Responsiveness
Tap the person’s shoulders and ask loudly:
“Are you okay?”
If there is no response, proceed immediately.
Step 3: Call for Help
- Call emergency medical services.
- Ask someone to bring an AED if available.
Step 4: Check Breathing
- Look for normal breathing.
- If breathing is absent or abnormal, begin CPR.
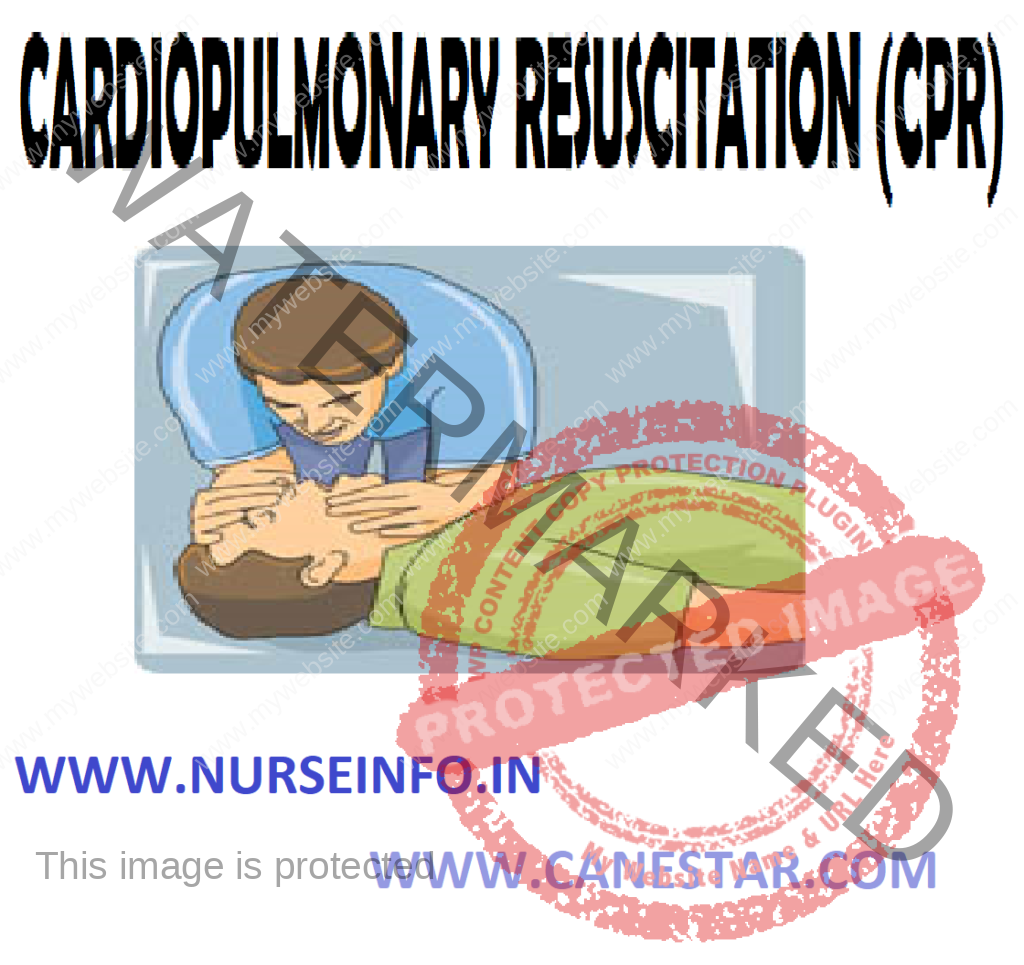
Step 5: Start Chest Compressions
Hand Position
- Place the heel of one hand in the center of the chest.
- Place the other hand on top.
- Interlock fingers.
Compression Technique
- Keep arms straight.
- Push hard and fast.
- Allow complete chest recoil after each compression.
Recommended Compression Rate
100–120 compressions per minute
Recommended Compression Depth
5–6 cm (2–2.4 inches) in adults
Step 6: Open the Airway
Use the:
Head Tilt–Chin Lift Method
- Tilt the head backward.
- Lift the chin upward.
If neck injury is suspected, use the jaw-thrust maneuver.
Step 7: Give Rescue Breaths
- Pinch the nose closed.
- Seal your mouth over the victim’s mouth.
- Deliver one breath over one second.
- Observe chest rise.
Give:
2 rescue breaths after every 30 compressions
Step 8: Continue CPR
Continue cycles of:
30 Chest Compressions : 2 Rescue Breaths
Continue until:
- The person regains consciousness.
- Emergency personnel arrive.
- An AED is available and ready.
- You are physically unable to continue.
Adult CPR Parameters
| Component | Recommendation |
|---|---|
| Compression Rate | 100–120/min |
| Compression Depth | 5–6 cm |
| Compression-to-Breath Ratio | 30:2 |
| Chest Recoil | Complete |
| Compression Interruptions | Minimal |
| Hand Position | Center of Chest |
Pediatric CPR Overview
Infants
- Compression depth: About 4 cm
- Use two fingers for single rescuer CPR
Children
- Compression depth: About 5 cm
- One or two hands may be used depending on child size
Use of Automated External Defibrillator (AED)
An AED is a portable device used to treat sudden cardiac arrest.
Steps
- Turn on the AED.
- Attach electrode pads.
- Follow voice prompts.
- Deliver shock if advised.
- Resume CPR immediately after shock.
Nursing Responsibilities During CPR
Nurses play a vital role during resuscitation.
Responsibilities include:
- Assess patient responsiveness.
- Activate emergency response system.
- Initiate CPR promptly.
- Maintain airway patency.
- Assist with ventilation.
- Monitor patient condition.
- Prepare emergency medications.
- Assist with defibrillation.
- Record events accurately.
- Communicate with healthcare team members.
- Provide emotional support to family members.
Advantages of CPR
- Maintains circulation.
- Preserves brain function.
- Increases survival rates.
- Supports oxygen delivery.
- Prevents organ damage.
- Buys time until advanced treatment is available.
Possible Complications of CPR
Although CPR is lifesaving, complications may occur:
- Rib fractures
- Sternal fractures
- Internal organ injury
- Gastric distension
- Aspiration
- Chest discomfort after recovery
Chain of Survival
The Chain of Survival includes:
- Early recognition of cardiac arrest.
- Early activation of emergency services.
- Early CPR.
- Early defibrillation.
- Advanced life support.
- Post-cardiac arrest care.
Patient Education
Healthcare professionals should educate the public about:
- Recognizing cardiac arrest.
- Learning CPR techniques.
- Importance of early CPR.
- AED awareness.
- Emergency response activation.
Conclusion
Cardiopulmonary Resuscitation (CPR) is one of the most important emergency procedures in healthcare. Prompt initiation of CPR can significantly improve survival and reduce complications associated with cardiac arrest. Every nurse and healthcare professional should possess the knowledge and skills required to perform high-quality CPR effectively and confidently.
Frequently Asked Questions (FAQs)
What does CPR stand for?
CPR stands for Cardiopulmonary Resuscitation.
What is the purpose of CPR?
The purpose of CPR is to maintain blood circulation and oxygen delivery to vital organs during cardiac arrest.
What is the compression-to-breath ratio in adult CPR?
The recommended ratio is 30 compressions to 2 rescue breaths (30:2).
What is the recommended compression rate?
The recommended compression rate is 100–120 compressions per minute.
What is the recommended compression depth for adults?
The recommended depth is 5–6 cm (2–2.4 inches).
When should CPR be stopped?
CPR should continue until the patient recovers, trained medical personnel take over, or the rescuer becomes unable to continue.
Keywords: Cardiopulmonary Resuscitation, CPR nursing notes, CPR procedure, adult CPR steps, basic life support, emergency nursing procedures, CPR for nurses, cardiac arrest management, CPR indications, nursing education.