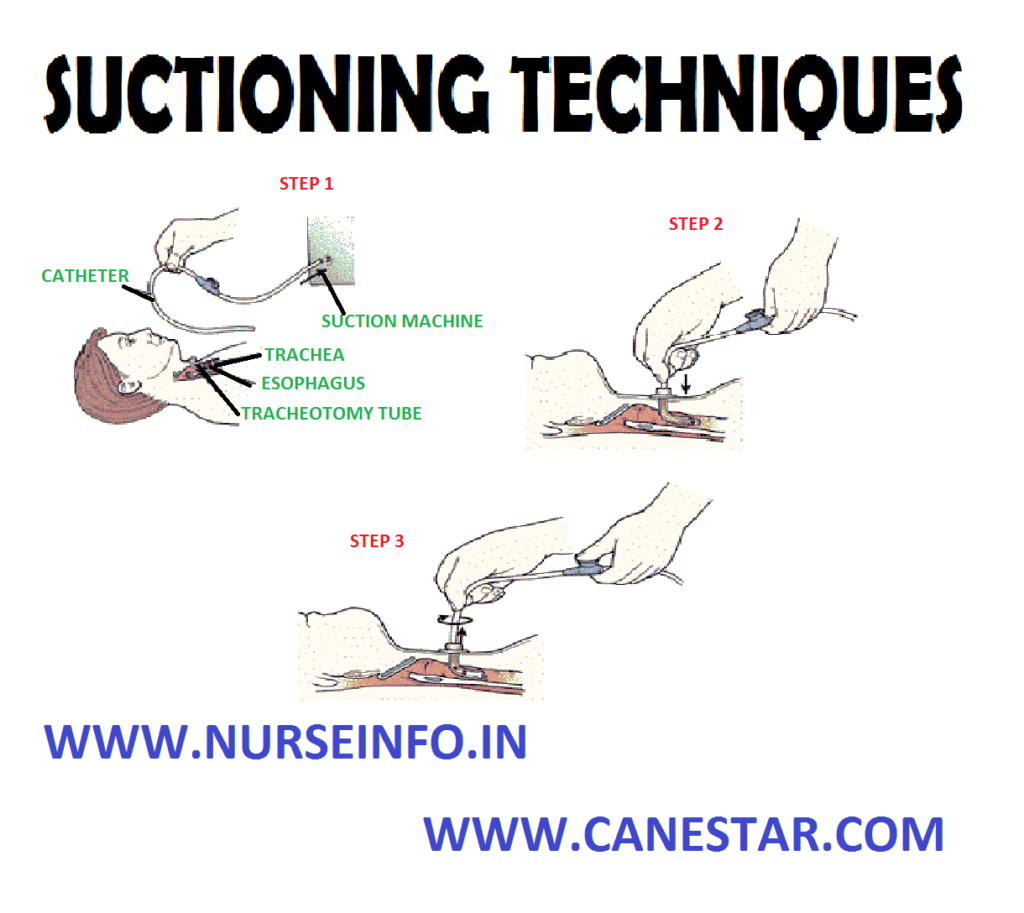
SUCTIONING TECHNIQUE – Types, Orotracheal and Nasotracheal and Tracheal Suctioning
Suctioning is the process of sucking. The removal of gas or fluid from a cavity or rather container by means of reduced pressure
Suctioning done: when a patient is unable to clear respiratory tract secretion with coughing, the nurse must use suctioning to clear the airways
TYPES
- Oropharyngeal and nasopharyngeal suctioning
- Orotracheal and nasotracheal suctioning
OROPHARYNGEAL AND NASOPHARYNGEAL
- The oropharynx extends behind the mouth from the soft palate above the level of the hyoid bone and contains the tensil. The nasopharynx is located behind the nose and extends to the level of soft palate
- This suctioning is used when the patient is able to cough effectively but is unable to clears secretions by expectorating or swallowing
OROTRACHEAL AND NASOTRACHEAL
It is necessary when the client with pulmonary secretion is unable to cough and does not have an artificial airway present
TRACHEAL SUCTIONING
Tracheal suctioning is accomplished through an artificial airway such as an endotracheal tube or tracheostomy tube.
EQUIPMENT
- Laryngoscope with curved on straight blade and working light sources
- Endotracheal tube with low pressure cuff and adapter to connect to ventilator style to guide the endotracheal tube
- Oral airway
- 10 ml syringe
- Suction sources
- Suction catheter
- Sterile towel
- Gloves
- Face shield
- End trail CO2 detector
- Resuscitation and mask connected to O2 source
PROCEDURE
Preparation Phase
Assess the patient’s heart rate, level of consciousness and respiratory status
Performance Phase
- Remove the patient dental bridgework and plates
- Remove headboard of bed
- Prepare equipment
- Aspirate stomach contents if nasogastric tube is in place.
- If time allows inform the patient of impending inability to talk and discuss alternative means of communication
- If the patient is confused, it may be necessary to apply soft wrist restraints
- Put on gloves and face shield
- During oral intubations if cervical spine is not injured place patients head in a “sniffing” position
- Spray the back of the patient’s throat with anesthesia spray if time is available
- Ventilate and oxygenate the patient with the resuscitation bag and mask before intubations
- Hold the handle of the laryngoscope in the left hand and hold the patients mouth open with the right hand by placing crossed hungers on the teeth
- Insert the curve blade of the laryngoscope along the right side of the tongue, push the tongue to the left and use right thumb and index finger to pull patient lower lip away from lower teeth
- Lift the laryngoscopes forward to expose the epiglottis
- Lift the laryngoscopes forward to 45 degree angle to expose glottis and visualize vocal cords
- As the epiglottis is lift forwards, the vertical opening of the larynx between the vocal cords will come into view
- Once the vocal cord is visualized, insert the tube into the right corner of the mouth and pass the tube while keeping vocal cords in constant view
- Gently push the tube through the triangular space formed by the vocal cords and back wall of trachea
- Stop insertion just after the tube cuff had disappeared from view beyond the cords
- Withdraw laryngoscope while holding endotracheal tube, attach bag to ET tube, and ventilate the patient
- Inflate cuff with the minimal amount of air required to occlude the trachea
- Insert a bite block if necessary
- Ascertain expansion of both sides of the chest by observation and auscultation of breath sound
- Record distance from proximal end of tube to the point where the tube reaches the teeth
- Secure tube to the patient’s face with adhesive tape or apply a commercially available endotracheal tube stabilization device
- Obtain chest X-ray to verify tube position


