THORACENTESIS – Purpose, General
Instructions, Preliminary Assessment, Preparation of the Patient and
Environment, Equipment, Procedure, After Care and Complications
Thoracentesis
is defined as introducing a hollow needle into pleural cavity and aspirating
fluid or cur, using aseptic technique
Thoracentesis
refer to the puncture by needle through the chest wall into the pleural space
for the purpose of removing pleural fluid (blood, serous fluid, pus, etc) and
or air (pneumothorax)
Thoracentesis
or pleural aspiration or pleural tap is the insertion of needle into the
pleural space through the chest wall to remove the pleural fluid or possibly
air
PURPOSE
To remove excessive pleural fluid
(serous fluid, blood or pus)
To drain fluid/air from pleural
cavity for diagnostic or therapeutic purposes
To introduce medications
To aid in full expansion of lung
To obtain specimen for biopsy
To take pleural biopsy for diagnostic
examination
To relieve pain
To relieve breathlessness caused by
accumulation of fluid or air in the pleural space
To aid in diagnosis and treatment
(chemical, bacteriological, cellular, composition and malignancy)
GENERAL INSTRUCTIONS
The patient should be prepared
physically and psychologically for the procedure
Thoracentesis is indicated in case of
pleural effusion due to infection, traumatic injury, cancer or cardiac
diseases, etc
Common site for thoracentesis is just
below the scapula at the seventh or eighth intercostals space
The patient should be warned that any
sudden movements during the procedure may cause injury to the lungs, blood
vessels, etc
The level of the aspiration needle
should be short to prevent pricking of the lungs
Usually upright position is used
during the procedure as it helps to collect the pleural fluid at the base of
the pleural cavity and hence facilitates to remove the fluid easily
Maintain strict aseptic technique to
prevent introduction of infection into the pleural space
The three way adaptor should be
fitted with the needle before it is introduced into the chest cavity. The adaptor should be in a closed position to
prevent the entry of air into the pleural cavity
The nurse should check the syringes
and needle for air-tightness; air may be entering the pleural cavity and
collapse
Remove the fluid slowly and not more
than 1000 ml at a time, if the tap is therapeutic to prevent mediastinal shift
Use water-seal drainage system, if
pleural fluid is purulent and difficult to drain
The specimen should be sent to the
laboratory soon after it collected
The aspiration should be discontinued
if any signs of complications are noted such as sharp pain, respiratory
distress, excessive coughing, crepitus, hemoptysis, circulatory collapse, etc
PRELIMINARY ASSESSMENT
Doctors order for any specific
instructions
Written informed consent of the
patient or relatives
General condition and diagnosis of
the patient
Review fresh erect chest X-ray
Confirm the diagnosis, location and
extent of the pleural air/fluid/pus
Acute respiratory insufficiency
(tension pneumothorax, rapidly developing thoracentesis without dsypnea) may
demand thoracocentesis without X-ray
Mental status of the patient to follow the instructions
Articles available in the unit
PREPARATION OF THE PATIENT AND ENVIRONMENT
Explain the sequence of the procedure
Provide privacy
Chest X-ray should be taken before
thoracentesis is done to diagnose the location
Check the vital signs and record it
on the nurse’s record for reference
A mild sedation may be given to the
patient before starting the procedure
Maintain the desired position during
the procedure
The nurse should remain near the
patient to observe him and to remind him not to move during the procedure
Premedication – injection atropine
sulfate 0.65 mg intramuscularly or intravenously half an hour before procedure
EQUIPMENT
A sterile
tray containing:
Sponge holding forceps – 1
Dissecting forceps – 1
Syringe (5ml) and 2 needles for
giving local anesthesia
20 ml syringe with 1 lock to aspirate
the fluid
Aspiration needle No. 16 (long and
short)
Three way stop clock
Small bowls (2) to take the cleaning
lotions
Specimen bottles and slides
Cotton swabs, gauze pieces and cotton
pads
Gown, masks and gloves for the doctor
Sterile dressing towels/slits
An
unsterile/clean tray containing:
Mackintosh and towel
Kidney tray and paper bag
Spirit, iodine and tincture benzoin
Lignocaine 2%
Suction apparatus with water-seal
drainage system
PROCEDURE
Position the patient in fowler’s.
Bring patient to one side of bed with feet support, arms and head leaning
forward on cardiac table with pillows
Untie gown to expose site for
aspiration
Instinct patient to avoid coughing
and to remain immobile during procedure
Explain that a feeling of deep
pressure will be experienced while fluid is being aspirated from pleural space
Provide sterile gloves to doctor
Open sterile set and assemble 20 ml,
50 ml syringes, 20-22 G needles and aspiration needle
Pour antiseptic solution to clean it
After showing label to doctor clean
top of local anesthetic bottle and assist to withdraw mediation
Reassure patient and instruct to hold
breath during insertion of aspiration needle
As physician does procedure, observe
for signs and symptoms of complication
After fluid is withdrawn from –
pleural space, transfer to specimen container
After needle is withdrawn, apply
pressure over puncture site. Assist in sealing site with tincture benzoin swab
AFTER CARE
Instruct patient to lie on
non/affected site for 1 hour. Ensure bed rest for 6 to 8 hours
Monitor vital signs every half hour
until stable
Observe patient for signs and
symptoms of hemothorax, tension pneumothorax, subcutaneous emphysema and air
embolism
Administer analgesics and antibiotics
as prescribed
Instruct patient to carry out deep
breathing exercises
A chest X-ray may be taken to
determine the effects of the procedure
The puncture site should be treated
aseptically to prevent contamination of the wound
The container with aspirated fluid
should be labeled and sent to the laboratory with requisition form
Replace the articles after cleaning
Wash hands thoroughly
Record the procedure in the nurse’s
record sheet
COMPLICATIONS
Pneumothorax and hemothorax: sudden
rise of sharp pain in the chest, persistent cough, shortness of breath, fall in
blood pressure, rapid pulse, anxiety, restlessness and faintness, profuse
sweating, pallor cyanosis
Tension pneumothorax: marked dyspnea,
cyanosis, reduced or absence of breath sounds and decreased movement of chest
on respiratory rates. Shifting of the trachea to the unaffected side
Mediastinal shift: cyanosis, severe
dyspnea, deviation of larynx and trachea from their normal midline position
towards the unaffected side, shifting of the heart heat position of maximum
impulse and distended neck veins
Pulmonary edema: blood tinged frothy
sputum, cough, rates, wheezing severe dyspnea, cyanosis, tachycardia,
tachypnea, distended neck veins, signs of heart failure, peripheral edema and
altered level of consciousness
THORACENTESIS – Purpose, General Instructions, Preliminary Assessment, Preparation of the Patient and Environment, Equipment, Procedure, After Care and Complications
PULMONARY FUNCTION TEST – (Abnormal
Findings, Description, Calculation of Total Lung Capacity, Calculation of Vital
Capacity, Age Related Changes, Client Preparation, Procedure, Gas
Exchange/Diffusing Capacity of the Lung, Inhalation Tests (Bronchial Provocation
Studies), Post-Procedural Tests and Contraindications
Pulmonary
function test are done using a spirometer that measures the amount of air a
patient can move in and out and how fast he or she can process it. The patient
breathes into a mouthpiece and performs several different breathing maneuvers
that are explained by the technician performing the test.
By measuring
the patient’s airflow and comparing the results with predicted values for each
patient’s height, weight, age, and gender, valuable information can be obtained
concerning whether the patient has mild, moderate or severe obstructive or
restrictive lung disease
ABNORMAL FINDINGS
Pulmonary fibrosis
Interstitial lung diseases
Tumor
Chest wall trauma
Emphysema
Chronic bronchitis
Asthma
Inhalant pneumonitis
Postpneumonectomy
Bronchiectasis
Airway infection
Pneumonia
Neuromuscular disease
Hypersensitivity bronchospasm
DESCRIPTION
Pulmonary
function test (PFT) is performed in a pulmonary function laboratory. After
preparing the client, a nose clip is applied and the unsedated client breathes into
spirometer or body plethysmograph, a device for measuring and recording lung
volume in liters versus time in seconds. The clients is instructed how to
breathe for specific tests; for example, to inhale as deeply as possible and
then exhale to the maximal extent possible. Using measured lung volumes,
respiratory capacities are calculated to assess pulmonary status
CALCULATION OF TOTAL LUNG CAPACITY
The total
lung capacity (TLC) is the total volume of the lung at their maximum inflation.
The four values are used to calculate TLC
Total volume (TV): the volume inhaled
and exhaled with normal quite breathing (also called tidal volume)
Inspiratory reserve volume (IRV): the
maximum amount that can be inhaled over and above a normal inspiration
Expiratory reserve volume (ERV): the
maximum amount that can be exhaled following a normal inhalation
Residual volume (RV): the amount of
air remaining in the lungs after maximal exhalation
ABBREVIATIONS USED IN PULMONARY FUNCTION TEST
FEV1 – Forced expiratory
volume in one second
FVC – Forced vital capacity
VC – Vital capacity (forced or
relaxed)
PEF – Peak (maximum) expiratory flow
rate
TLC – Total lung capacity
FRC – Functional residual capacity
RV – Residual volume
TCO – Gas Transfer factor for carbon
monoxide
DCO – Diffusing capacity for carbon
monoxide
KCO – Transfer Coefficient for carbon
monoxide (TCO/liter lung volume)
CALCULATION OF VITAL CAPACITY
Vital
capacity (VC) is the total amount of air that can be exhaled after a maximal
inspiration; it is calculated by adding together the IRV, TV and ERV
Inspiratory capacity: it is the
amount of the air can be inhaled following a normal quiet exhalation. It is
calculated by adding the TV and IRV
Functional residual capacity (FRC):
it is the volume of air left in the lungs after a normal exhalation. The ERV
and RV are added to determine
Forced expiratory volume (FEV1):
it is the amount of air that can be expelled in 1 second
Forced vital capacity (FVC): it is
the amount of air that can be exhaled forcefully and rapid after maximum air
intake
Minute volume (MV) is the total
amount or volume of air breathed in minute. In older clients, residual capacity
is increased and vital capacity is decreased. These age-related changes result
from the following
AGE RELATED CHANGES
Calcification of the costal cartilage
and weakening of the intercostals muscles, which reduce movement of the chest
wall
Vertebral osteoporosis, which spinal
flexibility and increases the degree of kyphosis, further increasing the
anterior posterior diameter of the chest
Diaphragmatic flattening and loss of
elasticity
CLIENT PREPARATION
Explain the test to the client
Inform the client that cooperation is
necessary to obtain accurate results
Instruct the client not to use
bronchodilators or smoke for 6 hours after this test (if required by physician)
Tell the client to withhold the use
of small-dose meter inhalers and aroused therapy before this study
Measure and record the client’s
height and weight before this study to determine the predicted values
List on the laboratory slip any
medications the client is taking
PROCEDURE
Spirometry
and Airflow Rates
The unsedated client is taken to the
pulmonary function laboratory
The client breaths through a sterile
mouthpiece and into a spirometer to measure and record the desired values
The client is asked to inhale as
deeply as possible. This is repeated several times (usually two to three
times). The two best are used for calculations. This test may be repeated with
bronchodilators if the client’s values are deficient
From this, the machine computes FVC,
FEV1, FEV1/FVC, PIFR, PEFR and MMEF
The client is asked to breathe in and
out as deeply and frequently as possible for 15 seconds. The total volume
breathed is recorded and multiplied by 4 to obtain the MVV
The client is asked to breathe in and
out normally into the spirometer and then exhale forcibly from the end tidal
volume expiration point. This provides measurement of ERV
The client is asked to breathe in and
out normally into the spirometer and then inhale forcibly from the end tidal
volume expiration point. This provides measurement of IC
The client is asked to breathe in and
out maximally (but not forced). This is a measure of VC and the calculated TLC
GAS EXCHANGE/DIFFFUSING CAPACITY OF THE LUNG (D1)
The D1 of CO is usually
measured by having the client inhale a CO mixture
D1 CO is calculated with
an analysis of the amount of CO exhaled compared with the amount inhaled. Some
procedures require arterial blood gas to be performed at the same time as the
gas exchange maneuvers
INHALATION TESTS (BRONCHIAL PROVOCATION STUDIES)
These tests also may be performed
during pulmonary function studies to establish a cause-and-effort relationship
in some clients with inhalant allergies
The methacholine or histamine
challenge test is typically used to detect the presence of hyperactive airway
diseases. This test would not be indicative for a client known to have asthma
Care is taken during the challenge
test in reverse any severe bronchospasm with prompt administration of an
inhalant bronchodilator (e.g. isoproterernol)
POST-PROCEDURAL CARE
Note that
clients with severe respiratory problems are occasionally exhausted after the
testing and will need rest
CONTRAINDICATIONS
Clients who are in pain because of
the inability to cooperate by deep inspiration and expiration
Clients who are unable to cooperate
because of age or mental incapacity
PULMONARY FUNCTION TEST – (Abnormal Findings, Description, Calculation of Total Lung Capacity, Calculation of Vital Capacity, Age Related Changes, Client Preparation, Procedure, Gas Exchange/Diffusing Capacity of the Lung, Inhalation Tests (Bronchial Provocation Studies), Post-Procedural Tests and Contraindications
PULMONARY ANGIOGRAPHY – Indications,
Client Preparation, Procedure, Post-Procedural Care, Contraindications and
Potential Complications
Pulmonary
angiography done through an injection of a radiography contrast material into
the pulmonary arteries, pulmonary angiography permits visualization of the
pulmonary vasculature.
When
congenital embolism is suspected, lung scanning should be performed first. If
the lung scan is normal, pulmonary embolism is ruled out first. Definitive
diagnosis of pulmonary embolism may require pulmonary angiography. Bronchial
angiography is now being in some facilities to identify bleeding sites in the
lungs
INDICATION
Angiography is used to detect
pulmonary embolism
Congenital and acquired lesions of
the pulmonary vessels
CLIENT PREPARATION
Explain the procedure to the client
Ensure that written and informed
consent for this procedure is obtained
Inform the client that a warm flash
will be felt when the dyes is injected
Check the client for allergies to
iodinated dyes and shellfish
Determine if the patient has
ventricular arrhythmias
Keep the client NPO after midnight on
the test
Administer preprocedural medications
as ordered. Atropine may be given to decrease secretions. Meperidine may be
used for sedation and relaxation
PROCEDURE
The clients are placed on an X-ray
table in the supine position
Electrocardiography electrodes are
attached for cardiac monitoring
The catheter is placed into the
femoral vein and passed into the inferior vena cave
With fluoroscopic visualization, the
catheter is advanced to the right atrium and the right ventricle
The catheter is manipulated into the
main pulmonary artery, where the dye is injected
X-ray films of the chest are
immediately taken in timed sequence. This allows all vessels visualized by the
injection to be photographed. If filling defects are seen in the
contrast-filled vessels, pulmonary emboli are present
If bronchial artery is performed, the
femoral artery is cannulated instead of the vein
During injection of dye, inform the
client that he or she will feel a burning sensation and flush throughout the
body
POST-PROCEDURAL CARE
Observe the catheter insertion site
for inflammation, hemorrhage and hematoma
Assess the client’s vital signs for
evidence of bleeding (decreased blood pressure, increased pulse)
Apply cold compress to puncture site
if needed to reduce swelling or discomfort
Inform the client that coughing may
occur after this study
Educate the client regarding the need
for bed rest for 12 to 24 hours after the rest
CONTRAINDICATIONS
Clients with allergies to shellfish
of iodinated dye
Clients who are pregnant, unless the
benefits outweigh the risks
Clients with bleeding disorders
POTENTIAL COMPLICATIONS
Allergic reaction to iodinated dye
Hypoglycemia or acidosis may occur in
clients who are taking metformin (glucophage) and receive iodine dye
Cardiac arrhythmia: premature
ventricular contractions during right-sided heart catheterization may lead to
ventricular tachycardia and ventricular fibrillation
PULMONARY ANGIOGRAPHY – Indications, Client Preparation, Procedure, Post-Procedural Care, Contraindications and Potential Complications
PLEURAL BIOPSY – Pre-Procedural Care,
Procedure, Post-Procedural Care and Complications
Biopsy
specimens may be taken from various respiratory tissues for examination. As
mentioned previously, specimens from tracheobronchial structures may be
obtained during bronchoscopy. Biopsy specimens of scalene and mediastinal nodes
may be obtained (with local anesthesia for pathologic study, culture or
cytological assessment)
PRE-PROCEDURAL CARE
Obtain inform consent, and instruct
the client about the need for and purpose of the rest
Preparation and positioning of a
client for pleural biopsy are similar to those for thoracentesis
Inform the client, the test is
painful, and the client must hold still
Assist and reassure the client. The
test takes 15-30 minutes to complete
PROCEDURE
Pleural biopsies can be performed
surgically through a small thoracotomy incision or during thoracentesis, with
the use of a cope needle
Needle biopsy is a relatively safe,
simple diagnostic procedure that can help to determine the cause of pleural
effusion
The needle removes a small fragment
of parietal pleura, which is used for microscopic cellular examination and
culture
If bacteriologic studies are needed,
the biopsy specimen should be obtained before chemotherapy is begun
POST-PROCEDURAL CARE
After the biopsy procedure, observe
the indications of complications (dyspnea, pallor, diaphoresis, excessive pain)
Follow-up chest X-ray studies are
usually done after the procedure
COMPLICATIONS
Rare complications include temporary
pain associated with intercostals nerve injury and pneumothorax
PLEURAL BIOPSY – Pre-Procedural Care, Procedure, Post-Procedural Care and Complications
LUNG BIOPSY – Purpose, Indication,
Procedure, After Care, Contraindications and Possible Complications
This
invasive procedure is used to obtain a specimen of pulmonary tissue for a
histological examination by using either an open or a closed technique. The
open method involves a limited thoracotomy. The closed technique includes
methods such as transbronchial lung biopsy, transbronchial needle aspiration
biopsy, transcatheter bronchial brushing, percutaneous needle biopsy and
video-assisted thoracotomy
PURPOSE
To identify or examine the abnormal
cellular structure and bacteria of lung tissues
To identify the pulmonary tumors or
parenchymal changes (acidosis)
INDICATION
Lung biopsy is indicated to determine
the pathology of pulmonary parenchymal diseases
Carcinomas
Granulomas
Sarcoidosis
Client preparation
Explain the procedure to the client
Ensure that informed consent is obtained
Instruct the client that fasting is usually ordered. The client may be
kept NPO after midnight on the day of the rest
Administer the preprocedural
medications 30-60 minutes before the test as ordered
Instruct the client to remain still
during the lung biopsy. Any movement or coughing could cause laceration of the
lung by the biopsy needle
PROCEDURE
Needle puncture (aspiration) biopsy
of the chest lesion is done with fluoroscopy
After a lesion is identified on a
chest film and localized by fluoroscopy, topical anesthesia is administered and
the needle is administered and the needle is inserted through the chest wall
into the lung tissue and lesion
A small sample of cell is aspirated
for microscopic study, and the needle is withdrawn
Aspiration biopsy may enable
definitive diagnosis of nonmalignant neoplasms, granulomas, other nonmalignant
growths
Transbronchial lung biopsy
This technique is performed via flexible fiberoptic bronchoscopy, using
cutting forceps
Fluoroscopy is used to ensure proper opening and positioning of the
forceps on the lesions
Fluoroscopy also permits visualization of the tug of the lung as the
specimen is removed
Transbronchial needle aspiration
The needle is inserted through the bronchoscope and into the tumor or
desired area, where aspiration is performed with the attached syringe
The needle is retracted within its sheath, and the entire catheter is
withdrawn from the fiberoptic scope
Transbronchial brushing
A small brush is moved back and forth over the suspicious area in the
bronchioles or its branches
The cells adhere to the brush, which is then removed and used to make
microscopic slides
Percutaneous needle biopsy
In this method for obtaining a closed specimen, the biopsy is obtained
after using fluoroscopic X-ray or CT scan determination of the desired site
The procedure is carried out by using a cutting needle or by aspiration
with a spinal type needle to obtain a specimen
Open lung biopsy
The client is taken to the operating room, and general anesthesia is
provided
The client is placed in the supine or lateral position and an incision is
made into the chest wall
After a piece of lung tissue is removed, the lung is sutured
Chest tube drainage is used for approximately 24 hours after an open lung
biopsy
Transcopic lung biopsy
The lung is collapsed a with a double lumen end tracheal tube placed
during induction of general anesthesia
With the use of a thoracoscope, the lung is grasped and piece is cut off
with the use of a cutting/stapling device. Large wedge lung resections can be
obtained
The scope and trocars are removed, and small chest tube is left in place
The tiny incision is closed, and the procedure is completed
This procedure is performed by the surgeon in 30-60 minutes
During the lung biopsy procedure, assess the client carefully for signs
of respiratory distress (e.g. shortness of breath, rapid pulse, and cyanosis)
AFTER CARE
After the procedure, examine any
sputum closely for evidence of blood
Observe the respiratory distress (may
indicate pneumothorax)
Monitor the client’s vital signs,
breath sounds, skin color and temperature
Place the biopsy specimen in
appropriate container for histological and microbial examination
Assess the client’s breath sound and
report any decrease on the biopsy site
Obtain a chest X-ray film to cheek
for complications (e.g. pneumothorax)
CONTRAINDICATIONS
The client with bullae or cysts of the
lung
Clients with suspected vascular
anomalies
Clients with bleeding abnormalities
Clients with pulmonary hypertension
Clients with respiratory
insufficiency
POSSIBLE COMPLICATIONS
Hemoptysis
Hemothorax
Pneumothorax
Empyema
LUNG BIOPSY – Purpose, Indication, Procedure, After Care, Contraindications and Possible Complications
BRONCHOSCOPY – Definition, Purpose,
Principle, General Instruction, Preliminary Assessment, Preparation of the
Patient Unit, Articles Needed, After Care, Findings and Complications
Bronchoscopy
is a endoscopic diagnostic procedure involving the inspection and observation
of the trachea, larynx, and bronchi. Bronchoscopy is ordered when clients have
unexplained pulmonary signs and symptoms or when nonspecific radiological
abnormalities exist
DEFINITION
Bronchoscope is an endoscopic
diagnostic procedure involving the inspection and observation of the trachea,
larynx and bronchi. Bronchoscopy is ordered when clients have unexplained
pulmonary signs and symptoms or when nonspecific radiological abnormalities
exist
PURPOSE
Diagnostic
Purpose
To visualize tumors, obstructions
secretions, bleeding sites and foreign objects in the tracheobronchial system
Collection of secretions for
cytological and bacteriologic study
Assessing tumors for potential resection
Tissue for lung biopsy may be
obtained
Therapeutic
Purpose
To remove secretions that obstructing
the air passages
To fulgurate (electrodesiccate) and
excise lesions
PRINCIPLE
The knowledge of the anatomy and
physiology of the body is essential for the safe administration of the
injection
Microorganism are present everywhere
so strict aseptic technique should be practiced
Any unfamiliar situation produces
anxiety
Organization and planning results in
the economy of time material and effort
GENERAL INSTRUCTION
Proper explanation about the
procedure should be given to the patient
Sedation should be given 30-60
minutes before the procedure
Procedure is done in a darkened room
Instruction should be given to the
patient to keep his mouth clean
Nothing should be given to the
patient 6-8 hours before the procedure
Loose teeth and artificial dentures
should be removed
The patient should be positioned on
his back with neck hyperextended
The patient should be informed that
his eyes will be covered during the procedure to reduce anxiety
The patient should be told that the
doctor and his assistants will be masked and gloved
PRELIMINARY ASSESSMENT
Identify the patient with name, bed
no: etc
Check the physician’s order
Check the general condition of the
patient
Assess the abilities and limitations
of the patient
Check the article available in the
patient’s unit
PREPARATION OF THE PATIENT UNIT
Ensure that a signed consent form has
been obtained
Obtain a medication history to
determine whether the patient is receiving anticoagulation therapy or aspirin
preparations
Explain the purpose and procedure of
the test. Warn the patient that the local anesthetic may taste bitter
Record baseline vital signs
Check for articles available in the
unit
The client should be NPO for 6 to 8
hours before the test
Oral hygiene should be given the
night before the test and in the morning
Postural drainage is performed for 3
days before the test
ARTICLES NEEDED
Bronchoscope
(flexible fiberoptic bronchoscope)
A sterile
tray containing
Gown
Gloves
Mask
An unsterile
tray containing: Normal saline
Procedure
A sedative and atropine are usually
given 1 hour before the test. The sedative/tranquilizer is to promote
relaxation; atropine is to reduce secretions during the test
A topical anesthetic is sprayed into
the pharynx and trachea
A rigid or flexible fiber optic
bronchoscope may be used
The bronchoscope is inserted through
the nose (most common) or through the mouth
The tube is inserted as the physician
observes the condition of the upper airways through the eyepiece and guides the
tube to the area of the lung to be evaluated
Parts of
flexible fiberoptic bronchoscope:
Eyepiece
Open channel
Fiberoptic tube connected to cold
light source
Section tubing
In-line sputum trap
AFTER CARE
If bronchoscope is done under general
anesthesia, position the patient in a head low position, flat with head turned
to one side
If not under general anesthesia
semi-Fowler’s position
Save all the sputum for laboratory
studies
Observe the patient for impaired
respiration laryngeal spasm and laryngeal edema
Laryngeal strider, dyspnea and
shortness of breath should be notified to the doctor
Provide emergency resuscitation as
necessary
Give treatment as prescribed
Give nothing by mouth until his gag
reflex returns
Give warm, soothing, soft fluids
Observe the patient for toxicity of
anesthetic drugs
Treat the sore throat
An ice collar may; be used to
minimize edema and soreness
Lozenges and smooth gargles are given
to the patient
Instruct the patient not to clear his
throat, cough or talk
FINDINGS
Atelectasis
Bleeding
Bronchial adenomas
Foreign bodies
Infection
Lung cancer
Sarcoidosis
Secretions
Tuberculosis
Tumors
COMPLICATIONS
Bleeding
Drug reactions
Hypotension
Laryngospasm
Bronchospasm
Hypoxia
Dysrhythmia
Cardiopulmonary arrest
BRONCHOSCOPY – Definition, Purpose, Principle, General Instruction, Preliminary Assessment, Preparation of the Patient Unit, Articles Needed, After Care, Findings and Complications
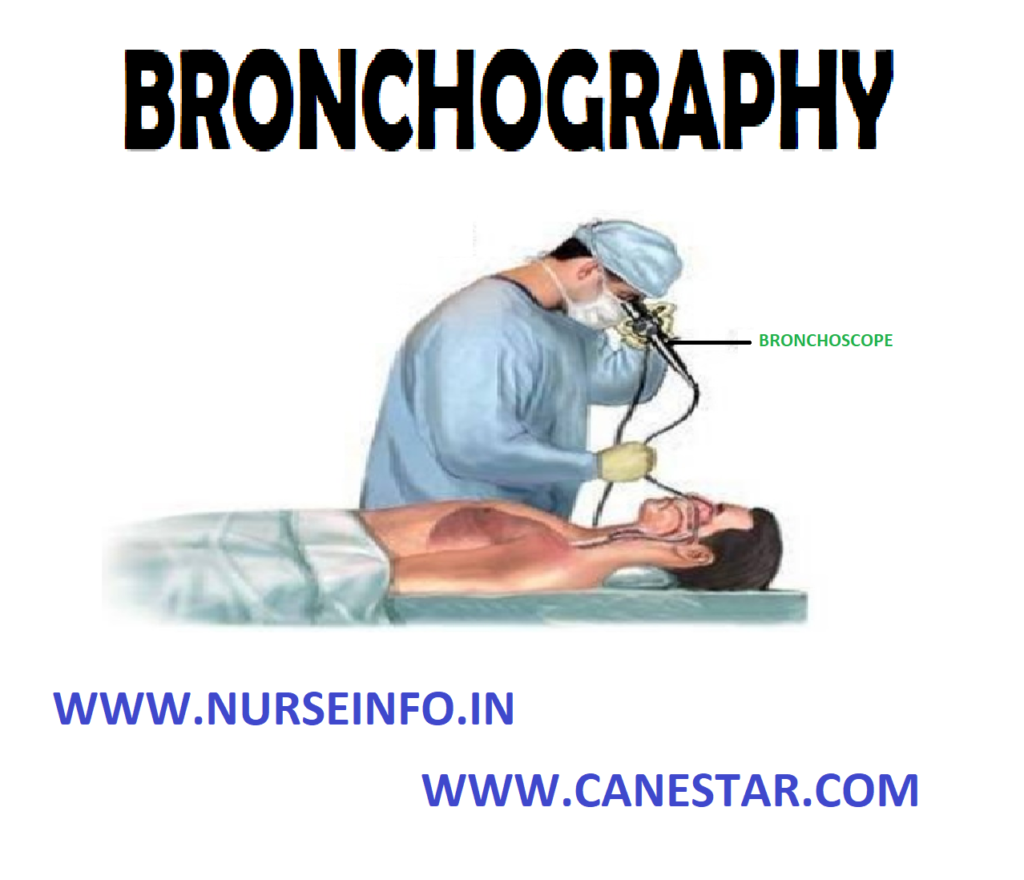
BRONCHOGRAPHY – Purpose, Client
Preparation, Procedure, Post-Procedural Care, Contraindications and Factors
Affecting Diagnostic Results
Bronchography
is a X-ray test to visualize the trachea, bronchi and entire bronchial tree
after a radiopaque iodine contrast liquid is injected through a catheter into
the tracheobronchial space. The bronchi are coated with the contrast dye, and a
series of X-ray is then taken
PURPOSE
To detect
bronchial obstruction such as foreign bodies and tumors
Obtain a signed consent form. Check
that the consent form is signed premeditation is given
Explain the procedure of the test.
Gradually clients are extremely apprehensive about this test and are fearful
that they may be unable to breath
Reassure the client that airway will
not be blocked. Inform the patient that he or she may have a sore throat after
the test as the result of catheter irritation
Obtain history of hypersensitivity to
anesthetics, iodine and X-ray dyes. Usually the client will receive an
expectorant several days before the test to loose secretions
Record the vital signs
PROCEDURE
A consent form should be signed
The client should be NPO for 6 to 8
hours before the test
Oral hygiene should be given the
night before the test and in the morning. This will decrease the number of
bacteria that could be introduced into the lungs
Postural drainage is performed for 3
days before the test. This procedure aids in the removal of bronchial mucus and
secretions
A sedative and atropine are usually
given 1 hour before the tests. The sedative/tranquilizer is to promote
relaxation; atropine is to reduce secretions during the test
A topical anesthetic is sprayed into
the pharynx and trachea. A catheter is passed through the nose into the
trachea, and a local anesthetic and iodized contrast liquid are injected
through the catheter
The client is usually asked to change
body positions so that the contrast dye can reach most areas of the bronchial
tree
Following the bronchography
procedure, the client may receive nebulization and should perform postural
drainage to remove contrast dye. Food and fluids are restricted until the gag
(cough) reflex is present
POST-PROCEDURAL CARE
Assess for signs and symptoms of
laryngeal edema (e.g. dyspnea, hoarseness, apprehension). This could be caused
by a traumatic insertion of the catheter
Assess for allergic reaction to the
anesthetic and iodized contrast dye (e.g. apprehension, flushing, rash, urticaria,
dyspnea, tachycardia and hypotension)
Check the gag reflex to see that it
has returned before offering food and fluids. Have the client swallow and cough
or tickle the posterior pharynx will a cotton swab; if gag reflex is present,
offer ice chips or sips of water before food
Monitor vital signs. The temperature
may be slightly elevated for 1 or 2 days after the test
Checks breathe signs. If bronchi and
fever are present, notify the health
care providers and record on the client’s chart
Have the client perform postural
drainage post-test? This procedure helps with the removal of the contrast dye.
Physiologic damage will not occur if some of the dye remains in the lungs for a
period of time
Offer throat lozenges or an ordered
medication for answer their questions
Be supportive of the client and
family. Be available to answer their questions
CONTRAINDICATIONS
Bronchoscopy is contraindicated
during pregnancy
Client is hypersensitive to
anesthetics, iodine or X-ray dyes
FACTORS AFFECTING DIAGNOSTIC RESULTS
Secretions in the trace bronchial
tree can prevent the contrast dye from coating the bronchial walls
BRONCHOGRAPHY – Purpose, Client Preparation, Procedure, Post-Procedural Care, Contraindications and Factors Affecting Diagnostic Results
WATER SEAL CHEST DRAINAGE – Indications, Objectives, Mechanism, Factors Affecting the Chest Drainage, Water Seal Drainage System, Types of Chest Drainage
Water seal
chest drainage means that a column of water in a bottle seals off the
atmospheric air preventing from entering the chest drainage tube and thereby in
the pleural sac
Water seal
drainage system or so called “closed chest drainage” is indented to allow air
and flew to escape from the pleural space with each exhalation and to prevent
that return flow with each inhalation
Water seal
acts as a one way valve, permitting the unit directional flow of air and fluid
out of the pleural space, but permitting none to enter from the drainage system
INDICATIONS
After thoracic or thoracoabdominal
surgeries
Chest injuries involving the pleura
Spontaneous pneumothorax
OBJECTIVES
To remove air and fluid from the
pleural space
To re-establish normal negative
pressure in the pleural space
To promote re-expansion of the lungs
which apposition and cohesion of the parietal and visceral pleura
To restore the normal pulmonary
ventilation
To prevent the reflex (return flow)
of air and fluid back into the pleural space from the drainage apparatus
To prevent shifting of the
mediastinum and collapse of the lung tissue by equalizing pressure on both
sides
MECHANISM
In a thoracic surgery the parietal
pleura is incised and pleural space is opened
Atmospheric air rushes into the
pleural space and the lungs collapse
When the chest wall is closed, the
air is enclosed in the pleural space thus causing to have a pneumothorax in the
operated site
Additional air may continue to leak
into the pleural space through the openings in the pulmonary pleural incision
Trauma of surgery causes
serosanguineous fluid to collect in the patient’s chest until healing occurs
Negative pressure has been lost
inside the space owing to pneumothorax
The body’s ability to absorb air from
the pleural cavity is limited
Therefore, a closed drainage must be
established to remove the collecting fluid and air from the pleural cavity and
to prevent additional air and fluid entering the pleural cavity
A closed drainage system is used
postoperatively to remove air and serosanguineous fluid form the pleural cavity
FACTOR AFFECTING THE CHEST DRAINAGE
Proper placement of chest catheters –
usually two catheters are placed in the chest, one of them is placed anteriorly
through the second intercostals space to permit the escape of air rising in the
pleural space. The lower catheter is placed posteriorly through the eighth or
ninth intercostals space in the maxillary line to drain off serosanguineous
fluid accumulating in the lower portion of the pleural space
Proper placement of drainage
apparatus – the drainage apparatus for closed chest drainage must always locate
at a level lower than the patient’s chest. Thus, this helps drainage by
gravity. At the same it prevents backflow of air and fluid in pleural space
Length of the drainage tubing –
drainage tubing which connect the chest catheters to the drainage apparatus
should be neither too long nor too short. It should fall in a straight line to
the drainage apparatus with no dependent loops. Dependent loops of the tubing,
that contain fluids obstruct the flow of air and water into the drainage bottle
and create back pressure thus impairing the drainage of air or fluid
WATER SEAL DRAINAGE SYSTEM
Maintaining the patency of the
drainage tubing: patency of the drainage tubing and the chest catheter are
checked frequently. Kinks and pressure on the tubing will cause obstruction in
the flow of drainage. Observe the amount of drainage per hour to make sure that
the tube is not internally plugged with pus or blood clots. Milking the tube
helps to dislodge any clot that is formed in the drainage tubes
Maintenance of an air tight drainage
system. Closed drainage system must be maintained air-tight. The bottles are
sealed with tight stoppers and all connection of the tubes is taped to ensure
its air tightness
Position of the patient: the patient
is placed in a Fowler’s position. This position helps to locate the fluid in
the lower portion of the pleural space and drainage thorough the chest tubes,
which are placed in the lower chest
Activity of the patient: the movement
of the patient in bed helps to drain the chest. Coughing and deep breathing
exercises help the patient to promote lung expansion and expulsion of air and
fluid from the pleural space by increasing the intrapulmonic and intrapleural
pressure.
Application of mechanical suction on
the water and drainage system
Continuous and gentle cough and respirations are too weak to
force the air and fluid out of the pleural space through the chest catheters
In the treatment of empyema thoracic in which the drainage is
too thick to drain
In those patients where air is leaking into the pleural space
faster than it can be removing by a water seal apparatus and or to speed up the
removal of air or fluid out of the pleural space
TYPES OF CHEST DRAINAGE
The One-Bottle Water-Seal System
The end of
the drainage tube from the patient’s chest is covered by a layer of water which
permits drainage and prevents lung collapse by sealing out the atmosphere.
Functionally, drainage depends on gravity, on the mechanics of respiration and,
if desired, on suction by the addition of controlled vacuum
The tube
from the patient extends approximately 2.5 cm below the level of the water in
the container. There is a vent for the escape of any air that might be leaking
from the lung. The water level fluctuates as the patient exhales. At the end of
the drainage tube, bubbling may or may not be visible. Bubbling can mean either
persistent leakage of air from the lung or other tissues or a leak in the
system
The Two-Bottle Water-seal System
The two
bottle system consists of the same water seal chamber plus a fluid-collection
bottle. Drainage is similar to that of a single unit, except that when pleural
fluid drains, the underwater seal system in not affected by the volume of
drainage
Effective
drainage depends on gravity or on the amount of suction added to the system.
When vacuum is added to the system from a vacuum source, such as wall suction,
the connection is made at the vent stem of the underwater-seal bottle. The
amount of suction applied to the system is regulated to the wall gauge
The Three-Bottle Water-seal System
This system
is similar in all respect to the two-bottle system, except for the addition of
a third bottle to control the amount of suction applied. The amount of suction
is determined by the depth to which the tip of the venting glass tube is
submerged. In the three-bottle system, drainage depends on gravity or the
amount of suction applied. The amount of suction in the system is controlled by
the manometer bottle. The mechanical suction motor or wall suction creates and
maintains a negative pressure throughout the entire closed drainage system
The
manometer bottle regulates the amount of the vacuum in the system. This bottle
contains three tubes:
A short tube above the water level
comes from the water seal bottle
Another short tube leads to the
vacuum or suction motor or wall suction
The third tube is a long tube which
extends below the water level in the bottle and which is open to the atmosphere
outside the bottle. This is in the tube that regulates the amount of vacuum in
the system. This is regulated by the depth to which this tube is submerged the
usual depth is 20 cm
When the vacuum in the system becomes greater than the depth
to which the tube is submerged, outside air is sucked into the system. This
result in constant bubbling in the manometer bottle, which indicates that the systems
is functioning properly
COMMMERCIALLY PREPARED DISPOSAL DRAINAGE SYSTEMS
Combine drainage collection, water seal and suction control
in one unit. These systems ensure patient safety with positive and negative
pressure relief valves and have a prominent air leak indicator. Some systems
produce no bubbling sound. System allows air and fluid to escape from the
pleural cavity but does not allow the air to re-enter. The system may include
one, two or three bottles to collect drainage, create a water seal, and control
suction. Or it may be a self-contained disposable system. That combines the
features of a multi bottle system in a compact, one piece unit
Equipment: thoracic drainage system which can function as gravity drainage systems to be connected to suction to enhance chest drainage
PREPARATION OF THE EQUIPMENT
Check the doctor’s order to determine the type of drainage
system to be used and specific procedural details. If appropriate, request the
drainage system and suction system from the central supply department. Collect
the appropriate equipment and take it to the patient’s bedside
Implementation
Explain the procedure to the patient
and wash your hands
Maintain sterile technique throughout
the entire procedure and whenever you make changes in the system or alter any
of the connections to avoid introducing pathogens into the pleural space
SETTING UP A COMMERCIALLY PREPARED DISPOSABLE SYSTEM
Open the packaged system and place it
on the floor in the rack supplied by the manufacture to avoid accidental
knocking it over or dislodging the components. After the system is prepared, it
may be hung from the side of the patient’s bed
Remove the plastic connector from the
short tube that is attached to the water-seal chamber. Using a 50 ml catheter
tip syringe instill sterile distilled water into the water-seal chamber
If suction is ordered, remove the cap
on the suction-control chamber to open the vent. Next instill sterile distilled
water until it reaches the 20 cm mark or the ordered level and recap the
suction-control chamber
Using the long tubes connect the
patient’s chest tube to the closed drainage system to the suction source, and
turn on the suction. Gentle bubbling should begin in the suction chamber,
indicating that the correct suction level has been reached
MANAGING CLOSED CHEST UNDERWATER-SEAL DRAINAGE
Repeatedly note the character,
consistency and amount of drainage collection chamber
Mark the drainage level in the
drainage collection chamber by noting the time and date at the drainage level
on the chamber every 8 hours
Check the water level in the
water-seal chamber every 8 hours, if necessary, carefully add sterile distilled
water until level reaches the 2 cm mark indicated on the water-seal chamber of
the commercial system
Check for fluctuation in the
water-seal chamber as the patient breathes. To check for fluctuation when a
suction system is being used, momentary disconnect the suction system
Check the water level in the
suction-control chamber. Detach the chamber from the suction chamber when the
bubbling ceases, observe the water level. If necessary add sterile distilled
water to bring the level to the 20 cm line or as ordered
Check the gentle bubbling in the
suction control chamber because it indicates that the proper suction level has
been reached
Periodically check that the air vent
in the system is working properly. Occlusion of the air vent results in a
build-up of pressure in the system that could cause the patient to develop a
tension pneumothorax
Coil the systems tubing and secure it
to the edge of the bed with a rubber band or tape and a safety pin. Avoid
creating dependent loops, kinks or pressure on the tubing
Be sure to keep two rubbers tipped
clamps at the bedside to clamp the chest tube if a bottle breaks or the
commercially prepared system cracks or to locate an air leak in the system
Encourage the patient to cough
frequently and breathe deeply to help drain the pleural space and expand the
lungs
Check the rate and quality of the
patient’s respirations and auscultate his lungs periodically to assess air
exchange in the affected lung
Tell the patient to report any
breathing difficulty immediately. Notify the doctor immediately if the patient
develops cyanosis rapid or shallow breathing, sub-cutaneous emphysema chest
pain or excessive bleeding
When clots are visible you may be
able to strip the tubing depending on your facility policy. This is a
controversial procedure because it creates high negative pressure that could
suck viable lung tissue into the drainage
Check the chest tube dressing at
least every 8 hours. Palpate the area surrounding that dressing for crepitus or
subcutaneous emphysema, which indicates that air is leaking into the
subcutaneous tissue surrounding the insertion site
Encourage active or passive range of
motion (ROM) exercises for the patient’s arm or the affected side if he has
been splint his arm to decrease his discomfort
Remind the ambulatory patient to keep
the drainage system below chest level and to be careful not to disconnect the
tubing to maintain the water seal
ASSESSMENT OF PROPER FUNCTIONING
Observing the oscillating movements
of the fluid up and down in the water-sealed tube
Observing the intermittent bubbling
in the water seal bottle
Observing the collection of drainage
in the water seal or drainage bottles
Observing the periodic emptying of
the suction control tube and bubbling in the suction control bottle when a
mechanical suction is attached to the under-water seal drainage system
Ascertain the status of the patient
by assessing vital signs and the appearance frequently
PRECAUTIONS TO BE TAKEN WHILE REPLACING CHEST DRAINAGE BOTTLES
Assemble the bottle with tight
stopper and tubes and check for their proper functioning
Double clamp the chest catheters
close to the patient’s chest to prevent entry of air into the pleural cavity
Clamps are applied at the end of a
full inspiration to prevent the air being sucked into the pleural space
Disconnect the bottle to be replaced
along with the drainage tubing and attach to new set, taking care not to
contaminate the end of the chest catheters
Be certain that the bottle is placed
well before the chest level and is fixed safely to prevent falling or being
kicked over accidentally
Unclamp the patient’s chest catheter
and make certain that the system is functioning properly before leaving the
patient
Watch the patient’s vital signs for
few minutes to see any changes in the general conditions
CHEST CATHETER REMOVAL
The chest catheter is removed only on
the return order of the physician, and is removed by the physician
Usually the chest catheters are
removed in two or three days, provided the remaining lung tissue is well
expanded, the air leaks are absent and fluid drainage is less than 75 ml per
day
A chest X-ray may be taken before the
chest catheters are removed to make sure that the lungs are fully expanded
After removal of the chest catheters,
the wound is covered with sterile petrolatum gauze and a firm dressing is
applied over the wound which is secured with wide strips of adhesive tapes
After removal of the catheters the
patient is observed closely for the development of respiratory distress
DISCHARGE TEACHING
The
following advice is given to these patients on discharge from the hospital
To have deep breathing and coughing
exercise
To maintain good nutrition
To maintain good hygiene especially
oral hygiene
To avoid activities or environment
that can cause irritation of trachea bronchial tree
They are advised not to smoke, to
avoid dusty place and to avoid exposure to the persons having respiratory
infections
To consult the physician if symptoms
of upper respiratory infections or other ailments develop
To obtain a fitness certificate
before they join their duty
COMMON PROBLEMS AND SUGGESTED ACTIONS
Lack of drainage
Causes: kinking, looping or pressure on the tubing may cause reflux of fluid into the intrapleural space or may impede drainage, causing blocking of the intrapleural drain
Nursing action: check the system and straighten tubing as required. Secure the tubing to prevent a recurrence of the problem
No fluctuation of fluid in tubing from the underwater seal
Causes – re-expansion of the lung, tubing is obstructed by blood clots fibrin, failure of the suction apparatus
Nursing action: ask medical staff if the drain may be removed following chest X-ray. The purpose of the drain has been fulfilled. Keeping the drain in any longer than necessary may lead to hazards from infection or air re-entry. “milk” the tubing towards the drainage bottle to try to dislodge the obstruction and re-establish potency. Straighten tubing as required. Secure the tubing to prevent a recurrence. Disconnect the suction apparatus and ensure drain is patent
Constant bubbling of fluid in the drainage
Causes: an air leak in the system
Nursing action: clamp the intrapleural drain momentarily close to the chest wall and establish whether there is a leak in the rest of the system. Clamping the tubing shows whether the leak is below the level of the clamp
Patient shows signs of rapid shallow breathing, cyanosis, pressure in the chest, subcutaneous emphysema or hemorrhage
Causes: tension pneumothorax, mediastinal shift, postoperative hemorrhage, severe incision pain, pulmonary embolus or cardiac temponade
Nursing action: observe record and report, any of these signs to a doctor immediately
Incision pain:
Nursing actions: provide analgesia as prescribed to reduce the patient’s discomfort and to enable deep breathing exercises to be performed and mobilization to ensure adequate drainage and to avoid complications
Accidental disconnection of the drainage tubing from the intrapleural drain:
Nursing action: apply an artery clamp to the drain immediately in order to avoid air entering the pleural space. Re-establish the connection as soon as possible in order to re-establish drainage. If necessary use cleans sterile drainage tube tubing may have been contaminated when it became disconnected
Patient needs to be moved to another area:
Nursing action: place the drainage bottle below the level of the intrapleural drain as close to the floor as possible in order to prevent reflux of fluid into the pleural space. Do not clamp the drain unless the doctor has ordered it
Intrapleural brain falls out
Nursing action: pull the purse string suture immediately to close the wound. Cover the wound with an occlusive sterile dressing. Inform a doctor. The objective is to minimize the amount of air entering the pleural space. The drain will probably need reinserting. Reassure the patient with appropriate explanations.
WATER SEAL CHEST DRAINAGE – Indications, Objectives, Mechanism, Factors Affecting the Chest Drainage, Water Seal Drainage System, Types of Chest Drainage
TRACHEOSTOMY SUCTIONING – Definition,
Purpose, Equipment, Preliminary Assessment and Procedure
DEFINITION
Tracheostomy
is an artificial airway which requires being maintained secretion free, thereby
insuring adequate ventilation for the patient
PURPOSE
To clear secretions from the
artificial airway or tracheobronchial tree
To maintain the patency of the
tracheostomy tube
To ensure maximum ventilation of the
patient
To reduce maximum ventilation of the
patient
To reduce the risk of respiratory
infection
EQUIPMENT
A clean tray
Sterile suction catheters size 14, 16
adult, 10, 12 pediatric with thumb control
Sterile gloves
Sterile towel
Sterile container and water or normal
saline for flushing the catheter and tubing
Normal saline for installation
Sterile syringe 2 ml, 5 ml
Resuscitation bag with reservoir
connected to 100% oxygen source. Add positive end expiratory pressure valve to
exhalation valve on resuscitation bag in an amount equal to that on the
ventilator or (PAP, CPAP device)
Receptacle for disposables
Suction apparatus, e.g. portable
machine or wall suction set at 80 to 120 mm Hg
PRELIMINARY ASSESSMENT
Check physician’s order, progress
notes and nursing care plan
Explain the procedure to the patient.
Include instructions on how to splint the surgical incision as coughing will be
induced during the procedure
Ensure the patient’s privacy
Position the patient in suitable
position
Monitor heart rate, respiration rate
and type and arterial blood pressure. If blood gases are ordered, know baseline
values
Collect and assemble equipment. Check
function of suction and resuscitation bag connected to 100% oxygen source
Wash and dry hands
Procedure
Open sterile towel and place in bib
like fashion on patient’s chest
Open sterile gloves and place on
sterile field
If the patient is attached to
ventilator test to ensure that disconnection of ventilator may be with one hand
Fill the sterile container with
sterile water
Open the end of the pack containing
the suction catheter and connect it to the tubing of the suction machine
Using the contaminated hand
disconnect the patient from the ventilator CPAP device or other oxygen source
Ventilate and oxygenate the patient
with the resuscitator bag 5 to 6 times
In the spontaneously breathing
patient coordinate ventilation with patients own respiratory effort
Slide the cover off the catheter and
rinse it through with sterile water/saline to lubricate it
Insert the catheter into the
tracheostomy as for as possible without applying suction
Apply suction and quickly rotate the
catheter while it is being withdrawn
Limit suction time 10 to 15 seconds.
Discontinue if heart rate decreases by 20 beats per minute or if cardiac ectopy
is observed
Ventilate the patient between suction
with 4-5 manual ventilation
Sterile normal saline 2 to 3 ml may
be instilled into the airway followed by manual ventilation then suction
Rinse catheter between suctioning.
Procedure with sterile water/saline
Continue procedure as necessary to a
maximum of 4 suction passes
Give the patient 6 to 8 ‘sigh’
breaths with the bag
Return the patient to the ventilator
or apply CPAP or other oxygen delivery device
Suck oral secretions from the
oropharynx above the artificial cuff
Deliver tracheostomy care as required
If patient is not an respiratory
assistance apply filter or humidifier as indicated
Check vital signs
Leave the patient as comfortable as
possible
Clear and clean equipment
Wash and dry hands
Document the procedure including
patient’s response in appropriate nursing notes
TRACHEOSTOMY SUCTIONING – Definition, Purpose, Equipment, Preliminary Assessment and Procedure
TRACHEOSTOMY CARE – Definition, Use
of Tracheostomies, Parts of the Tracheostomy, Indications for Tracheostomy,
Complications of Tracheostomy, Care of the Tracheostomy Patient and Cleansing
the Inner Cannula
DEFINITION
A
tracheostomy is an incision into the trachea the 2nd, 3rd,
or 4th tracheal ring
USE OF TRACHEOSTOMIES
To facilitate prolonged artificial
ventilation
To bypass serious upper respiratory
obstructions
To prevent aspiration of blood,
secretions or food into the lungs
To provide easier access to the lower
airways than that is possible through nose or mouth
PARTS OF THE TRACHEOSTOMY TUBE
Outer tube or outer cannula
The inner tube or inner cannula
The obturator or pilot. It is used as
a guide to the outer tube
INDICATIONS FOR TRACHEOSTOMY
Apnea
Respiratory obstruction
Circulatory arrest
Exsanguinating hemorrhage
Carcinoma of the larynx
Diphtheria, Ludwig’s angina
Head injury, neck injury or chest
injuries
Respiratory failure
Fracture of the larynx or trachea
In case of foreign body in
hypopharynx or larynx
Patient with severe burns, especially
around hand, neck, and face
Patients who have had thyroidectomy
or radical neck resection
Patients with neurological disorders,
drug overdose, bulbar paralysis, or cerebrovascular accidents
Patients with severe pulmonary edema
Patients with severe emphysema
Weak, feeble patients
Canine biting
COMPLICATIONS OF TRACHEOSTOMY
Subcutaneous emphysema
Pneumothorax
Mediastinal emphysema
Obstruction of tracheostomy tube
Respiratory insufficiency
Displacement of the tube from its
position on the tracheal turner
Hemorrhage
Pulmonary infection
Atelectasis
Tracheoesophageal fistula
Tracheomalacia
Constant
pressure exerted by the cuff causes tracheal dilation and erosion
Signs and
Symptoms
An increased amount of air is
required in the cuff to maintain the seal
A large tracheostomy tube is required
to prevent air leak at the stone
Food particles are seen is tracheal
secretions
The client does not receive the set
tidal volume of the ventilator
Management
No special
management is needed unless bleeding occurs
Prevention
Use and uncuffed tube as soon as
possible
Monitor cuff pressure and air volumes
closely and detect changes
Tracheal
Stenosis
Narrowed
tracheal lumen is due to scar formation from irritation of tracheal mucosa by
the cuff
Signs and
Symptoms
Stenosis
usually is seen after the cuff is deflated or the tracheostomy tube is removed.
The client has increased coughing, inability to expectorate secretions or
difficulty in breathing or talking
Management
Tracheal
dilation or surgical intervention is used
Prevention
Prevent pulling of and traction on
the tracheostomy tube
Properly secure the tube in the
midline position
Maintain proper cuff pressure
Minimize oronasal intubation time
Tracheoesophageal
fistula (TEF)
Excessive
cuff pressure causes erosion of the posterior wall of the trachea. A hole is
created between the trachea and the anterior esophagus. The client at highest
risk also has a nasogastric tube present
Signs and
Symptoms
Manually administer oxygen by mask to
prevent hypoxemia
A small soft feeding tube is used
instead of a nasogastric tube for tube feedings
A gastrostomy or jejunostomy may be
performed
Monitor the client with a nasogastric
tube closely; assess for TEF and aspiration
Prevention
Maintain cuff pressure
Monitor the amount of air needed for
inflation and detect changes
Progress to a deflated cuff or
cuffless tube as soon as possible
Trachea-innominate
artery fistula
A
malpositioned tube causes its distal tip to push against the lateral wall of
the tracheostomy. Continued pressure causes necrosis and erosion of the
innominate artery. This is a medical emergency
Signs and
Symptoms
The tracheostomy
tube pulsates in synchrony with the heartbeat. There is heavy bleeding from the
stoma. This is a life-threatening complication
Management
Remove the tracheostomy tube
immediately
Apply direct pressure to the
innominate artery at the stoma site
Prepare the client for immediate
surgical repair
Prevention
Use correct tube size and maintain
tube in midline position
Prevent pulling or tugging on the
tracheostomy tube immediately notify the physician of the pulsating tube
CARE OF THE TRACHEOSTOMY PATIENT
Maintain an open airway. Suction and
clean the tube as indicated. Prevent aspiration, e.g. of water, solutions, etc.
through the tracheostomy. Keep materials which may occlude the tracheostomy,
away from the opening, e.g. clothing, bedsheets
Observe the patient carefully for
indication of respiratory difficulty, e.g. noisy respirators, restlessness,
cyanosis, intercostals and substernal retraction, alternations in respiratory
rate, labored respiration
Practice asepsis. Strict aseptic
technique should be followed while suctioning, cleaning and dressing the wound
Observe for complications of
tracheostomy. If the airway is obstructed, do suctioning, if the tracheostomy
outer tube has come out, put the tracheal dilator inside and inform the doctor.
Never try to push a blown out tracheostomy tube back into its place. Tracheal
dilator and tracheal hook, sterile, should be present near the patient all the
time
Ensure maximal humidification of the
inspired air and approximately warm inspired air. Sterile wet gauze covering
the tracheostomy will help in humidification
Provide adequate hydration to help
liquefy pulmonary secretions. At least 3,000 ml of intravenous fluids are
ordered daily if adequate oral intake is not possible
Maintain fluid and electrolyte
balance. Keep an accurate intake and output chart
Be gentle. The tracheal mucosa is
easily traumatized during suctioning
Keep the necessary articles like
extra sterile inner tracheostomy tube, tracheal dilator, tape, Vaseline, gauze,
sterile gauze pieces, suction nozzles, sterile water and suction apparatus
nearby
Prevent pressure and trauma to the
tracheobronchial tree. If a cuffed tube is being used, see that the cuff is
deflated, as ordered, to relieve pressure periodically on the tracheal wall
Periodically inspect the tracheostomy
for trauma or infection
Ensure use of a fresh tracheostomy
tube as needed. Clean the inner cannula of mucus and encrustations as
indicated. The inner tube is changed by nurses and outer tube by doctors
Change the dressings and tracheostomy
tube as necessary
Provide appropriate skin care. Keep
skin clean and dry
Provide adequate nourishment
Provide frequent mouth care to
minimize possible infection. Plenty of water should be given orally
Administer medications as ordered.
Narcotics and sedatives are usually avoided. To minimize apprehension, only
mild tranquilizers are given
For long-term cases, the patient and
his relatives are taught how to take care of the tube
Alleviate the patient’s apprehension
by closely observing him, providing care in a calm but efficient manner and
helping him communicate by providing a call bell
The suction
procedure is as follows:
Auscultate the chest before and after
suctioning
Wash hands and use sterile gloves
Place a sterile towel across the
patient’s chest just below the tracheostomy tube
Clean the skin around the tube and
the adaptors with a recommended antiseptic
Select the catheter, attach it to the
suction apparatus and lubricate it with sterile normal saline, gently insert
into the tracheostomy tube and do the suctioning. It should not be continued
more than 5 seconds at a time
After suctioning, discard the
catheter and gloves and also the saline. Note the amount and the character of
the secretions aspirated
Wash hands after completion of the
procedure
Cleansing
the Inner Cannula
It is
changed every 2 to 4 hour, but in some cases, only twice. It can be cleaned
with cold water and soap and also with hydrogen peroxide solution. After
cleaning, it can be sterilized and can be used again. Do not leave the inner
cannula out for longer than 5 to 10 m while removing or cleaning it
If left out for
longer periods, secretions and crust begin to form in the outer cannula, making
it difficult to reinsert the inner cannula
The
following conditions should be reported to the doctor if they occur during the
postoperative period:
Tube displacement
Indications of shock, hemorrhage,
respiratory insufficiency and hypoxia
Respiratory obstruction
Excessive restlessness or
apprehension
Cyanosis, in case of cyanosis, oxygen
should be given
Rhinorrhea
Development of tracheoesophageal
fistula
TRACHEOSTOMY CARE – Definition, Use of Tracheostomies, Parts of the Tracheostomy, Indications for Tracheostomy, Complications of Tracheostomy, Care of the Tracheostomy Patient and Cleansing the Inner Cannula